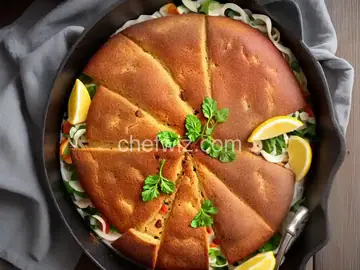
Oven-Fried Panko Chicken
Rate this recipeBe the first to rate
 By AprilPublished
 Do you love the delicious crunch of fried chicken but want a healthier alternative?
 By AprilPublished
 Do you love the delicious crunch of fried chicken but want a healthier alternative?
Preheat the oven to 450°F and position the rack in the middle.
In a pie plate, combine panko, cayenne, 1/2 teaspoon of salt, and 1/4 teaspoon of pepper. Mix well.
In a small bowl, mix together butter, 1/2 teaspoon of salt, and 1/4 teaspoon of pepper. Brush this mixture evenly over the chicken.
Take two pieces of chicken at a time and place them in the crumb mixture. Coat both sides of the chicken evenly, pressing it into the crumbs to help them stick. Then, transfer the coated chicken, skin side up, to a shallow baking pan.
Bake the chicken in the preheated oven for 30 to 40 minutes, or until it is well browned and cooked through.
Allow the chicken to stand, uncovered, for 5 to 10 minutes. This will help it become crispy.
Do you love the delicious crunch of fried chicken but want a healthier alternative? Look no further than oven-fried panko chicken! This recipe gives you all the satisfaction of fried chicken without the guilt. In this article, we'll explore the secrets to making perfectly crispy oven-fried panko chicken that will have your taste buds dancing.
So, what's the secret to achieving that irresistible crunch? It's all in the panko breadcrumbs. These Japanese breadcrumbs are lighter and crispier than regular breadcrumbs, giving your chicken a delightful texture. When combined with a hot oven, the result is a perfectly golden and crispy coating that will rival any deep-fried chicken.
Coating the chicken in panko breadcrumbs is a breeze. Simply dip each piece of chicken into a mixture of flour, egg, and spices, then press it into a generous coating of panko breadcrumbs. The flour and egg create a sticky surface for the breadcrumbs to adhere to, ensuring an even coating that won't fall off during baking. As the chicken cooks, the breadcrumbs will turn golden brown and crispy, creating the illusion of fried chicken.
One of the biggest advantages of oven-fried panko chicken is that it's significantly healthier than traditional fried chicken. By baking the chicken instead of deep-frying it, you can cut down on the amount of oil and fat used in the cooking process. This means you can enjoy your favorite comfort food without worrying about your waistline.
Now that you know the basics, let's dive into some tips to ensure your oven-fried panko chicken turns out perfectly every time:
Start by preheating your oven to a high temperature. The hot oven creates a blast of heat that will help the chicken get that crispy exterior. Don't be afraid to turn up the heat!
For the crispiest results, place your chicken on a wire rack set inside a baking sheet. This allows air to circulate around the chicken, promoting even browning and ensuring that the bottom doesn't get soggy.
To ensure that both sides of the chicken get crispy, flip each piece halfway through the cooking process. This will help to achieve an evenly golden crust.
Avoid overcrowding the baking sheet, as this can lead to steaming rather than baking. Give each piece of chicken enough space to allow the hot air to circulate and crisp up the coating.
Now that your oven-fried panko chicken is ready to be devoured, it's time to think about what to serve alongside it. Crispy oven fries, a fresh green salad, or even some cornbread would be the perfect accompaniments to this flavorful dish. Get creative and experiment with different side dishes to find your favorite combination!
Oven-fried panko chicken is a delicious and healthier alternative to traditional fried chicken. With its crispy coating and juicy interior, it's sure to be a hit with the whole family. By following the tips and tricks outlined in this article, you can create a mouthwatering dish that will have everyone asking for seconds. So, why not give it a try and enjoy all the flavor of fried chicken without the guilt?
While regular breadcrumbs can be used, panko breadcrumbs will give you a much crispier result.
Yes, you can use boneless chicken breasts if you prefer. Just make sure to adjust the cooking time accordingly, as chicken breasts tend to cook faster.
The cooking time will vary depending on the thickness of the chicken. As a general rule, bake the chicken for 20-25 minutes, or until it reaches an internal temperature of 165°F (74°C).
Absolutely! Let the chicken cool completely before storing it in an airtight container or freezer bag. It can be frozen for up to three months.
Yes, you can use gluten-free alternatives if you have dietary restrictions. Just make sure to check the labels to ensure they are gluten-free.
Of course! Simply add your favorite spices or hot sauce to the flour mixture to give your chicken a kick of heat.
Absolutely! Just cut the chicken into bite-sized pieces before coating and baking them.
While this recipe is tailored for chicken, you can certainly use the same technique with other meats. Just adjust the cooking time accordingly.
AprilCook, recipe developer and the heart of Chefwiz. More about April