Oreo Spider Webs
Rate this recipeBe the first to rate
 By AprilPublished
 Are you ready to create a spooky treat that will delight both kids and adults alike?
 By AprilPublished
 Are you ready to create a spooky treat that will delight both kids and adults alike?
Prepare a baking sheet by lining it with parchment paper.
In a bowl that is safe to use in the microwave, combine semisweet chocolate and 1 tablespoon of coconut oil. Heat in the microwave in 30-second intervals, stirring each time until the mixture is melted and smooth.
Take half of the melted chocolate and transfer it into a plastic bag. Repeat the melting process with the white chocolate.
Take one Oreo cookie at a time and dip it into either the white or semisweet chocolate, making sure to fully coat the cookie. Place the coated cookie onto the prepared baking sheet.
Immediately after dipping the cookie, use the plastic bag to pipe 3 concentric circles of the opposite colored chocolate onto the coated cookie.
With a toothpick, starting from the inner-most circle, drag a line through each circle towards the edge of the cookie to create a web-like pattern.
Repeat steps 4-6 for all the remaining cookies.
Transfer the baking sheet with the decorated cookies to the refrigerator to allow the chocolate to set.
Are you ready to create a spooky treat that will delight both kids and adults alike? Look no further than Oreo Spider Webs! These delicious treats are not only easy to make but also a fun activity to enjoy with your loved ones. Whether you're hosting a Halloween party or simply want to add some festive vibes to your day, Oreo Spider Webs are the perfect choice.
Before you dive into making Oreo Spider Webs, gather all the necessary ingredients and tools. You'll need Oreos, black licorice laces, and candy eyes. Additionally, make sure you have a microwave-safe bowl, a microwave, and a baking sheet lined with parchment paper.
First things first, you'll need to melt the chocolate. Break the Oreos apart and set aside the side with the cream filling. Place the chocolate wafers in a microwave-safe bowl and heat them in the microwave until melted and smooth. Be sure to stir the chocolate every 30 seconds to prevent it from burning.
Once the chocolate is melted, it's time to create the spider webs. Take an Oreo without the cream filling and dip it into the melted chocolate, ensuring it is fully coated. Place the coated Oreo on the parchment-lined baking sheet. Repeat this step with the remaining Oreos.
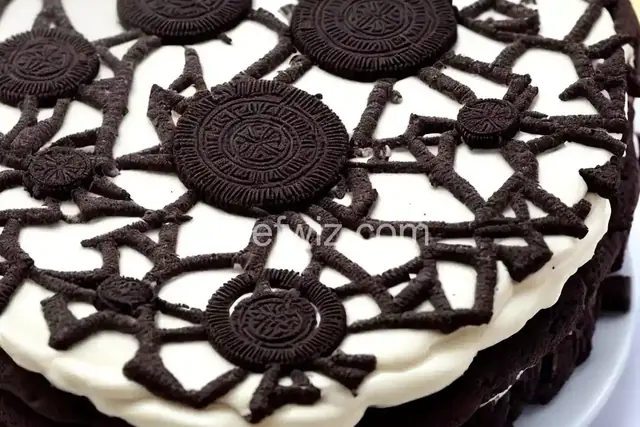
For a more intricate spider web design, use a toothpick or a piping bag filled with melted chocolate to draw concentric circles on top of the coated Oreos. Then, use a toothpick to drag lines from the center outward, creating the web pattern. Get creative with your designs!
Now that the spider webs are complete, it's time to add the finishing touches. Cut the black licorice laces into small pieces and press them into the melted chocolate to create the spider legs. Place two candy eyes on each spider web to give them a spooky look.
Once you've finished creating your Oreo Spider Webs, allow them to cool and harden. They can be enjoyed immediately or stored in an airtight container for later. Serve them at your Halloween party, share them with friends, or simply indulge in a delicious treat on your own.
Remember, Oreo Spider Webs are not only a tasty delight but also a way to tap into your creativity. Let your imagination run wild as you experiment with different designs and decorations. The possibilities are endless!
Absolutely! White chocolate can be a great alternative and adds a spooky touch to the spider webs.
Of course! Get creative with your decorations. You can use colorful sprinkles, edible glitter, or even small gummy spiders.
Yes, you can make them a day or two in advance. Just be sure to store them in an airtight container to maintain their freshness.
Unfortunately, Oreos contain wheat and soy, which may not be suitable for individuals with certain allergies. However, there are gluten-free and allergen-friendly alternatives available in stores.
Absolutely! If you prefer making your own chocolate, feel free to use homemade chocolate for the spider webs.
Yes, you can experiment with different cookies to create your own version of spider webs. Try using chocolate chip cookies, sugar cookies, or even homemade cookie dough.
When stored properly in an airtight container, Oreo Spider Webs can stay fresh for up to a week.
Absolutely! While black is the traditional color, you can use any color of your choice to create vibrant and unique spider webs.
AprilCook, recipe developer and the heart of Chefwiz. More about April