No-Fail Pie Crust
Rate this recipeBe the first to rate
 By AprilPublished
 Have you ever attempted to make a homemade pie crust only to end up with a soggy, crumbly mess?
 By AprilPublished
 Have you ever attempted to make a homemade pie crust only to end up with a soggy, crumbly mess?
In a large bowl, combine flour and salt and mix well using a whisk.
Cut in the shortening until the mixture resembles coarse crumbs.
In a separate bowl, mix together cold water, egg, and vinegar.
Add the water mixture to the flour mixture and blend using a fork until a ball of dough forms.
Divide the dough into three equal portions.
Flatten each portion into a disk shape.
Wrap each disk with plastic wrap and refrigerate until you are ready to use them.
On a lightly floured surface, roll out one disk to fit an 8- or 9-inch pie pan.
Follow the baking instructions in your specific pie recipe.
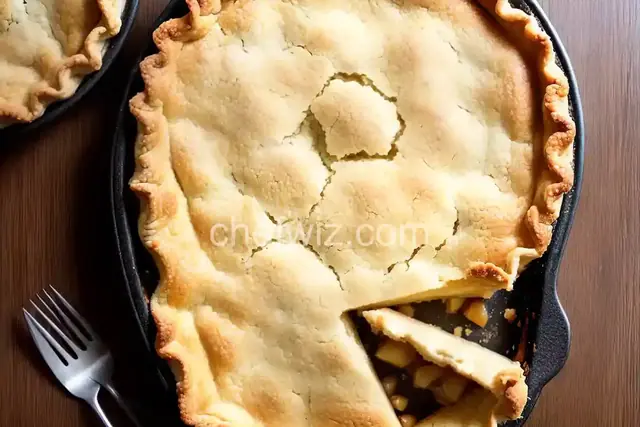
Have you ever attempted to make a homemade pie crust only to end up with a soggy, crumbly mess? Don't worry, you're not alone. Many people struggle with pie crust, but fear not, because I'm here to guide you through the process of making a no-fail pie crust that will have your friends and family begging for seconds.
Picture this: you've just spent hours carefully crafting the perfect filling for your pie. The aroma fills your kitchen, and your mouth starts to water. But then, you take a bite, and all you can taste is a lackluster crust that falls apart in your hands. Talk about disappointment. A good pie crust is the foundation of any great pie. It should be flaky, buttery, and hold up to the delicious filling inside.
A no-fail pie crust is one that is easy to make and consistently produces fantastic results. It's a crust that can withstand the weight of a rich, gooey filling without becoming soggy or crumbling apart. It's a crust that is forgiving, even for those who are new to pie-making. And most importantly, it's a crust that tastes absolutely heavenly.
It all starts with the right ingredients. You'll need flour, butter, salt, and ice water. The key to a perfect pie crust is using cold butter and ice-cold water. The cold butter creates pockets of steam as it melts in the oven, which gives you that flaky texture we all love. The cold water helps to keep the butter from melting too quickly, ensuring a tender crust.
Once you have your ingredients, it's time to get your hands dirty. Mix the flour and salt together in a large bowl. Add in the cold, cubed butter and use your fingers to work it into the flour until it resembles coarse crumbs. The small chunks of butter are what create the flakiness in the crust.
Next, add in the ice water, a tablespoon at a time, and mix until the dough comes together. Be careful not to overmix, as this can result in a tough crust. Once the dough is formed, shape it into a disk, wrap it in plastic wrap, and refrigerate for at least 30 minutes. This resting period allows the gluten in the dough to relax, making it easier to roll out later.
When you're ready to roll out your crust, lightly flour your work surface and rolling pin. Roll the dough out into a circle, rotating it frequently to ensure an even thickness. Gently transfer the rolled-out crust to your pie dish and press it into place. Trim off any excess dough and crimp the edges for a professional-looking finish.
Now comes the fun part: filling and baking your pie. Whether you're making a classic apple pie or a savory quiche, your no-fail pie crust will provide the perfect base for your creation. And when you pull that golden, flaky masterpiece out of the oven, you'll know that all your hard work was worth it.
While margarine can be used as a substitute, it may affect the flavor and texture of the crust. Butter is generally preferred for its rich, buttery taste.
Absolutely! You can make the pie crust up to 2 days in advance. Just wrap it tightly in plastic wrap and store it in the refrigerator until ready to use.
Yes, you can freeze the pie crust for up to 3 months. Just make sure to wrap it well in plastic wrap and place it in a freezer-safe bag or container.
Yes, you can use whole wheat flour, but keep in mind that it will result in a denser crust. You may also need to adjust the amount of water slightly, as whole wheat flour tends to absorb more liquid.
Absolutely! Using a food processor makes the process even quicker and easier. Simply pulse the flour, salt, and butter together until it resembles coarse crumbs, then add in the ice water and pulse until the dough comes together.
To prevent your pie crust from shrinking, make sure to let it rest in the refrigerator for at least 30 minutes before baking. This allows the gluten to relax and prevents excessive shrinkage.
Unfortunately, this recipe is not gluten-free. However, there are many great gluten-free pie crust recipes available that use alternative flours such as almond flour or gluten-free all-purpose flour.
Your pie crust is done when it is golden brown and crisp. Keep an eye on it while it bakes, and if the edges start to brown too quickly, you can cover them with foil to prevent burning.
Absolutely! This pie crust works well for both sweet and savory pies. Its buttery flavor pairs perfectly with a variety of fillings, from fruit to meat and vegetables.
In conclusion, a no-fail pie crust is within your reach. With the right ingredients, a little patience, and a lot of love, you can create a crust that will take your pies to the next level. So go ahead, roll up your sleeves, and get ready to impress with your homemade pie crust skills. Happy baking!
AprilCook, recipe developer and the heart of Chefwiz. More about April