No-Churn Chocolate Ice Cream
Rate this recipeBe the first to rate
 By AprilPublished
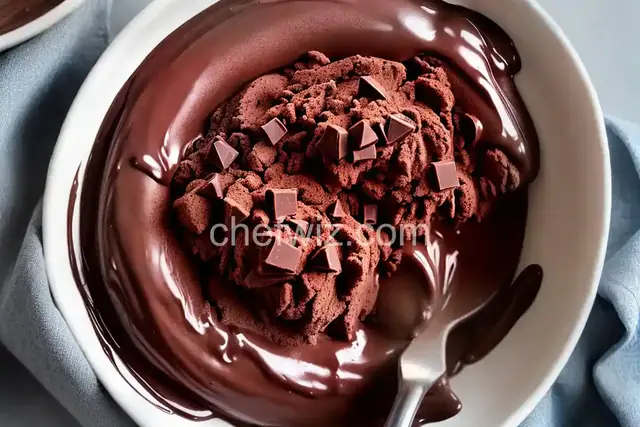
 Who doesn't love a scoop of creamy, rich chocolate ice cream on a hot summer day?
 By AprilPublished
 Who doesn't love a scoop of creamy, rich chocolate ice cream on a hot summer day?
To make the ice cream, start by whisking together the condensed milk, cocoa powder, vanilla, and salt in a large bowl. The mixture will become thick, so set it aside.
Using a mixer on medium-high speed, whip the cream until it forms firm peaks. This should take about 2 minutes.
Take about 1 cup of the whipped cream and fold it into the cocoa mixture using a rubber spatula. Make sure the two mixtures are well combined.
Next, fold the lightened mixture back into the remaining whipped cream until everything is well blended.
Pour the mixture into a chilled metal loaf pan that measures 9-by-5-by-3 inches. Cover the pan and place it in the freezer.
Allow the mixture to freeze for about 2 hours, until it reaches a thick and creamy consistency similar to soft-serve ice cream.
At this point, you can swirl in any desired mix-ins using a spoon.
Cover the pan again and continue to freeze the ice cream until it becomes solid and scoopable. This should take about 3 more hours.
Who doesn't love a scoop of creamy, rich chocolate ice cream on a hot summer day? The only problem is, making homemade ice cream can be a time-consuming process. But fear not! With this no-churn chocolate ice cream recipe, you can satisfy your cravings in no time, without an ice cream maker.
Traditional ice cream recipes often require an ice cream maker, which can be expensive and take up valuable kitchen space. But with this no-churn method, all you need is a few simple ingredients and a hand mixer or whisk. It's the perfect solution for those who want to enjoy homemade ice cream without the hassle.
One of the secrets to this no-churn chocolate ice cream is condensed milk. This sweet, thick milk is made by removing water from regular milk, resulting in a rich and creamy base for your ice cream. Combined with heavy cream, it creates a velvety smooth texture that will have you coming back for seconds.
Now that we've covered the basics, let's dive into the recipe. To make this delicious treat, you'll need:
Start by whisking together the condensed milk, cocoa powder, vanilla extract, and salt until well combined. In a separate bowl, whip the heavy cream until soft peaks form. Gently fold the whipped cream into the chocolate mixture until fully incorporated.
Transfer the mixture to a loaf pan or a freezer-safe container, cover with plastic wrap, and freeze for at least 6 hours or until firm. Once it's ready, scoop out a generous serving and indulge in the creamy, chocolatey goodness.
Don't limit yourself to just plain chocolate ice cream. Get creative and add your favorite mix-ins to the base. Whether it's crushed cookies, nuts, or swirls of caramel, the possibilities are endless. You can even experiment with different flavors by substituting the cocoa powder with other ingredients like coffee or matcha powder.
No, condensed milk is essential for the creamy texture and sweetness of this recipe. Regular milk won't yield the same results.
Yes, you can substitute condensed milk with alternatives like coconut milk, almond milk, or even Greek yogurt. However, keep in mind that the taste and texture may vary.
Yes, if you don't have a hand mixer, you can still make this recipe by whisking vigorously by hand. It may take a bit more effort, but the end result will be worth it.
It typically takes around 6 hours for the ice cream to firm up in the freezer. However, it's best to check after 6 hours and freeze longer if needed.
Absolutely! Feel free to experiment with different flavors like strawberry, mint, or even peanut butter. Just replace the cocoa powder with your desired flavoring agent.
Yes, you can store the ice cream in an airtight container in the freezer for up to 2 weeks. Just make sure to let it thaw for a few minutes before serving.
While heavy cream is recommended for the best results, you can try using alternatives like whipping cream or coconut cream. However, keep in mind that the texture may be slightly different.
Absolutely! You can substitute the heavy cream with a non-dairy alternative like coconut cream or almond milk. Just make sure to choose a condensed milk that is also dairy-free.
Now that you have the recipe and answers to some common questions, it's time to get creative in the kitchen. Whip up a batch of this no-churn chocolate ice cream and treat yourself to a delightful frozen dessert. Your taste buds will thank you!
AprilCook, recipe developer and the heart of Chefwiz. More about April