Molten Lava Cakes
Rate this recipeBe the first to rate
 By AprilPublished
 Who can resist the allure of a warm, gooey chocolate dessert?
 By AprilPublished
 Who can resist the allure of a warm, gooey chocolate dessert?
Preheat the oven to 400 degrees Fahrenheit.
Thoroughly butter 12 cups of a standard muffin tin.
Sprinkle cocoa powder over the buttered cups, then tap out any excess. Set aside.
In a large bowl, use a hand mixer to beat the butter and granulated sugar until fluffy.
Add the eggs one at a time, beating well after each addition.
Mix in the vanilla, then gradually add the flour, espresso, and salt. Mix until just combined.
Stir in the melted chocolate until evenly mixed.
Divide the batter equally among the prepared muffin cups.
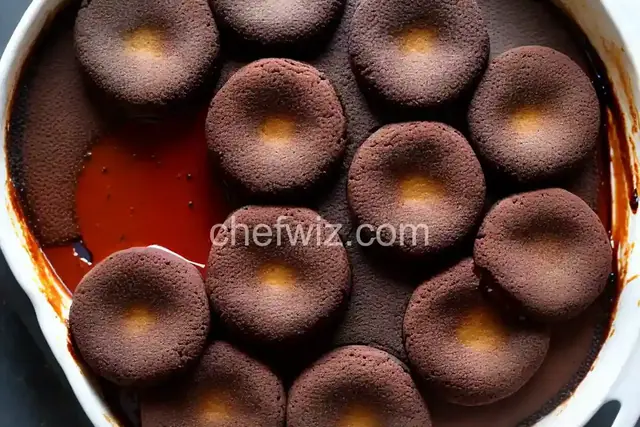
Bake until the tops of the cakes no longer jiggle, approximately 8 to 9 minutes.
Remove from the oven and let them stand for 5 minutes.
Place a large baking sheet on top of the muffin tin. Hold both pans together and flip them to invert the cakes onto the baking sheet.
Quickly transfer the cakes to serving plates, placing them bottom sides up.
Dust with powdered sugar and serve immediately.
Who can resist the allure of a warm, gooey chocolate dessert? Molten lava cakes are the epitome of indulgence, combining the richness of chocolate with a luscious, molten center. Whether you're hosting a dinner party or treating yourself to a special dessert, these delectable treats are guaranteed to satisfy your sweet tooth.
Imagine cutting into a perfectly baked chocolate cake, only to discover a river of liquid chocolate flowing out. The contrast between the delicate cake exterior and the oozing, velvety center creates a sensory experience like no other. It's like a volcano erupting with chocolatey goodness, tantalizing your taste buds and leaving you craving for more.
What sets molten lava cakes apart from regular chocolate cakes is the timing. The secret lies in slightly undercooking the batter, allowing the center to remain molten while the outer layer bakes to perfection. This delicate balance creates a dessert that's both tender and decadent, a true symphony of flavors and textures.
Contrary to popular belief, making molten lava cakes at home is easier than you might think. With just a handful of ingredients and a few simple steps, you can transform your kitchen into a gourmet bakery. The best part? You don't need any fancy equipment or extensive baking experience.
Start by melting high-quality chocolate and butter together, creating a smooth and glossy mixture. Then, whisk in sugar, eggs, and a touch of vanilla extract until the batter becomes velvety and well combined. Gently fold in a small amount of flour, ensuring that it's fully incorporated without overmixing.
Next, it's time to bake the cakes. Grease individual ramekins and fill them with the batter, making sure not to overfill. Place the ramekins on a baking sheet and slide them into a preheated oven. The precise baking time may vary depending on your oven, but typically, 10-12 minutes at a moderate temperature will yield the perfect molten lava cakes.
While classic molten lava cakes are undeniably delightful, don't be afraid to get creative and add your own personal touch. Here are a few ideas to elevate your dessert game:
Experiment with different flavors by infusing your batter with a hint of coffee, a dash of cinnamon, or a splash of liqueur. These subtle additions can elevate your molten lava cakes to new heights, adding complexity and depth to the overall taste.
Take your presentation to the next level by garnishing your molten lava cakes with a variety of toppings. Fresh berries, a dusting of powdered sugar, or a dollop of whipped cream can provide a delightful contrast to the warm, chocolatey goodness.
For the ultimate indulgence, serve your molten lava cakes alongside a scoop of velvety ice cream. The cold creaminess of the ice cream complements the warm, molten center, creating a heavenly combination that's hard to resist.
Molten lava cakes are a dessert lover's dream come true. With their irresistible combination of rich chocolate, tender cake, and molten center, they are guaranteed to impress even the most discerning palates. Whether you're celebrating a special occasion or simply craving a decadent treat, these little bundles of chocolatey joy will never disappoint. So why wait? Treat yourself and your loved ones to the ultimate dessert experience with homemade molten lava cakes.
A1: While it's best to serve molten lava cakes fresh out of the oven, you can prepare the batter in advance and refrigerate it. Just be sure to bring it back to room temperature before baking.
A2: Yes, you can freeze unbaked molten lava cakes. Simply wrap each ramekin tightly in plastic wrap and aluminum foil before placing them in the freezer. When you're ready to enjoy, bake them directly from frozen, adding a few extra minutes to the baking time.
A3: Absolutely! While dark chocolate is the traditional choice for molten lava cakes, you can experiment with milk or white chocolate for different flavor profiles. Just keep in mind that the sweetness and texture may vary.
A4: The key is to bake the cakes until the edges are set but the center is still slightly jiggly. Inserting a toothpick into the cake should come out with some moist crumbs, but not raw batter.
A5: Yes, you can use smaller ramekins or muffin tins to create individual mini molten lava cakes. Just remember to adjust the baking time accordingly, as they will cook faster than larger cakes.
A6: Absolutely! You can substitute all-purpose flour with gluten-free flour in the same quantity. Just ensure that the gluten-free flour blend you're using is suitable for baking.
A7: Greasing the ramekins with butter or non-stick cooking spray and dusting them with cocoa powder or flour will help prevent the cakes from sticking to the sides.
A8: While molten lava cakes are best enjoyed fresh, you can reheat them in the microwave for a short burst of 10-15 seconds. Be cautious not to overheat, as you don't want to lose the molten center.
AprilCook, recipe developer and the heart of Chefwiz. More about April