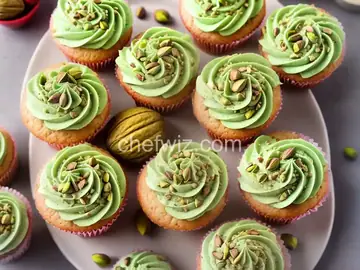
Moist Red Velvet Cupcakes
Rate this recipeBe the first to rate
 By AprilPublished
 Who can resist the allure of a perfectly moist, velvety red cupcake?
 By AprilPublished
 Who can resist the allure of a perfectly moist, velvety red cupcake?
Preheat the oven to 350 degrees F (175 degrees C).
Grease two 12 cup muffin pans or line them with 20 paper baking cups.
In a large bowl, use an electric mixer to beat the butter and sugar until they become light and fluffy.
Mix in the eggs, buttermilk, red food coloring, and vanilla.
Stir in the baking soda and vinegar.
In a separate bowl, combine the flour, cocoa powder, and salt.
Stir the flour mixture into the batter until it is just blended.
Spoon the batter into the prepared cups, dividing it evenly.
Bake in the preheated oven for 20 to 25 minutes, or until the tops of the cupcakes spring back when lightly pressed.
Cool the cupcakes in the pan set over a wire rack.
Once the cupcakes are cool, arrange them on a serving platter.
Frost the cupcakes with your desired frosting.
Who can resist the allure of a perfectly moist, velvety red cupcake? Whether you're celebrating a special occasion or simply craving a decadent treat, these red velvet cupcakes are sure to satisfy your sweet tooth. In this article, we'll delve into the secrets of creating moist, delicious red velvet cupcakes that will have everyone coming back for more.
Red velvet cupcakes are more than just a pretty color. They offer a unique flavor profile that combines the richness of chocolate with a subtle tanginess. The addition of buttermilk and vinegar helps to enhance the tangy undertones and create a tender, melt-in-your-mouth texture. Think of red velvet cupcakes as the perfect marriage between a chocolate cake and a light, fluffy sponge.
Creating moist red velvet cupcakes begins with the right ingredients. High-quality cocoa powder is essential for achieving a rich, chocolatey flavor. Be sure to use natural cocoa powder, as Dutch-processed cocoa can alter the acidity of the batter. To enhance the velvety texture, we recommend using cake flour instead of all-purpose flour. The lower protein content in cake flour ensures a tender crumb.
Buttermilk is the secret behind moist red velvet cupcakes. It not only adds tanginess but also helps to keep the cupcakes tender and moist. If you don't have buttermilk on hand, you can easily make a substitute by combining regular milk with a tablespoon of vinegar or lemon juice. Let the mixture sit for a few minutes before using it in the recipe.
One of the biggest challenges when baking red velvet cupcakes is achieving the right moisture balance. Too dry, and the cupcakes will be crumbly. Too moist, and they will be heavy and unappetizing. The key is to measure your ingredients accurately and not overmix the batter. It's important to remember that red velvet cupcakes should be light and delicate, so a gentle hand is required.
To ensure a tender crumb, start by creaming the butter and sugar together until light and fluffy. Add the eggs one at a time, beating well after each addition. Sift the dry ingredients together, including the cocoa powder and flour, before gradually adding them to the batter. Alternate between adding the dry ingredients and the buttermilk mixture, beginning and ending with the dry ingredients. Mix until just combined, being careful not to overmix.
No red velvet cupcake is complete without its vibrant red color. Traditionally, the color was achieved through a reaction between the cocoa powder and the acidic ingredients. However, nowadays, most recipes call for red food coloring to achieve the desired hue. Add the food coloring a little at a time until you reach the desired intensity.
Now that you have a perfectly mixed batter, it's time to bake those red velvet cupcakes to perfection. Preheat your oven to the recommended temperature and line your cupcake tin with paper liners. Fill each liner about two-thirds full with batter to allow for rising. Bake for the recommended time or until a toothpick inserted into the center comes out clean. Remember, every oven is different, so be sure to keep an eye on your cupcakes as they bake.
Allow your red velvet cupcakes to cool in the tin for a few minutes before transferring them to a wire rack to cool completely. Once cooled, it's time to frost these delectable treats. Cream cheese frosting is the classic choice for red velvet cupcakes, but you can also experiment with other flavors such as vanilla or chocolate. Get creative with your piping and decorations to make these cupcakes truly irresistible.
If you can resist eating them all in one sitting, red velvet cupcakes can be stored in an airtight container at room temperature for a few days. However, they are best enjoyed fresh, when the flavors are at their peak. So gather your loved ones, pour a glass of milk, and indulge in the moist, velvety goodness of these red velvet cupcakes.
Dutch-processed cocoa alters the acidity of the batter, affecting the overall taste and texture. Stick to natural cocoa powder for the best results.
Combine regular milk with a tablespoon of vinegar or lemon juice. Let it sit for a few minutes before using in the recipe.
While the red food coloring is traditional, you can omit it if desired. However, your cupcakes will not have the vibrant red hue associated with red velvet.
Be sure to measure your ingredients accurately and avoid overmixing the batter. Additionally, do not open the oven door during baking, as this can cause the cupcakes to sink.
Absolutely! Cream cheese frosting is the classic choice, but you can experiment with other frostings such as vanilla or chocolate to suit your taste.
Store them in an airtight container at room temperature for a few days. However, for the best flavor and freshness, it's recommended to enjoy them within a day or two.
Yes, you can freeze the cupcakes for up to three months. Be sure to wrap them tightly in plastic wrap or place them in a freezer-safe container. Thaw them in the refrigerator before serving.
Absolutely! The recipe can be easily adapted to make a red velvet cake. Simply adjust the baking time and use the appropriate cake pans.
AprilCook, recipe developer and the heart of Chefwiz. More about April