Melting Ice Cream Cone Cake
Rate this recipeBe the first to rate
 By AprilPublished
 Melting Ice Cream Cone Cake: A Sweet Treat for All Occasions Who doesn't love ice cream?
 By AprilPublished
 Melting Ice Cream Cone Cake: A Sweet Treat for All Occasions Who doesn't love ice cream?
Preheat the oven to 350 degrees F. Grease four 8-inch round cake pans with flour-based baking spray.
In the bowl of an electric mixer, cream the butter and granulated sugar until light and fluffy for about 3 minutes.
Add the eggs one at a time, mixing well after each addition. Mix in the vanilla extract.
Sift together the flour, baking powder, and salt. Add the flour mixture to the butter mixture alternately with the milk in three additions, starting and ending with the flour.
Mix on low speed until the batter is smooth and thoroughly combined. Fold in the confetti sprinkles.
Bake the cakes for 25 to 35 minutes, or until they spring back when pressed in the center. Let them cool for 10 minutes in the pan, then transfer them to cooling racks to cool completely.
Level the cakes using a large serrated knife or cake leveling tool. Reserve the cake scraps for later use.
To make the buttercream frosting:
Cream the butter and confectioners' sugar together on low speed in the bowl of an electric mixer.
Increase the speed to high and whip until the mixture is light in color.
Turn off the mixer and add the vanilla extract and 1/3 cup of heavy cream. Beat again until the frosting is light and fluffy.
Add additional heavy cream if the frosting
Melting Ice Cream Cone Cake: A Sweet Treat for All Occasions
Who doesn't love ice cream? It's a classic treat that brings joy to people of all ages. But have you ever thought about combining the deliciousness of ice cream with the fun and creativity of baking? That's where the melting ice cream cone cake comes in. This delightful dessert is not only visually appealing but also incredibly tasty. So, let's dive into the world of melting ice cream cone cakes and discover why they're the perfect addition to any celebration.
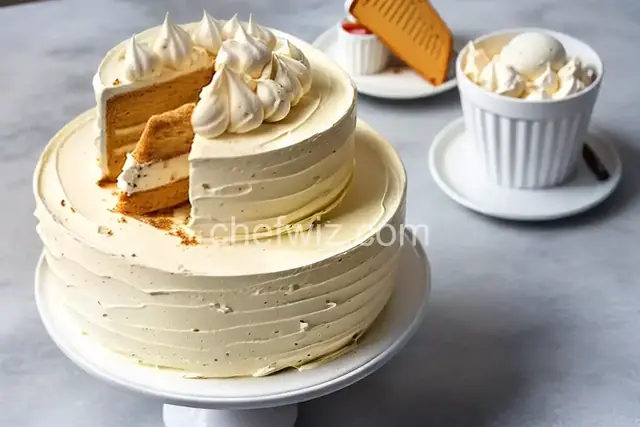
What makes a melting ice cream cone cake so special? Well, imagine a cake that looks like an ice cream cone that is melting. It's a whimsical and playful design that instantly puts a smile on anyone's face. The cake is typically made in the shape of an ice cream cone, with a delicious sponge cake base and a creamy frosting that resembles melting ice cream. The frosting is usually piped onto the cake in a way that mimics the drips of melting ice cream, creating a truly eye-catching effect.
But it's not just about the appearance. The melting ice cream cone cake is also a delight for the taste buds. The sponge cake is light and fluffy, providing the perfect canvas for the creamy frosting. You can choose any flavor you like, whether it's classic vanilla, rich chocolate, or fruity strawberry. The frosting is often infused with the same flavors as the ice cream it imitates, making each bite a burst of deliciousness.
Now, you may be wondering, can I make a melting ice cream cone cake at home? Absolutely! While it may seem like a complicated dessert to create, with a little patience and some basic baking skills, you can easily whip up your own masterpiece. There are plenty of recipes and tutorials available online that walk you through the process step by step. So, gather your ingredients, preheat your oven, and let your creativity run wild.
One of the great things about the melting ice cream cone cake is its versatility. You can customize it to suit any occasion or theme. Planning a birthday party for a little one? Decorate the cake with colorful sprinkles and top it off with a cherry. Hosting a summer gathering? Add some crushed cookies to the frosting to give it a crunchy texture, reminiscent of an ice cream cone. The possibilities are endless, and the end result is always a crowd-pleaser.
Now, let's address some common questions about the melting ice cream cone cake:
1. Is it difficult to make a melting ice cream cone cake?
Not at all! With the right recipe and a little practice, you can create a stunning melting ice cream cone cake in no time.
2. Can I use any type of cake for the base?
Yes, you can use any type of cake you like. Sponge cake is a popular choice, but you can also experiment with flavors like chocolate or red velvet.
3. How do I achieve the melting effect with the frosting?
The key is to pipe the frosting in a way that resembles melting ice cream. Start from the top of the cone and let the frosting drip down the sides.
4. Can I use different flavors of frosting?
Absolutely! Feel free to get creative and use different flavors of frosting to mimic various ice cream flavors.
5. Can I make the melting ice cream cone cake in advance?
While it's best to enjoy the cake fresh, you can make it a day ahead and store it in the refrigerator. Just make sure to cover it properly to prevent the frosting from drying out.
6. Can I use store-bought frosting?
Yes, you can use store-bought frosting if you're short on time or prefer the convenience. Just make sure to choose a frosting that is easy to pipe.
7. Can I make mini melting ice cream cone cakes?
Definitely! You can use cupcake molds to create individual-sized melting ice cream cone cakes. It's a fun and adorable twist on the classic dessert.
8. Can I add additional decorations to the cake?
Absolutely! Feel free to let your creativity shine by adding extra decorations like sprinkles, edible flowers, or even a drizzle of chocolate sauce.
In conclusion, the melting ice cream cone cake is a delightful and visually stunning dessert that is sure to impress. Whether you're celebrating a birthday, hosting a party, or simply craving something sweet, this cake is a fantastic choice. With its whimsical design and delicious flavors, it's a treat that will bring a smile to everyone's face. So, why not give it a try and indulge in a little slice of happiness?
Now you have all the information you need to make your own melting ice cream cone cake. Get ready to wow your friends and family with this sweet and creative dessert. Happy baking!
AprilCook, recipe developer and the heart of Chefwiz. More about April