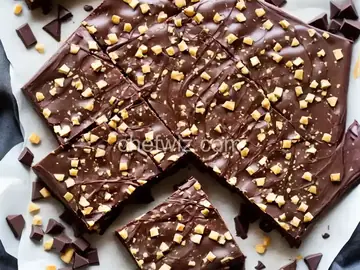
Layered Peppermint Bark
Rate this recipeBe the first to rate
 By AprilPublished
 Are you ready to take your holiday treats to the next level? Look no further than layered peppermint bark !
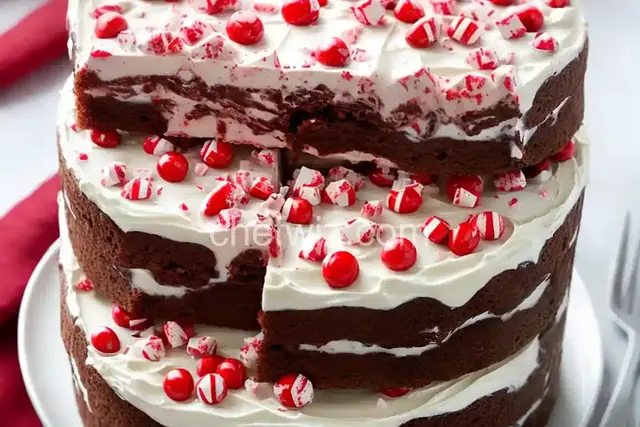 By AprilPublished
 Are you ready to take your holiday treats to the next level? Look no further than layered peppermint bark !
Prepare a 9x12-inch baking pan by lining it with aluminum foil or parchment paper.
In a double boiler, melt half of the white chocolate over low heat, stirring regularly to prevent burning. Use a rubber spatula to scrape down the sides of the boiler.
Pour the melted white chocolate into the prepared pan and spread it evenly.
Sprinkle a quarter of the crushed peppermint candies evenly over the white chocolate layer.
Place the pan in the refrigerator and let it chill for about 15 minutes until firm.
In the meantime, melt the dark chocolate, heavy cream, and peppermint extract in the double boiler, stirring frequently until everything is melted and well combined.
Quickly pour the dark chocolate mixture over the chilled white chocolate layer and spread it evenly.
Return the pan to the refrigerator and let it chill for about 20 minutes until firm.
Melt the remaining white chocolate in the double boiler, stirring frequently until melted.
Spread the melted white chocolate quickly over the chilled chocolate layers.
Sprinkle the remaining crushed peppermint candies over the top.
Chill the pan in the refrigerator for another 20 minutes until firm.
To serve, cut or break the dessert into small pieces.
Are you ready to take your holiday treats to the next level? Look no further than layered peppermint bark! This festive and delicious dessert is sure to be a hit at any holiday gathering. With its rich layers of chocolate and refreshing bursts of peppermint, it's the perfect combination of sweet and minty. So, let's dive in and discover how to make this mouthwatering treat!
Before we get started, let's talk about the layers that make this peppermint bark so special. We'll be using both dark chocolate and white chocolate to create a beautiful contrasting effect. The dark chocolate layer adds a deep, rich flavor, while the white chocolate layer brings a creamy sweetness to the mix. It's a match made in dessert heaven!
To create the layers, we'll need to melt both the dark and white chocolate. You can do this by using a double boiler or by microwaving the chocolate in short bursts, stirring in between, until smooth and melted. Be sure to be patient and gentle with the chocolate, as overheating can cause it to seize and become clumpy.
Now that our chocolate is melted, it's time to infuse it with that refreshing peppermint flavor. We can do this by adding a few drops of peppermint extract to each chocolate layer. The amount of extract you use will depend on your personal preference, so feel free to adjust accordingly. Just remember, a little goes a long way!
Once our chocolate is flavored and smooth, it's time to start layering! Begin by pouring the dark chocolate onto a parchment-lined baking sheet, spreading it out evenly with a spatula. Then, carefully pour the white chocolate on top, using the spatula to create swirls and patterns. Finally, sprinkle crushed peppermint candies over the top for an extra festive touch.
Now comes the hard part: waiting for the bark to set. Pop the baking sheet in the fridge for at least an hour, or until the chocolate is firm to the touch. Once it's set, remove the bark from the fridge and break it into pieces. The irregular shapes and sizes add to the charm of this homemade treat.
Layered peppermint bark can be stored in an airtight container at room temperature for up to two weeks. But let's be honest, it probably won't last that long! This delightful treat is perfect for enjoying yourself or sharing with friends and family. Wrap up a few pieces in festive packaging for a thoughtful homemade gift.
Layered peppermint bark is a delightful and festive treat that is sure to impress. With its rich layers of chocolate and refreshing burst of peppermint, it's the perfect indulgence for the holiday season. Whether you're enjoying it yourself or sharing it with loved ones, this homemade bark is a guaranteed crowd-pleaser. So, gather your ingredients, get creative with your layers, and enjoy the sweet taste of the holidays!
Absolutely! Feel free to use whichever type of chocolate you prefer.
If you don't have peppermint extract on hand, you can crush some peppermint candies and mix them into the melted chocolate for a similar taste.
Of course! Get creative and try adding crushed nuts, sprinkles, or even a drizzle of caramel for some extra flavor and texture.
It typically takes about an hour in the fridge for the bark to fully set, but you can leave it in longer if needed.
Yes, you can freeze the bark for up to three months. Just make sure to thaw it in the fridge before enjoying.
Absolutely! Feel free to experiment with different extracts or flavorings to create your own unique bark.
Yes, layered peppermint bark can be made in advance and stored in an airtight container until ready to serve.
Definitely! Using colored chocolate can add a fun and vibrant twist to your peppermint bark.
AprilCook, recipe developer and the heart of Chefwiz. More about April