Keto Taco Cups
Rate this recipeBe the first to rate
 By AprilPublished
 Are you looking for a delicious and low-carb snack that satisfies your cravings?
 By AprilPublished
 Are you looking for a delicious and low-carb snack that satisfies your cravings?
Preheat the oven to 375 degrees Fahrenheit and prepare a large baking sheet by lining it with parchment paper.
Spoon approximately 2 tablespoons of cheddar cheese onto the prepared baking sheet, spacing them a few inches apart.
Bake the cheese in the preheated oven until it becomes bubbly and the edges start to turn golden, which should take around 6 minutes.
Allow the cheese to cool on the baking sheet for a minute.
While the cheese is cooling, grease the bottom of a muffin tin using cooking spray. Carefully lift the melted cheese slices from the baking sheet and place them on the bottom of the muffin tin.
Fit another inverted muffin tin on top of the cheese slices and let it cool for 10 minutes. If you don't have a second muffin tin, you can use your hands to help shape the cheese around the inverted tin.
Heat oil in a large skillet over medium heat. Add the onion and cook, stirring occasionally, until it softens, which should take around 5 minutes.
Stir in the garlic and then add the ground beef to the skillet. Use a wooden spoon to break up the meat while cooking.
Cook the beef until it is no longer pink, approximately 6 minutes, and then drain any excess fat from the skillet.
Return the cooked beef to the skillet and season it with chili powder, cumin,
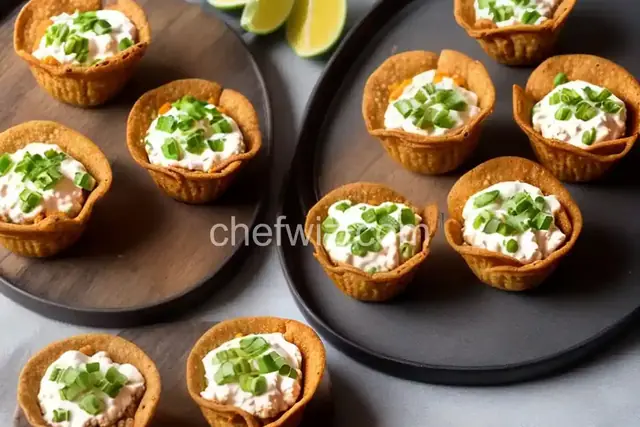
Are you looking for a delicious and low-carb snack that satisfies your cravings? Look no further than Keto Taco Cups! These delightful bite-sized treats are perfect for parties, game nights, or simply as a quick and easy snack. Packed with flavor and made with keto-friendly ingredients, they are sure to be a hit with everyone.
Imagine the irresistible combination of your favorite taco fillings, all nestled inside a crispy and savory cup. Keto Taco Cups take the classic taco concept and turn it into a convenient and portable snack. The best part? They are completely guilt-free and won't derail your low-carb diet.
These cups are not only delicious but also incredibly versatile. You can customize them to suit your taste preferences and dietary needs. Whether you prefer a spicy kick or a milder flavor, you can easily adjust the seasonings and toppings to create the perfect taco cup for you.
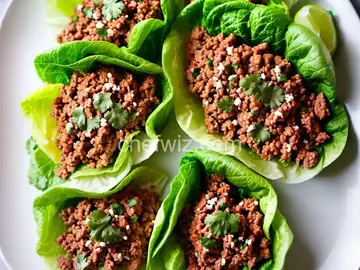
The process of making Keto Taco Cups is simple and straightforward. Start by preparing the taco meat filling using your choice of ground meat. Season it with a blend of spices, such as chili powder, cumin, and garlic powder, to infuse it with that classic taco flavor.
Next, you'll need to create the taco cups. You can easily make them using low-carb tortillas or by using shredded cheese as the base. If you're using tortillas, simply press them into a cupcake tin and bake until they turn golden and crispy. If you prefer a cheese base, sprinkle shredded cheese onto a baking sheet and bake until it melts and forms a crispy cup.
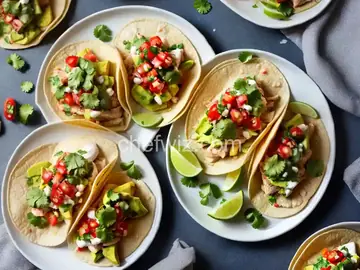
Once your taco cups are ready, fill them with the seasoned meat mixture and top with your favorite toppings. Think shredded lettuce, diced tomatoes, sliced jalapenos, sour cream, and grated cheese. The possibilities are endless, so feel free to get creative!
There are numerous reasons why you should give Keto Taco Cups a try. Firstly, they are a great way to satisfy your taco cravings while sticking to your low-carb lifestyle. These cups are rich in protein and healthy fats, making them a satisfying and nourishing snack option.
Additionally, Keto Taco Cups are incredibly convenient. They are easy to make and can be prepared in advance, making them perfect for meal prepping or for entertaining guests. You can also easily pack them for on-the-go snacking or as a portable lunch option.
Another great advantage of Keto Taco Cups is their versatility. You can experiment with different fillings, toppings, and seasonings to create a variety of flavor combinations. From classic ground beef tacos to spicy chicken or vegetarian options, the choice is yours.
Yes, you can! Simply prepare the taco cups and the filling separately, and store them in the refrigerator until you're ready to serve. When you're ready to enjoy them, fill the cups with the taco mixture and add your desired toppings.
Yes, you can freeze Keto Taco Cups. After baking the taco cups, allow them to cool completely before placing them in an airtight container or freezer bag. When you're ready to eat them, simply thaw them in the refrigerator and fill them with your favorite taco fillings.
Absolutely! Keto Taco Cups can be made with various types of ground meat, such as chicken, turkey, or even seafood. Just make sure to adjust the seasonings accordingly to complement the meat you choose.
Yes, Keto Taco Cups can be easily modified to suit a vegetarian diet. Instead of using meat, you can substitute it with diced tofu, black beans, or grilled vegetables. The cheese base also adds a deliciously satisfying element to the cups.
The level of spiciness in Keto Taco Cups is entirely up to you. If you enjoy a spicy kick, you can add extra chili powder or hot sauce to the meat filling. Conversely, if you prefer milder flavors, you can reduce the amount of spices used.
Absolutely! If you're short on time or prefer the convenience of store-bought taco seasoning, feel free to use it. Just make sure to check the label for any added sugars or artificial ingredients that may not align with your keto diet.
Yes, you can make Keto Taco Cups dairy-free by omitting the cheese or using a dairy-free alternative. You can also experiment with dairy-free toppings such as avocado, salsa, or dairy-free sour cream.
Absolutely! Keto Taco Cups are not only delicious for adults but also a hit with kids. They can be a fun and interactive way to introduce healthier, low-carb options to children. Let them choose their favorite toppings and enjoy assembling their own taco cups.
In conclusion, Keto Taco Cups are a fantastic snack option for anyone following a low-carb or ketogenic lifestyle. They offer the flavors of a classic taco in a convenient and portable form. Whether you're hosting a gathering or simply craving a tasty treat, these cups are sure to satisfy.
AprilCook, recipe developer and the heart of Chefwiz. More about April