
How to Make A Cheese Board
Are you ready to impress your guests at your next gathering? Creating a stunning cheese board is the perfect way to showcase your culinary skills and provide a delightful experience for everyone. In this article, I will guide you through the process of making a cheese board that will leave your guests in awe.
Choosing the Right Cheeses
When it comes to creating a cheese board, the first step is selecting the right cheeses. You want to create a balanced and diverse selection that caters to different tastes and preferences. Think about including a variety of textures and flavors, such as soft, semi-soft, hard, and aged cheeses.
Pairing with Complementary Accompaniments
While the cheeses are the stars of the show, the accompaniments play a crucial supporting role. Consider adding a variety of crackers, bread, and fresh fruits like grapes and figs. These elements will not only enhance the flavors of the cheeses but also add visual appeal to the overall presentation.
Arranging Your Cheese Board
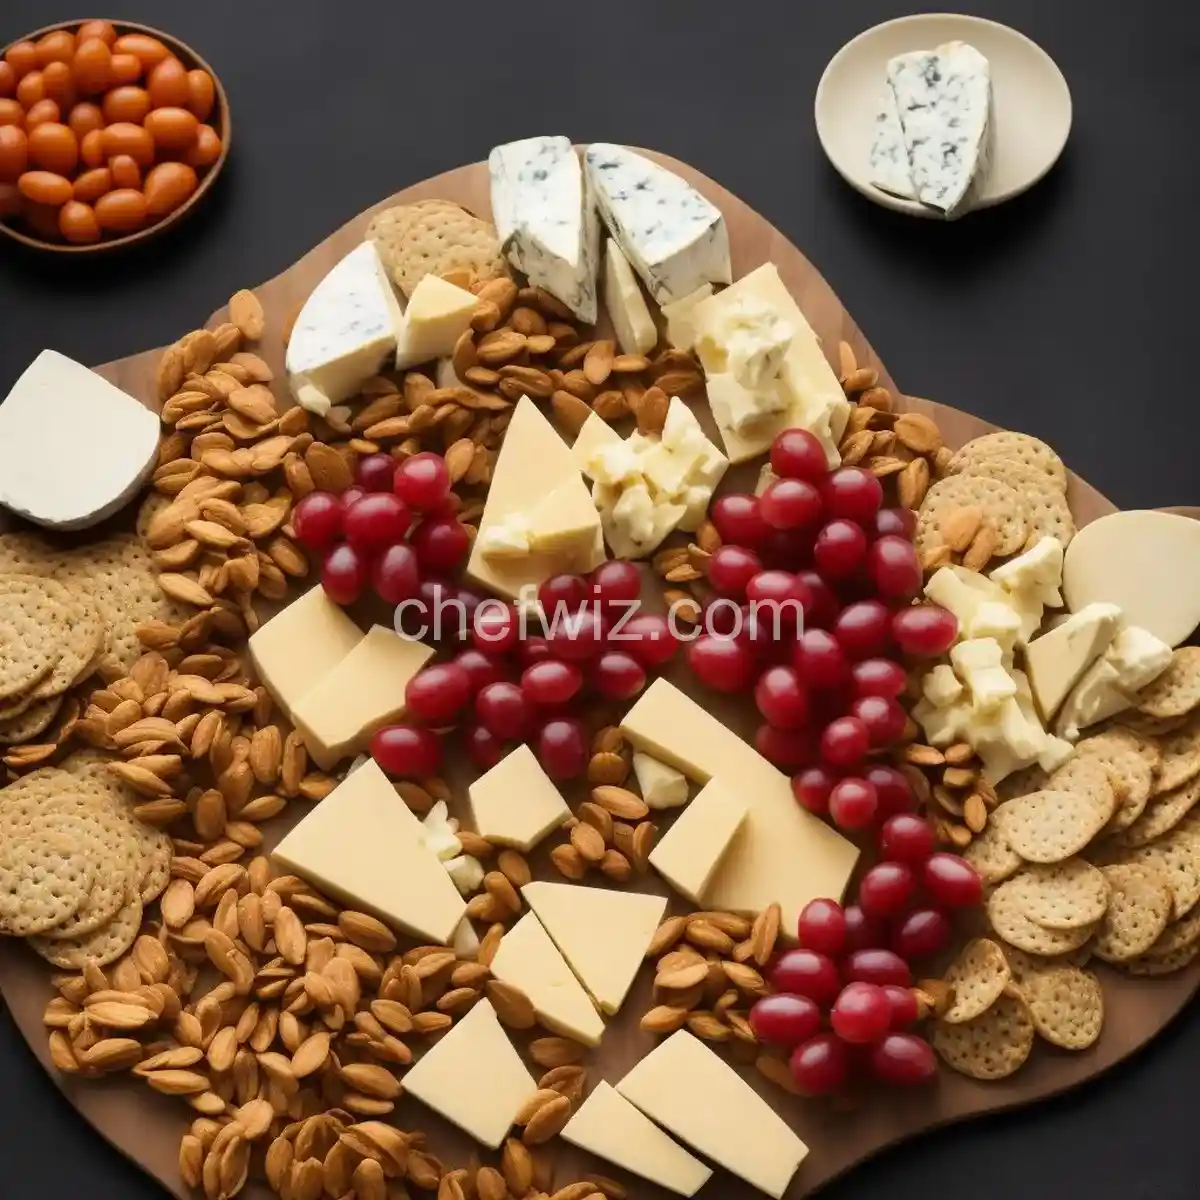
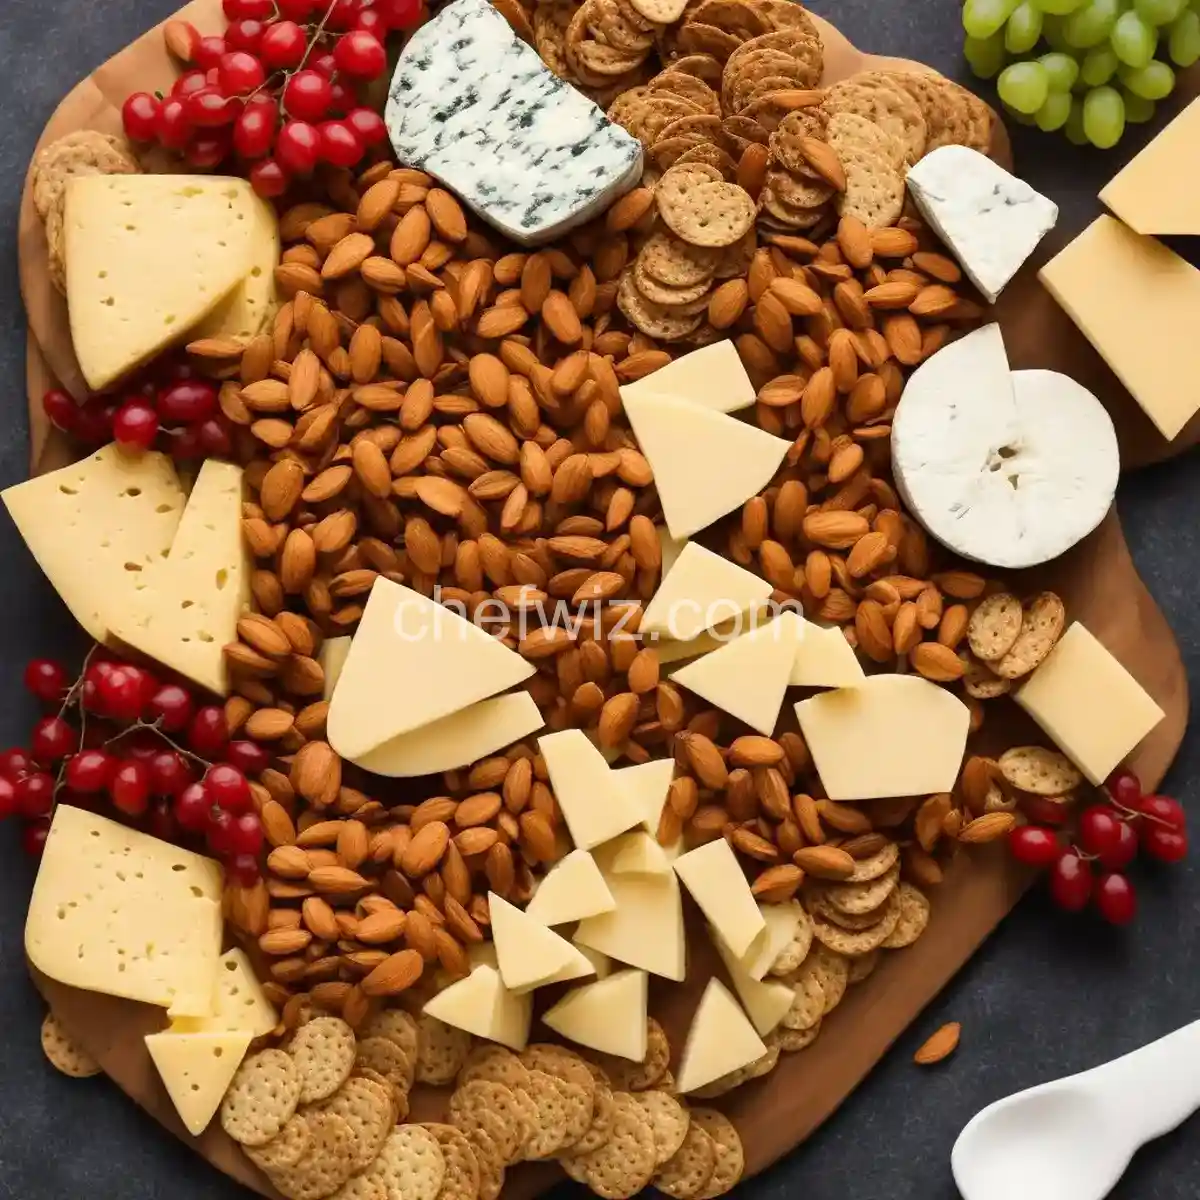
Now that you have selected your cheeses and accompaniments, it’s time to arrange them on your cheese board. Start by placing the cheeses on the board, keeping in mind the visual balance and ensuring there is enough space between each cheese. Arrange the accompaniments around the cheeses, creating a beautiful and inviting display.
Creating a Feast for the Eyes
Remember, presentation is key when it comes to a cheese board. Aim to create a feast for the eyes by incorporating different colors, textures, and heights. Consider using small bowls or ramekins to hold spreads or nuts, and use fresh herbs or edible flowers as garnishes.
Serving and Enjoying
Your cheese board is now ready to be served and enjoyed. Encourage your guests to explore the different flavors and combinations. Provide small knives or cheese spreaders for easy serving, and don’t forget to offer some wine or other beverages that pair well with cheese.
Cleaning and Storing
After the party is over, it’s important to properly clean and store your cheese board. Use warm soapy water to clean the board, ensuring all the cheese residue is removed. Let it air dry completely before storing it in a cool and dry place. This will help prolong the life of your cheese board and keep it in excellent condition for future use.
FAQs
1. Can I use any type of cheese for a cheese board?
While there are no hard and fast rules, it’s best to choose a variety of cheeses with different textures and flavors to create a well-rounded cheese board.
2. How many cheeses should I include in my cheese board?
Aim for a selection of three to five cheeses, depending on the size of your board and the number of guests you are serving.
3. Can I include non-dairy cheeses on my cheese board?
Absolutely! There are a variety of non-dairy cheeses available that can be included on a cheese board for those with dietary restrictions or preferences.
4. What are some alternative accompaniments for a cheese board?
In addition to crackers and fresh fruits, you can consider adding cured meats, olives, pickles, or even honey and jams as accompaniments.
5. How long can a cheese board be left out at room temperature?
It is recommended to leave a cheese board out at room temperature for no more than two hours to ensure food safety.
6. Can I prepare a cheese board in advance?
Absolutely! You can prepare your cheese board a few hours before your event and keep it covered in the refrigerator. Just remember to take it out about 30 minutes before serving to allow the cheeses to come to room temperature.
7. What type of knife should I use to serve the cheeses?
It’s best to provide a different knife for each cheese to prevent flavors from mixing. Use a soft cheese knife for soft cheeses and a sharp knife for hard cheeses.
8. Can I customize my cheese board based on dietary restrictions?
Absolutely! Feel free to customize your cheese board based on dietary restrictions or preferences. Including a variety of cheeses and accompaniments ensures that there is something for everyone to enjoy.
Conclusion
Creating a cheese board is not just about arranging cheeses and accompaniments. It is a form of art that allows you to showcase your creativity and culinary expertise. By carefully selecting cheeses, pairing them with complementary accompaniments, and arranging them beautifully, you can create a cheese board that is not only visually stunning but also a delight for the taste buds. So, next time you have guests over, treat them to a memorable cheese board experience that will leave a lasting impression.

How to Make A Cheese Board
Ingredients
- 8 oz of white cheddar cheese
- 4 oz of herbed goat cheese or sheeps milk cheese
- 8 oz of brie cheese
- Crackers or flatbread crisps
- 2 apples or pears
- 8 small bunches of grapes
- 1/2 cup of olives
- 1/2 cup of almonds
- Tart cherry or fig jam
- Honey
- Roasted chickpeas
- Rosemary or thyme
Instructions
- Select the ingredients you prefer from the provided list.
- Place the chosen ingredients on a platter.


