How to Caramelize Onions
Rate this recipeBe the first to rate
 By AprilPublished
 Have you ever wondered how to achieve those perfectly caramelized onions that add a burst of flavor to any dish?
 By AprilPublished
 Have you ever wondered how to achieve those perfectly caramelized onions that add a burst of flavor to any dish?
Heat a medium skillet over medium heat and melt the butter.
Add the onions to the skillet and cook, stirring frequently, until they begin to soften.
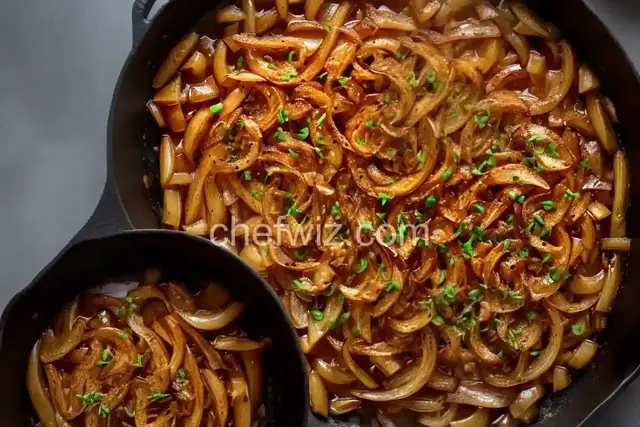
Reduce the heat to medium-low and continue cooking the onions, stirring often, until they turn a deep golden color and reach a jam-like consistency. This should take approximately 45 to 60 minutes.
Have you ever wondered how to achieve those perfectly caramelized onions that add a burst of flavor to any dish? Look no further! In this article, we will explore the art of caramelizing onions and reveal the secrets to achieving that rich, sweet, and golden-brown goodness. So, grab your apron and let's get started!
Before we dive into the process of caramelizing onions, let's understand what caramelization actually means. Caramelization is a cooking technique that involves slowly cooking sugars, such as those found in onions, until they turn brown and develop a sweet, nutty flavor. This process results in a transformation of the onion's natural sugars, bringing out a depth of flavor that can elevate any dish.
Caramelized onions add a whole new dimension to your recipes. They bring a natural sweetness and complexity that can enhance both savory and sweet dishes. Whether you're making French onion soup, a savory tart, or even a caramelized onion jam, the result is a flavor explosion that will leave your taste buds begging for more.
Now that we understand the magic of caramelized onions, let's dive into the step-by-step process of achieving that perfect caramelization.
Not all onions are created equal when it comes to caramelization. The best onions for this process are the sweet varieties, such as yellow or Vidalia onions. Their higher sugar content will yield a sweeter and more flavorful result.
Peel the onions and slice them thinly. The thickness of the slices will depend on how you plan to use them. Thicker slices will retain more texture, while thinner slices will melt into a luscious caramelized mass.
Choose a wide, heavy-bottomed pan or skillet that can distribute heat evenly. Heat some oil or butter over medium-low heat until it melts and coats the bottom of the pan.
Add your sliced onions to the pan and spread them out in an even layer. The key to caramelization is patience. Cook the onions slowly over low heat, stirring occasionally, for at least 30-45 minutes. This slow cooking process allows the natural sugars in the onions to break down and develop their characteristic caramelized flavor.
As the onions cook, you will notice them gradually turning golden brown. Be sure to stir them occasionally to prevent burning and ensure even caramelization. If you notice any bits sticking to the bottom of the pan, you can deglaze with a splash of water or wine to release those flavorful caramelized bits.
Once your onions have reached a deep golden-brown color and a sweet aroma fills the air, they are ready to be enjoyed. Taste a small piece and adjust the seasoning if needed. You can add a pinch of salt, a sprinkle of sugar, or even a splash of balsamic vinegar to enhance the flavors even further.
Caramelizing onions is a culinary technique that can elevate your dishes to new heights. With a little patience and the right ingredients, you can achieve those beautifully golden-brown, sweet, and flavorful caramelized onions. So, next time you're in the kitchen, give it a try and indulge in the magic of caramelization.
While you can technically caramelize any type of onion, sweet varieties like yellow or Vidalia onions are the best for achieving that perfect caramelized flavor.
Caramelizing onions is a slow process that takes at least 30-45 minutes. The low and slow cooking allows the natural sugars in the onions to slowly break down and develop their sweet, nutty flavor.
While it's tempting to crank up the heat to speed up the caramelization process, it's best to resist the urge. Cooking the onions slowly over low heat allows the sugars to caramelize evenly, resulting in a more delicious outcome.
While oil or butter is typically used to cook the onions and prevent them from sticking to the pan, you can experiment with alternative cooking methods, such as using vegetable broth or water. However, keep in mind that the flavor and texture might vary.
Absolutely! Caramelized onions can be stored in an airtight container in the refrigerator for up to a week. They can also be frozen for longer storage.
The possibilities are endless! Caramelized onions can be used in soups, stews, sandwiches, pasta dishes, tarts, pizzas, and even as a topping for burgers or hot dogs. Get creative and experiment with different recipes to enjoy the deliciousness of caramelized onions.
While caramelizing onions on the stovetop is the traditional method, you can also achieve caramelization in the oven. Simply spread the sliced onions on a baking sheet, drizzle with oil, and bake at a low temperature (around 300°F or 150°C) for 1-2 hours, stirring occasionally.
Yes, you can! Simply add the sliced onions to a slow cooker, along with some oil or butter, and cook on low heat for 6-8 hours or on high heat for 3-4 hours. The slow cooker method is perfect for hands-off caramelization.
AprilCook, recipe developer and the heart of Chefwiz. More about April