Homemade Plum Jam Recipe
Rate this recipeBe the first to rate
 By AprilPublished
 Do you enjoy the sweet, tangy taste of fresh plums? Would you like to savor that flavor all year round?
 By AprilPublished
 Do you enjoy the sweet, tangy taste of fresh plums? Would you like to savor that flavor all year round?
In a large bowl, combine plums, sugar, and pectin (if using) and toss. Cover the bowl and refrigerate for at least 8 to 24 hours.
Place a few metal spoons in the freezer. Wash 6 pint-sized canning jars and their lids thoroughly. If you plan to store the jam for a long time, prepare a water bath and sterilize the jars.
Transfer the plum mixture to a large, wide pot and stir in calcium water. Cook over medium heat, stirring occasionally to prevent scorching. Simmer until the plums are mostly softened, around 15 minutes.
For a smoother jam, set up a food mill over a bowl and ladle a few cups of the mixture into it. Mill the mixture into the bowl. Repeat this process until roughly half of the plums have been milled, then stir the milled plums back into the pot.
Continue cooking until the mixture starts to foam. Remove and discard any foam using a metal spoon. Stir in butter and bottled lemon juice. Cook, stirring occasionally, until the foaming subsides, around 15 minutes longer. Continue cooking, stirring more frequently, until the jam has a glossy texture, about 10 minutes longer.
To test for doneness, spoon a small amount of jam onto one of the frozen spoons and return it to the freezer for 5 minutes. Check the consistency. The jam
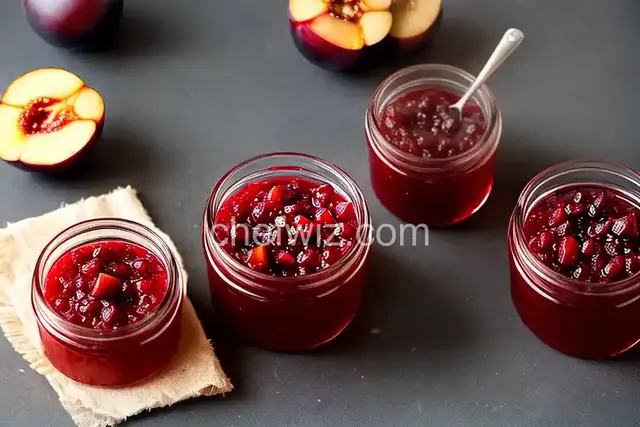
Do you enjoy the sweet, tangy taste of fresh plums? Would you like to savor that flavor all year round? Look no further than homemade plum jam! With just a few simple steps, you can create a delicious spread that captures the essence of summer in every jar.
Plum jam offers a delightful balance of sweetness and tartness. The natural sugars in the plums are enhanced through the process of making jam, resulting in a rich, fruity flavor that will leave your taste buds dancing with joy. Whether you spread it on toast, use it as a filling for pastries, or swirl it into yogurt, plum jam is a versatile treat that adds a burst of flavor to any dish.
When it comes to making plum jam, selecting the right type of plums is crucial. Look for plums that are ripe but not overly soft. The skin should have a vibrant color, and the fruit should give slightly when gently pressed. Popular varieties for jam-making include Santa Rosa, Damson, and Italian Prune plums. Each variety brings its own unique flavor profile, so don't be afraid to experiment!
Before diving into the jam-making process, you'll need to prepare your plums. Start by washing them thoroughly and removing any stems or leaves. If desired, you can also peel the plums for a smoother texture. Once prepped, slice the plums in half and remove the pits. Now you're ready to start cooking!
Making plum jam is a labor of love that requires patience and attention to detail. Once you've prepared your plums, it's time to gather your ingredients and get started. Here's a quick overview of the jam-making process:
Begin by placing the prepared plums in a large pot and adding a touch of water to prevent sticking. Bring the mixture to a gentle simmer over medium heat, stirring occasionally to prevent burning. As the plums cook, they will release their juices and begin to break down, creating a thick, luscious consistency.
To balance out the natural tartness of the plums, you'll need to add sweetener. This can be in the form of granulated sugar, honey, or even a natural sweetener like stevia. Start with a small amount and adjust to taste as you go. Remember, you can always add more sweetness, but you can't take it away!
Once your plum jam has reached the desired consistency and sweetness, it's time to transfer it into jars. Make sure to sterilize your jars beforehand to ensure proper preservation. Carefully ladle the hot jam into the jars, leaving a small headspace at the top. Seal the jars tightly and allow them to cool before storing them in a cool, dark place. Your homemade plum jam will keep for several months, allowing you to enjoy the taste of summer long after the plums have disappeared from the trees.
Homemade plum jam is a delightful way to preserve the flavors of summer and enjoy them throughout the year. With a few simple steps and the right ingredients, you can create a burst of flavor in every jar. So why not give it a try? Your taste buds will thank you!
Yes, frozen plums can be used to make jam. Simply thaw them before starting the cooking process.
The time it takes for plum jam to set can vary. On average, it can take anywhere from 20 to 40 minutes.
Yes, you can reduce the amount of sugar in the recipe. However, keep in mind that sugar acts as a preservative, so reducing it may affect the shelf life of the jam.
Absolutely! Adding spices can enhance the flavor of your plum jam. Experiment with different combinations to find your perfect blend.
While this recipe is specifically tailored for plums, you can adapt it to other fruits as well. Just adjust the cooking time and sweetness level according to the fruit you're using.
Of course! Simply scale up the recipe accordingly and adjust the cooking time as needed.
It's best to let the plum jam cool completely before sealing and storing it. This ensures proper preservation and prevents any potential spoilage.
Yes, you can make a reduced-sugar plum jam by using a sugar substitute or reducing the amount of sugar in the recipe. Just keep in mind that the texture and shelf life may be slightly different.
AprilCook, recipe developer and the heart of Chefwiz. More about April