Homemade Pita Bread Recipe
Rate this recipeBe the first to rate
 By AprilPublished
 Have you ever tasted the warm, fluffy goodness of homemade pita bread?
 By AprilPublished
 Have you ever tasted the warm, fluffy goodness of homemade pita bread?
In a medium mixing bowl, combine water, oil, sugar, yeast, salt, and whole wheat flour using a wooden spoon until well combined and smooth.
Stir in all-purpose flour until the mixture forms a shaggy mass.
Using clean hands, knead the dough in the bowl for 10 minutes or until it becomes smooth and very elastic, adding small amounts of extra flour if necessary.
Alternatively, knead the dough at low speed in a stand mixer with the dough hook attachment for about 8 minutes, until it becomes very elastic and smooth.
Turn the dough out onto a lightly floured work surface and shape it into a smooth ball.
Lightly oil a clean mixing bowl and place the dough inside, rubbing oiled hands over the top of the dough.
Cover the bowl with a damp cloth and let the dough rise in a warm place for 1 hour.
Meanwhile, place a baking steel or a 12-inch cast iron skillet on the top oven rack and preheat the oven to 500°F (260°C).
Line a plate with a large, clean kitchen towel and set it aside.
Punch down the dough and transfer it to a lightly floured work surface.
Cut the dough into 6 even pieces and shape each piece into a ball.
Cover the dough balls with a damp towel and let them rest for 10 minutes.
Roll each piece of
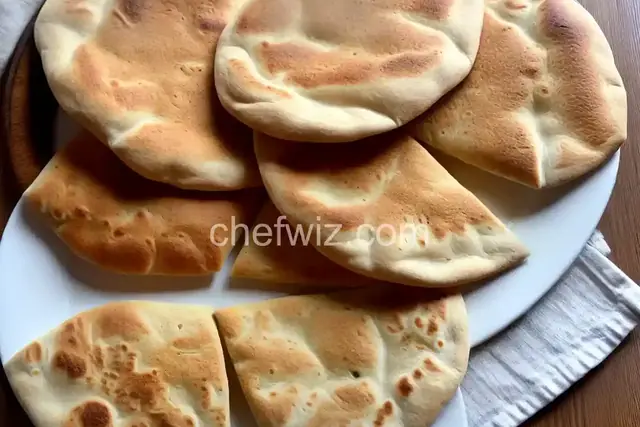
Have you ever tasted the warm, fluffy goodness of homemade pita bread? There's something incredibly satisfying about tearing into a freshly baked pita and filling it with your favorite ingredients. And the best part? Making pita bread from scratch is easier than you might think!
Pita bread is like a pocket of happiness waiting to be filled with deliciousness. It's a versatile bread that can be used for sandwiches, wraps, or simply enjoyed on its own. The dough is soft and pliable, and when baked, it puffs up to create a hollow center, perfect for stuffing. It's like a fluffy cloud that holds all your favorite flavors together.
Imagine stepping into your kitchen with the aroma of freshly baked bread wafting through the air. The process of making homemade pita bread is not only delicious but also incredibly rewarding. From mixing the simple ingredients to watching the dough rise and transform into beautiful rounds, every step is a delightful adventure.
Creating homemade pita bread requires just a handful of basic ingredients that you probably already have in your pantry. Flour, water, yeast, salt, and a touch of olive oil are all you need to get started. No need to worry about complicated measurements or obscure ingredients. It's a straightforward recipe that anyone can master.
Kneading the dough is where the magic happens. It's like giving your dough a warm, loving hug. As you knead, you're developing the gluten, which gives the pita bread its elasticity and chewiness. It's a therapeutic process that allows you to connect with your food on a deeper level.
Once your dough has rested and risen, it's time to bake those beautiful rounds of pita bread. The oven is your gateway to a world of pillowy softness. As the bread bakes, the heat causes it to puff up dramatically, creating that signature pocket. It's a sight to behold and a testament to your baking skills.
Making homemade pita bread is a wonderful culinary adventure that everyone should embark on. The simplicity of the ingredients, the joy of kneading, and the satisfaction of watching the bread puff up make it an experience worth savoring. So why not roll up your sleeves, gather your ingredients, and dive into the world of homemade pita bread? Your taste buds will thank you!
Absolutely! Homemade pita bread freezes beautifully. Just make sure to let it cool completely before sealing it in an airtight container or freezer bag. When you're ready to enjoy it, simply thaw and warm it up in a toaster or oven.
Homemade pita bread can stay fresh for up to a week if stored properly. Keep it in an airtight bag or container at room temperature. If you want to extend its shelf life, you can refrigerate it for an extra few days.
Absolutely! You can substitute part or all of the all-purpose flour with whole wheat flour to make whole wheat pita bread. The result is a slightly denser, nuttier bread that pairs well with hearty fillings.
Yes, you can definitely use a stand mixer with a dough hook attachment to knead the dough. It's a great time-saving option if you prefer not to knead by hand. Just be sure to follow the manufacturer's guidelines for mixing and kneading times.
Absolutely! You can add various herbs, spices, or even cheese to the dough to infuse it with extra flavor. Get creative and experiment with different combinations to customize your pita bread to your liking.
Yes, you can make mini pita breads by simply dividing the dough into smaller portions before rolling and baking. Mini pitas are perfect for appetizers, kids' lunches, or individual portions.
Yes, you can use instant yeast instead of active dry yeast. Keep in mind that instant yeast doesn't require proofing in warm water, so you can add it directly to the dry ingredients. Just follow the manufacturer's instructions for the appropriate substitution ratio.
The key to perfectly puffed pita bread lies in the high heat of the oven. Make sure your oven is preheated to a high temperature before baking. When the bread hits the hot surface, the steam inside the dough rapidly expands, causing the bread to puff up beautifully.
Absolutely! Pita bread can be a delightful base for sweet treats. Try spreading Nutella or your favorite fruit preserves on a warm pita and enjoy a delicious dessert that combines the best of bread and sweetness.
AprilCook, recipe developer and the heart of Chefwiz. More about April