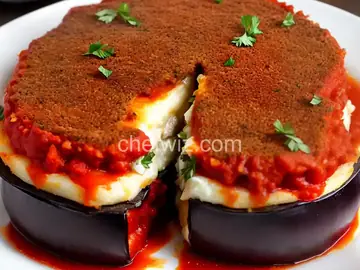
Homemade Pita Bread
Rate this recipeBe the first to rate
 By AprilPublished
 Have you ever wondered how to make your own fresh and delicious pita bread at home?
 By AprilPublished
 Have you ever wondered how to make your own fresh and delicious pita bread at home?
Place yeast in the bowl of a stand mixer and pour in 1 cup of warm water and 1 cup of flour. Stir the mixture and let it sit for 15 to 20 minutes until it becomes bubbly and foamy.
Add 1 1/2 tablespoons of olive oil and salt to the yeast mixture, followed by 1 3/4 cups of flour. Mix at low speed using a dough hook attachment until the dough is soft, flexible, and slightly sticky. If the dough sticks to the sides of the bowl, gradually add up to 1/4 cup more flour.
Knead the dough with the machine on low speed for 5 to 6 minutes until it becomes slightly springy and still soft. Transfer the dough onto a floured work surface and shape it into a ball.
Grease the inside of the bowl with 1/4 teaspoon of olive oil. Roll the dough around in the bowl to coat it with a thin layer of oil. Cover the bowl with foil and let the dough rise until it doubles in size, approximately 2 hours.
Remove the dough from the bowl and place it on a floured work surface. Gently flatten it into a 1-inch thick shape. Use a knife to cut the dough into 8 equal pieces.
Take each piece of dough and shape it into a small round ball with a smooth top, pulling the dough from the sides and t
Have you ever wondered how to make your own fresh and delicious pita bread at home? Look no further! In this article, we will take you through the step-by-step process of making homemade pita bread. With just a few simple ingredients and some basic kitchen tools, you'll be able to enjoy warm and fluffy pita bread straight from your own oven. Let's dive in!
Pita bread has a unique quality that sets it apart from other types of bread. Its soft and chewy texture, combined with its versatility, makes it a favorite among bread lovers. Whether you're using it to dip into hummus, stuff it with your favorite fillings, or even as a pizza base, pita bread is a versatile and delicious option.
Making pita bread at home is not only fun but also rewarding. The process starts with a simple dough made from flour, water, yeast, and a pinch of salt. After the dough has risen, it is divided into small balls and rolled out into flat circles. These circles are then baked in a hot oven, where the magic happens. The high heat causes the dough to puff up, creating a pocket in the center - the characteristic feature of pita bread.
To achieve the perfect pita bread, there are a few tips and tricks to keep in mind. Firstly, make sure your oven is preheated to a high temperature before baking the pita bread. This will help create a strong burst of heat, causing the bread to puff up. Secondly, make sure to roll out the dough circles evenly, as this will ensure even baking. Lastly, don't overbake the pita bread - a few minutes in the oven is all it takes for them to become golden brown and delicious.
Absolutely! Whole wheat flour can be used as a healthier alternative to all-purpose flour. However, keep in mind that the texture and flavor of the pita bread may be slightly different.
Yes, you can freeze homemade pita bread. Simply let them cool completely, then place them in an airtight container or freezer bag and store them in the freezer for up to three months.
The dough typically takes about one to two hours to rise, depending on the temperature of your kitchen. You'll know it's ready when it has doubled in size.
Absolutely! Adding herbs or spices to the dough can add an extra layer of flavor to your pita bread. Experiment with different combinations to find your favorite.
Yes, you can make mini pita breads by simply dividing the dough into smaller balls and rolling them out into smaller circles. Adjust the baking time accordingly.
While an oven is the traditional method for baking pita bread, you can also use a grill. Simply preheat the grill to a medium-high heat and cook the pita bread for a few minutes on each side.
Yes, you can use instant yeast instead of active dry yeast. However, keep in mind that the rising time may be slightly shorter with instant yeast.
Yes, you can make gluten-free pita bread by using a gluten-free flour blend. Keep in mind that the texture and taste may differ from traditional pita bread.
Making homemade pita bread is a fun and rewarding experience. With just a few simple ingredients, you can create a delicious and versatile bread that is perfect for dipping, stuffing, or enjoying on its own. So why not give it a try? Get creative with your fillings and toppings, and enjoy the satisfaction of baking your own pita bread from scratch. Happy baking!
AprilCook, recipe developer and the heart of Chefwiz. More about April