Homemade Hard Pretzels
Rate this recipeBe the first to rate
 By AprilPublished
 Are you craving a delicious homemade snack that's crunchy on the outside and soft on the inside?
 By AprilPublished
 Are you craving a delicious homemade snack that's crunchy on the outside and soft on the inside?
In the bowl of a stand mixer, combine warm water, sugar, and kosher salt. Sprinkle the yeast on top and let it sit for 5 minutes or until it starts to foam.
Add the flour to the bowl and use the dough hook attachment to mix on low speed until well combined.
Increase the speed to medium and knead the dough for about 4 to 5 minutes, or until it becomes smooth and pulls away from the sides of the bowl.
Remove the dough from the bowl, clean the bowl, and coat it with vegetable oil. Place the dough back in the bowl, cover it with plastic wrap, and let it sit in a warm place for around 50 to 55 minutes, or until it doubles in size.
Preheat the oven to 350 degrees F.
Line 4 half sheet pans with parchment paper and lightly brush them with vegetable oil. Set them aside.
Fill a large roasting pan with enough water to come up to one-third of its sides, and bring it to a boil over high heat.
On a slightly oiled work surface, turn out the dough and divide it into approximately 36 pieces, each weighing about 1 ounce. Roll out each piece into a stick that is 14 to 15 inches long, and place them on the prepared sheet pans, about 1/4 inch apart. Cover the unused dough with a slightly damp towel to prevent it
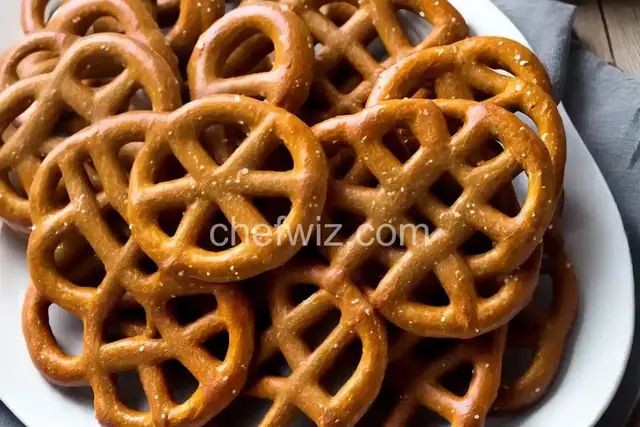
Are you craving a delicious homemade snack that's crunchy on the outside and soft on the inside? Look no further than homemade hard pretzels! These delightful treats are not only fun to make but also make your taste buds dance with joy. In this article, we will dive into the art of making homemade hard pretzels, exploring the process, tips, and tricks to achieve pretzel perfection.
Before we jump into the pretzel-making process, let's gather all the necessary ingredients and equipment. You'll need flour, water, yeast, salt, sugar, and baking soda. As for equipment, a mixing bowl, measuring cups, baking sheets, and parchment paper will come in handy. Once you have everything ready, it's time to roll up your sleeves and get started!
The foundation of a great pretzel lies in the dough. It's important to create a dough that is elastic, yet firm enough to hold its shape. Think of it as the backbone of your pretzel. Knead the dough until it becomes smooth and pliable. This will ensure a pretzel that is both chewy and tender.
Shaping the dough into pretzels is where the fun begins. Take a small piece of dough and roll it into a long rope. Then, shape it into a "U" shape. Cross the ends over each other, twist them once, and bring them back down to the bottom of the "U" shape. Congratulations, you've just made a pretzel! Repeat this process until all the dough is shaped into pretzels.
Now that your pretzels are beautifully shaped, it's time to give them their signature chewiness. Boiling the pretzels in a water and baking soda solution will create a thin, crispy crust on the outside while keeping the inside soft and fluffy. This step sets homemade hard pretzels apart from their store-bought counterparts.
After boiling, it's time to bake the pretzels to golden perfection. Preheat your oven, place the pretzels on a parchment-lined baking sheet, and sprinkle them with salt for that classic pretzel flavor. Bake them until they turn a beautiful golden brown. Once out of the oven, let them cool for a few minutes before taking that first heavenly bite.
Homemade hard pretzels are a delightful snack that brings a touch of nostalgia and a burst of flavor. With a little patience and practice, you can create pretzels that rival those from your favorite bakery. So why not gather your ingredients, roll up your sleeves, and embark on the pretzel-making adventure? Your taste buds will thank you!
Absolutely! Whole wheat flour can be substituted for all-purpose flour to add a nutty flavor and a slightly denser texture to your pretzels. Keep in mind that the dough may be a bit drier, so adjust the water accordingly.
Yes, you can freeze the pretzels after they have been baked. Allow them to cool completely, then place them in airtight containers or freezer bags. When you're ready to enjoy them, simply thaw at room temperature and reheat in the oven for a few minutes.
Absolutely! Get creative with your toppings. You can sprinkle sesame seeds, poppy seeds, cheese, or even cinnamon sugar on top of your pretzels before baking. The possibilities are endless!
Homemade hard pretzels are best enjoyed fresh on the day they are baked. However, if stored in an airtight container at room temperature, they can stay fresh for up to 3 days.
Absolutely! Mini pretzels are a fun and bite-sized variation of the classic pretzel. Simply divide the dough into smaller portions and adjust the baking time accordingly.
Yes, you can! There are many gluten-free flour blends available that can be used as a substitute for all-purpose flour. Follow the same steps and measurements, but ensure the flour blend you choose is suitable for gluten-free baking.
Absolutely! Pretzel bites are a bite-sized version of the classic pretzel. Instead of shaping the dough into large pretzels, simply cut the dough into small pieces and follow the same boiling and baking process.
Yes, you can! Sweet pretzels are a delicious twist on the classic. Simply brush the pretzels with melted butter and sprinkle them with cinnamon sugar before baking. You can even dip them in melted chocolate for an extra indulgent treat.
While yeast is traditionally used to give pretzels their light and airy texture, you can make pretzels without yeast using baking powder as a leavening agent. The result will be slightly different, but still delicious!
AprilCook, recipe developer and the heart of Chefwiz. More about April