Homemade Graham Cracker Crust
Rate this recipeBe the first to rate
 By AprilPublished
 Have you ever wanted to make your own graham cracker crust from scratch?
 By AprilPublished
 Have you ever wanted to make your own graham cracker crust from scratch?
In a medium-sized bowl, mix together crushed graham crackers, sugar, melted butter, and a pinch of salt.
Stir the mixture until it has a wet sand-like consistency and can hold together when pressed.
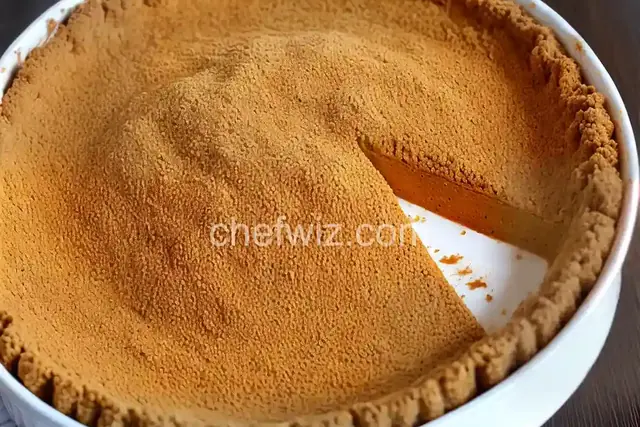
Transfer the mixture into a 9-inch pie plate or springform pan and press it evenly onto the bottom and up the sides of the pan. Use the back of a spoon or a measuring cup to firmly pack the crust.
If you plan to bake the crust, preheat your oven to 350°F (175°C). Place the crust in the oven and bake until it turns golden, which usually takes about 12 minutes.
Have you ever wanted to make your own graham cracker crust from scratch? Look no further! In this article, we will explore the wonderful world of homemade graham cracker crusts and discover just how easy it is to create this delicious treat. So, let's dive in and get started!
So, you might be wondering, why go through the trouble of making your own graham cracker crust when you can easily buy one from the store? Well, the answer is simple: homemade is always better. When you make your own crust, you have full control over the ingredients and can ensure that it is fresh and of the highest quality.
Not only that, but making your own crust allows you to experiment and customize the flavors to your liking. You can add a touch of cinnamon for extra warmth or even incorporate crushed nuts for added crunch. The possibilities are endless!
A homemade graham cracker crust strikes the perfect balance between sweetness and texture. The crumbly, buttery graham crackers form a sturdy base that holds together beautifully, while the slight sweetness adds a delightful contrast to whatever filling you choose.
Think of it like building a house – the crust is the foundation. Just as a strong foundation is essential for a stable house, a well-made graham cracker crust is crucial for a delicious dessert. It sets the stage for the main attraction and complements the flavors in the most harmonious way.
Making your own graham cracker crust is a straightforward process. Here's a step-by-step guide to help you get started:
Before you begin, make sure you have all the necessary ingredients at hand. You will need graham crackers, sugar, melted butter, and a pinch of salt. These simple ingredients come together to create a crust that is both flavorful and crumbly.
Using a food processor or a rolling pin, crush the graham crackers until they resemble fine crumbs. You can also place them in a ziplock bag and crush them with a rolling pin for a more hands-on approach. The choice is yours!
In a bowl, combine the crushed graham crackers, sugar, melted butter, and a pinch of salt. Mix everything together until the ingredients are well incorporated and the mixture resembles wet sand.
Take a pie or tart pan and press the graham cracker mixture into the bottom and sides. Use the back of a spoon or your fingers to firmly pack the crust. Make sure to create an even layer for the best results.
Once the crust is ready, place it in the refrigerator for at least 30 minutes to firm up. This step is crucial as it allows the crust to hold its shape when baked. After chilling, you can either bake the crust for a few minutes to give it a golden color or use it as is for a no-bake dessert.
Homemade graham cracker crusts are a delightful addition to any dessert. They offer a perfect balance of sweetness and texture, and making them from scratch allows you to unleash your creativity and customize the flavors to your liking. With just a few simple steps, you can create a sturdy and delicious crust that will take your desserts to the next level.
Absolutely! While graham crackers are the classic choice, you can experiment with different types of crackers like chocolate wafers or digestive biscuits for unique flavors.
Of course! There are plenty of gluten-free graham cracker options available in stores, or you can make your own using gluten-free ingredients.
It's best to let the crust cool completely before adding the filling. This ensures that the crust maintains its structure and doesn't become soggy.
Absolutely! Once the crust is fully cooled, you can wrap it tightly in plastic wrap and freeze it for future use. Just thaw it before adding the filling.
Yes, you can substitute sugar with alternative sweeteners like honey or maple syrup. Keep in mind that the flavor and texture may vary slightly.
A homemade graham cracker crust can last up to a week when stored properly in an airtight container at room temperature.
Absolutely! While graham cracker crusts are commonly associated with sweet desserts, they can also work wonderfully with savory dishes like quiches or tarts.
Definitely! Simply divide the graham cracker mixture into individual tart pans or ramekins, and press the mixture firmly to create mini crusts.
AprilCook, recipe developer and the heart of Chefwiz. More about April