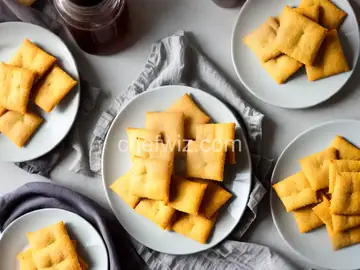
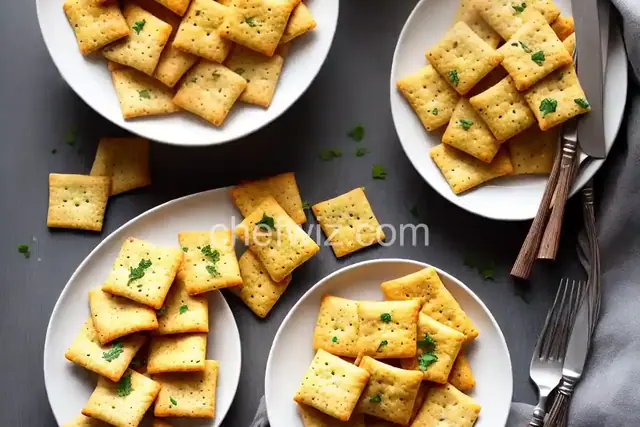
Homemade Garlicky Cheese Crackers
Rate this recipeBe the first to rate
 By AprilPublished
 Crackers are a snack that never goes out of style. They are versatile, portable, and perfect for munching on the go.
 By AprilPublished
 Crackers are a snack that never goes out of style. They are versatile, portable, and perfect for munching on the go.
Preheat the oven to 400 degrees F (200 degrees C).
Line a baking sheet with parchment paper or a silicone baking mat.
In a food processor or by mixing manually, combine flour, sugar, baking powder, garlic powder, salt, and dill.
Add 4 tablespoons melted butter and vegetable oil, and combine.
With the food processor on low speed, slowly drizzle in water until the dough forms a ball.
Remove the dough from the food processor and cover it with plastic wrap. Let it rest for 10 minutes.
On a lightly floured surface, roll out the dough as thin as possible, aiming for a thickness thinner than a pie crust or like crepes.
Use a cookie cutter or a knife/pizza cutter to cut the dough into desired shapes. Arrange the shapes on the prepared baking sheet and let them rest for another 10 minutes.
Prick several holes in each cracker using a toothpick. This step is crucial for achieving flat crackers.
Bake in the preheated oven for approximately 10 minutes, until the crackers turn golden brown.
Remove from the oven, brush the tops with the remaining melted butter, and immediately sprinkle with coarse sea salt.
Transfer the crackers from the baking sheets to a wire rack to cool completely.
While the crackers cool, prepare the cheese topping by mixing mascarpone, Cheddar, and Parmesan
Crackers are a snack that never goes out of style. They are versatile, portable, and perfect for munching on the go. While store-bought crackers are convenient, there's something special about homemade ones. In this article, we'll explore the world of homemade garlicky cheese crackers and discover why they are a must-try for all snack lovers.
Imagine the aroma of freshly baked crackers wafting through your kitchen. The anticipation of that crispy, golden bite. Homemade crackers offer a level of satisfaction that store-bought ones simply can't match. Why settle for mass-produced when you can create your own delicious, customizable snacks?
Garlic and cheese are a match made in snacking heaven. The pungent, savory flavor of garlic complements the creamy, tangy taste of cheese. When combined in a cracker, these two ingredients create a symphony of flavors that will make your taste buds dance with joy.
Creating homemade garlicky cheese crackers doesn't require a long list of ingredients. In fact, you may already have everything you need in your pantry. Flour, butter, garlic powder, grated cheese, and a pinch of salt are all it takes to whip up a batch of these delectable treats.
Making homemade garlicky cheese crackers is easier than you might think. With a few simple steps, you'll be enjoying your own crispy, flavorful snacks in no time.
Start by combining flour, butter, garlic powder, grated cheese, and salt in a mixing bowl. Use your hands to mix the ingredients together until a dough forms. The dough should be slightly crumbly but hold together when pressed.
Next, roll the dough into a thin sheet using a rolling pin. You can sprinkle a little flour on the surface to prevent sticking. Once the dough is thin and even, use cookie cutters to cut out cracker shapes. Remember to prick each cracker with a fork to prevent them from puffing up during baking.
Place the cut-out crackers on a baking sheet lined with parchment paper. Bake them in a preheated oven until they turn golden brown and crispy. The exact baking time may vary, so keep a close eye on them to avoid burning. Once they are done, let them cool on a wire rack before enjoying.
Homemade garlicky cheese crackers are a delightful snack that will leave you craving more. With their irresistible combination of flavors and simple preparation process, they are a must-try for anyone who appreciates a good snack. Whether you're enjoying them on their own or pairing them with dips and spreads, these crackers are sure to impress.
Yes, absolutely! Experiment with different cheese varieties like cheddar, Parmesan, or Gouda to create unique flavors.
While garlic powder provides a more concentrated flavor, you can use fresh minced garlic as a substitute. Just keep in mind that it may affect the texture of the crackers slightly.
If stored in an airtight container, these crackers can stay fresh for up to a week. However, they are so delicious that they rarely last that long!
Absolutely! Simply substitute the all-purpose flour with a gluten-free flour blend, and you'll have gluten-free garlicky cheese crackers.
Definitely! Feel free to experiment with herbs like rosemary or spices like paprika to add an extra kick of flavor to your crackers.
Yes, these homemade garlicky cheese crackers are vegetarian-friendly.
Absolutely! You can make these crackers a day or two in advance and store them in an airtight container until your party.
Yes, you can freeze these crackers for up to a month. Just make sure to thaw them at room temperature before serving.
AprilCook, recipe developer and the heart of Chefwiz. More about April