Homemade Dulce de Leche
Rate this recipeBe the first to rate
 By AprilPublished
 Have you ever tasted the creamy, caramel goodness of dulce de leche?
 By AprilPublished
 Have you ever tasted the creamy, caramel goodness of dulce de leche?
Combine 4 cups of milk, 1¼ cups of sugar, and ¼ teaspoon of baking soda in a heavy saucepan (3-4 quarts) and mix well.
Place the saucepan over medium heat and bring the mixture to a boil.
Once boiling, reduce the heat and let it simmer uncovered. Stir occasionally.
Continue simmering for about 1½ to 1¾ hours until the mixture is caramelized and thickened. Be sure to stir more frequently after about an hour to prevent burning.
Stir in 1 teaspoon of vanilla extract.
Transfer the mixture to a bowl and allow it to cool. This should yield approximately 1 ½ cups of caramelized mixture.
Preheat the oven to 425°F and position the rack in the middle.
Pour the contents of a 14-ounce can of sweetened condensed milk into a deep-dish pie plate (9-inch) and cover it tightly with foil.
Place the pie plate in a roasting pan and add enough hot water to the pan, filling it halfway up the pie plate.
Bake the milk in the middle of the oven for 45 minutes.
Check the water level and add more if necessary. Continue baking for an additional 45 minutes or until the milk becomes thick and brown.
Remove the pie plate from the water bath and let it cool without covering.
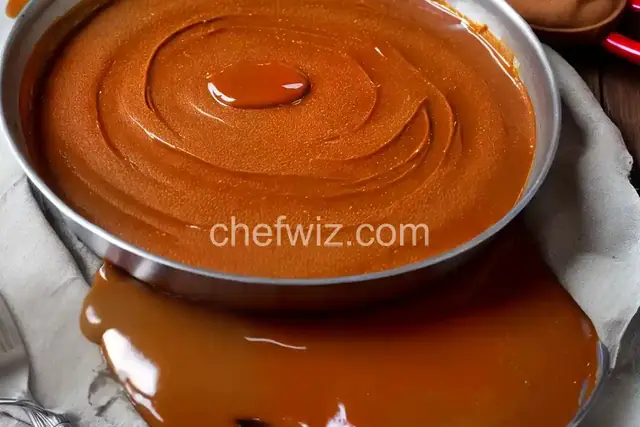
The result should be
Have you ever tasted the creamy, caramel goodness of dulce de leche? It's like a warm hug for your taste buds, a sweet treat that brings comfort and joy. And the best part? You can make it right in your own kitchen! In this article, we'll explore the art of making homemade dulce de leche, step by step. Get ready to indulge in a luscious dessert that will leave you craving for more!
Dulce de leche, which translates to "sweet milk" in Spanish, is a thick and creamy caramel-like sauce made from milk and sugar. It has a rich, velvety texture and a deep, caramelized flavor that is simply irresistible. Whether you drizzle it over ice cream, spread it on toast, or use it as a filling for cakes and pastries, dulce de leche adds a touch of decadence to any dessert.
The traditional method of making dulce de leche involves simmering a can of sweetened condensed milk for several hours. While this method is simple, it can be time-consuming and requires constant monitoring to prevent the can from exploding. Not to mention, it can also be a bit risky. So, let's explore a safer and equally delicious alternative - making dulce de leche from scratch!
Making dulce de leche from scratch allows you to have complete control over the ingredients and the cooking process. Plus, it's much safer and doesn't require any special equipment or guesswork. All you need is milk, sugar, vanilla extract, and a pinch of salt.
Before we begin, let's gather all the ingredients we need. You'll need 4 cups of milk, 1 cup of sugar, 1 teaspoon of vanilla extract, and a pinch of salt. Make sure to use whole milk for the creamiest results.
In a heavy-bottomed saucepan, combine the milk, sugar, vanilla extract, and salt. Stir gently to dissolve the sugar. Place the saucepan over medium heat and bring the mixture to a simmer. Stir occasionally to prevent the milk from scorching.
Once the mixture comes to a simmer, reduce the heat to low and continue cooking. Stir the mixture occasionally to prevent the bottom from sticking and burning. The goal is to cook the milk slowly, allowing it to caramelize and thicken gradually.
Simmer the mixture over low heat for about 1 to 2 hours, or until it reaches your desired consistency. The longer you cook it, the thicker and darker the dulce de leche will become. Keep in mind that it will continue to thicken as it cools, so don't worry if it seems a bit runny at first.
Making homemade dulce de leche is a delightful culinary adventure that rewards you with a heavenly treat. With just a few simple ingredients and a little patience, you can create a jar of velvety caramel sauce that will elevate any dessert to new heights. So, why wait? Indulge in the magic of dulce de leche and savor every spoonful of sweetness!
While whole milk is recommended for the creamiest results, you can experiment with other types of milk, such as skim or almond milk. However, keep in mind that the texture and flavor may vary.
Homemade dulce de leche can be stored in an airtight container in the refrigerator for up to two weeks. Just make sure to let it come to room temperature before using or serving.
Absolutely! You can infuse your dulce de leche with flavors like cinnamon, espresso, or even a hint of rum. Just add the desired flavorings during the cooking process.
Yes, you can easily double or triple the recipe to make a larger batch of dulce de leche. Just make sure to use a larger saucepan and adjust the cooking time accordingly.
Absolutely! Using a slow cooker is another safe and convenient method to make dulce de leche. Simply pour the condensed milk into a glass jar, seal it tightly, and place it in the slow cooker filled with water. Cook on low for 8-10 hours, and voila!
Yes, dulce de leche makes a delicious frosting for cakes and cupcakes. Just make sure to let it cool and thicken before spreading it on your baked goods.
Absolutely! Dulce de leche is a popular filling for pastries like churros, empanadas, and alfajores. Its creamy and sweet flavor pairs perfectly with flaky pastry dough.
Yes, you can freeze homemade dulce de leche for up to three months. Just transfer it to an airtight container or freezer bag and thaw it in the refrigerator before using.
AprilCook, recipe developer and the heart of Chefwiz. More about April