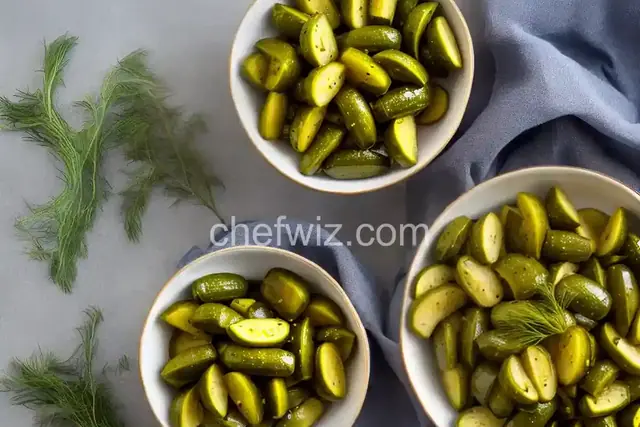
Are you a fan of tangy and crispy pickles? Look no further! In this article, we will explore the joy of making homemade dill pickles that are sure to satisfy your taste buds. Whether you're a pickle aficionado or a curious beginner, get ready to embark on a flavorful adventure!
Why Make Your Own Pickles?
Have you ever wondered why homemade pickles taste so much better than store-bought ones? It's all about the control and creativity you have in your own kitchen. When you make your own pickles, you can experiment with different flavors and adjust the ingredients to suit your preferences. Plus, the satisfaction of biting into a pickle that you made from scratch is simply unbeatable!
The Science Behind Pickling
Before we dive into the process of making homemade dill pickles, let's take a moment to understand the science behind pickling. Pickling is a preservation method that involves immersing food in a liquid, typically a vinegar-based brine. The acidity of the brine creates an environment that inhibits the growth of bacteria, ensuring your pickles stay crisp and delicious for months.
Choosing the Right Cucumbers
The key to achieving the perfect homemade dill pickles lies in selecting the right cucumbers. Look for firm and unwaxed cucumbers, preferably pickling cucumbers. These cucumbers have fewer seeds and a thinner skin, which results in a crispier texture. Remember, the quality of your ingredients greatly impacts the final product.
The Pickling Process
Now that you have your cucumbers, it's time to dive into the pickling process. Start by washing and sterilizing your jars to ensure they are clean and ready for use. Next, prepare the brine by combining vinegar, water, salt, and dill seeds in a pot. Bring the mixture to a boil and let it cool for a few minutes.
Adding Flavorful Ingredients
One of the joys of making homemade dill pickles is the ability to add your own twist to the recipe. Enhance the flavor by adding garlic cloves, mustard seeds, peppercorns, or even red pepper flakes for a spicy kick. Get creative and experiment with different combinations to find the perfect flavor profile that tickles your taste buds.
The Waiting Game
Once you've prepared your cucumbers and brine, it's time for the waiting game. Pour the brine over the cucumbers in the sterilized jars, making sure they are fully submerged. Seal the jars and store them in a cool, dark place for a few weeks to allow the flavors to develop. Patience is key here, but trust us, it will be worth the wait!
Frequently asked questions
- . Can I use regular cucumbers instead of pickling cucumbers?
Absolutely! While pickling cucumbers are preferred for their firmness and thin skin, regular cucumbers can also be used. Just make sure to slice them into spears or rounds to achieve a similar texture.
- . How long do homemade dill pickles last?
When stored properly in a cool, dark place, homemade dill pickles can last for several months. Just remember to keep an eye out for any signs of spoilage, such as mold or an off-putting odor.
- . Can I adjust the level of spiciness in my pickles?
Definitely! If you prefer a milder taste, you can reduce the amount of spicy ingredients or omit them altogether. On the other hand, if you're a spice enthusiast, feel free to increase the quantities or add extra chili flakes.
- . Can I reuse the brine for future batches of pickles?
Absolutely! As long as the brine is still clear and doesn't show any signs of spoilage, you can reuse it for future batches. Just make sure to strain it and bring it to a boil before using it again.
- . Can I make sweet pickles instead of dill pickles?
Of course! If you prefer sweeter pickles, you can add sugar or honey to the brine mixture. Adjust the sweetness level to your liking and enjoy your homemade sweet pickles.
- . How can I achieve a more vibrant green color in my pickles?
If you want your pickles to have a vibrant green color, you can try adding a pinch of turmeric to the brine mixture. However, be cautious as turmeric can stain your hands and utensils.
- . Can I use apple cider vinegar instead of white vinegar?
Yes, you can! Apple cider vinegar adds a slightly fruity and tangy flavor to the pickles. It's a great alternative if you're looking to switch things up.
- . Can I make pickles without using vinegar?
Yes, you can! While vinegar is the traditional ingredient used in pickling, there are other methods that don't involve vinegar. Fermenting pickles using a saltwater brine is one such method. It results in a unique flavor profile and is worth exploring if you're feeling adventurous.
In conclusion, making homemade dill pickles is both a science and an art. With the right ingredients, a little patience, and a dash of creativity, you can create pickles that are bursting with flavor and satisfaction. So, why settle for store-bought pickles when you can enjoy the magic of homemade goodness? Grab those cucumbers and embark on your pickle-making journey today!
 By AprilPublished