Homemade Butterfingers Recipe
Rate this recipeBe the first to rate
 By AprilPublished
 Who doesn't love a sweet treat that combines the creamy richness of chocolate with the irresistible crunch of a candy bar?
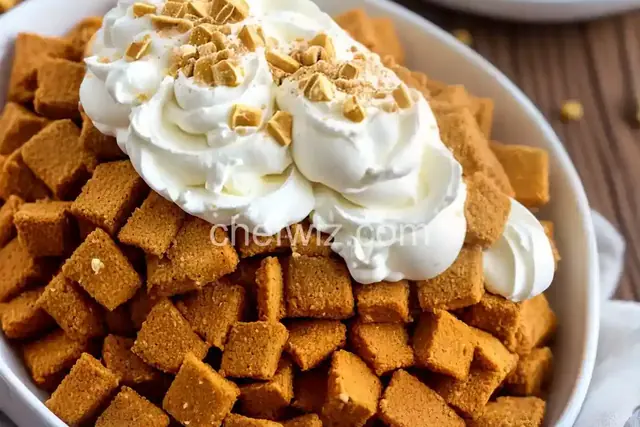 By AprilPublished
 Who doesn't love a sweet treat that combines the creamy richness of chocolate with the irresistible crunch of a candy bar?
To prepare the candy, start by lining a jelly roll pan with a silicon mat and preheating the oven to 200°F. In a medium pot, combine water, molasses, corn syrup, sugar, and vanilla bean seeds. Heat the mixture over medium heat until the sugar dissolves and the mixture begins to simmer. Let it simmer until it reaches a temperature between 280 and 290°F on a candy thermometer. While the syrup is cooking, grind the peanuts and powdered sugar together in a food processor until it forms a thick, damp mass. Set it aside. Once the syrup reaches the desired temperature, pour it onto the silicon mat in the pan, keeping it in the center. Tilt the pan to evenly coat the mat and fold the candy back over itself if needed.
To layer the candy, sprinkle the ground peanut mixture over 2/3 of the candy. Fold the unsprinkled section up and over the center, then fold the double-thick section over the remaining piece. You should have a 3-layer candy packet. Place the pan in the oven for 5 minutes to warm and make the candy pliable. Remove it from the oven and lift out the silicon mat. Roll out the candy to a 14” x 10” rectangle using a rolling pin. Fold it into thirds again and return it to the oven for 4 minutes. Repeat this process with corn flakes, folding and returning to the oven for 4 minutes.
To cut the
Who doesn't love a sweet treat that combines the creamy richness of chocolate with the irresistible crunch of a candy bar? Butterfingers have been a popular candy choice for decades, and now, you can recreate this classic confection in the comfort of your own kitchen. In this article, we will guide you through the process of making homemade Butterfingers that are sure to satisfy your sweet tooth. So let's dive in and discover the secrets behind this delicious recipe!
Have you ever wondered what gives Butterfingers their unique texture and flavor? It's all about the crispy, crunchy center made from a combination of peanut butter and crispy rice cereal. The layers of chocolate coating add a luscious sweetness that perfectly complements the peanut buttery goodness. When you bite into a homemade Butterfinger, you'll experience a symphony of flavors and textures that will leave you craving more.
Creating your own Butterfingers may sound like a complex task, but fear not! We've broken down the process into simple steps that anyone can follow. From preparing the crispy center to coating the bars in chocolate, we'll guide you through each stage with detailed instructions.
1. Can I use any type of peanut butter?
Yes, you can use any type of peanut butter that you prefer. Whether you like creamy or crunchy, the choice is yours! Just make sure it's a smooth consistency to achieve the best results.
2. What if I don't have crispy rice cereal?
If you don't have crispy rice cereal on hand, you can try using crushed cornflakes or even crushed pretzels. These alternatives will still provide a satisfying crunch to your homemade Butterfingers.
3. Can I substitute the chocolate coating?
While the classic Butterfinger recipe calls for a chocolate coating, you can certainly experiment with different types of chocolate. Dark chocolate, white chocolate, or even flavored chocolate can add a unique twist to your homemade creation.
4. How should I store my homemade Butterfingers?
Once your Butterfingers are fully set and coated in chocolate, it's best to store them in an airtight container in the refrigerator. This will help them maintain their freshness and prevent the chocolate from melting.
5. Can I add any additional ingredients?
While the classic Butterfingers recipe is delicious on its own, you can certainly get creative and add your own twist. Consider incorporating chopped nuts, dried fruit, or even a sprinkle of sea salt to elevate the flavor profile.
6. How long do homemade Butterfingers last?
When stored properly, homemade Butterfingers can last for up to two weeks. However, with their irresistible taste, it's unlikely they'll stick around for that long!
7. Are homemade Butterfingers suitable for vegans?
Yes, homemade Butterfingers can be made vegan-friendly by using plant-based ingredients. Opt for a vegan chocolate coating and ensure your peanut butter is free from any animal-derived additives.
8. Can I make mini Butterfingers?
Absolutely! If you prefer bite-sized treats, you can easily shape your homemade Butterfingers into smaller bars or even roll them into bite-sized balls. Just adjust the proportions and cooking time accordingly.
Now that you have all the information you need to embark on your homemade Butterfingers adventure, it's time to roll up your sleeves and get cooking. With a few simple ingredients and a little bit of patience, you'll be able to enjoy the delectable taste of Butterfingers anytime you want. So why wait? Get ready to indulge in this sweet and crunchy delight that will surely satisfy your candy cravings!
AprilCook, recipe developer and the heart of Chefwiz. More about April