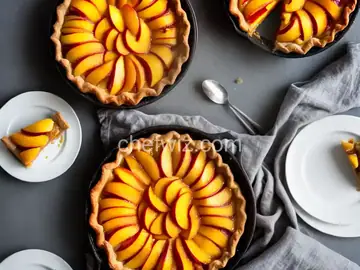
Hasselback Pear Tart
Rate this recipeBe the first to rate
 By AprilPublished
 Are you tired of the same old pear tart recipe? Looking for a unique and impressive dessert to wow your guests?
 By AprilPublished
 Are you tired of the same old pear tart recipe? Looking for a unique and impressive dessert to wow your guests?
Preheat the oven to 400 degrees F (200 degrees C).
Fit the puff pastry into a 10-inch square tart pan with removable sides.
Place a pear half, cut-side down, on a work surface.
Place a chopstick above and below the pear half to frame it on the top and bottom.
Thinly slice the pear half lengthwise, stopping when the knife hits the chopstick, and leaving the bottom 1/4 inch of the pear intact.
Repeat step 5 with the remaining pear halves.
Place the hasselbacked pears in a bowl and add white sugar and lemon juice. Gently toss to coat and let stand for 5 minutes.
In a separate bowl, mix cream cheese, confectioners' sugar, and vanilla extract together.
Spread the cream cheese mixture over the puff pastry.
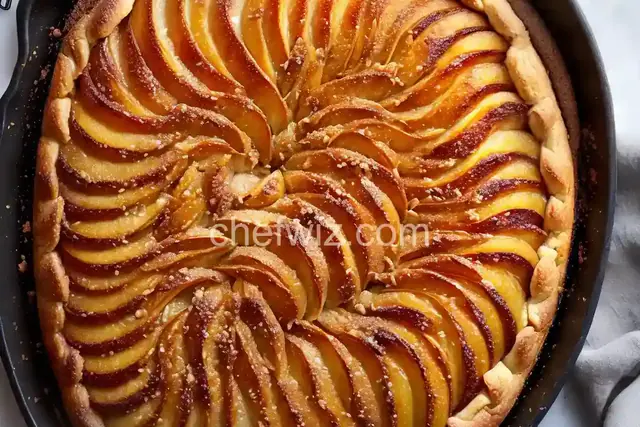
Arrange the hasselbacked pears over the cream cheese layer, cutting some of the halves into quarters if needed to fit them in.
Slightly fan out each pear and drizzle any accumulated juices from the pear bowl over the pears.
Sprinkle turbinado sugar over the tart.
Bake in the preheated oven for about 35 minutes, or until the crust is puffed and lightly browned and the juices are bubbling.
Allow the tart to cool for 15 minutes before slicing.
If
Are you tired of the same old pear tart recipe? Looking for a unique and impressive dessert to wow your guests? Look no further than the Hasselback Pear Tart! This delightful twist on a classic dessert is not only visually stunning but also incredibly delicious. In this article, we will explore the art of making a Hasselback Pear Tart and why it should be your next baking adventure.
Think of a Hasselback Pear Tart as a whimsical combination of a traditional pear tart and a Hasselback potato. The pears are thinly sliced and fanned out like a deck of cards, creating a beautiful and intricate design. The tart is then baked to perfection, resulting in a tender, caramelized pear filling nestled in a buttery crust.
Making a Hasselback Pear Tart may seem intimidating at first, but fear not! With a few simple steps, you'll be on your way to creating a stunning dessert that will impress even the most discerning palate. Here's a quick overview of the process:
Before you begin, make sure you have all the necessary ingredients on hand. You'll need fresh pears, butter, sugar, flour, and a pre-made pie crust or homemade crust if you prefer. You can also add a touch of cinnamon or nutmeg for extra flavor.
Start by peeling and coring the pears. Then, slice them thinly, making sure not to cut all the way through. The slices should be about 1/4 inch apart, creating a fan effect. Sprinkle the pears with a little sugar and set aside.
If you're using a pre-made pie crust, roll it out and place it in a tart pan. If you prefer a homemade crust, follow your favorite recipe. Blind bake the crust for a few minutes to ensure a crispy base.
Now comes the fun part! Carefully transfer the sliced pears onto the crust, fanning them out in a decorative pattern. Dot the pears with butter and sprinkle with sugar. Bake the tart in a preheated oven until golden brown and bubbly.
So, why should you choose a Hasselback Pear Tart over a traditional pear tart? The answer lies in both presentation and taste. The visually stunning design of the fanned-out pears will impress your guests and make them believe you spent hours in the kitchen. And when they take their first bite, they'll be greeted with a burst of sweet, caramelized pear flavor that is simply irresistible.
Furthermore, the Hasselback Pear Tart allows for endless creativity. You can experiment with different types of pears, add spices like cinnamon or nutmeg, or even drizzle the tart with a caramel sauce for an extra touch of decadence. The possibilities are endless!
While pears are the traditional choice for a Hasselback Pear Tart, you can certainly experiment with other fruits. Apples, peaches, and even plums can work well in this recipe.
Absolutely! If you prefer to make your own tart crust, go ahead and follow your favorite recipe. Just make sure to blind bake it before adding the sliced pears.
The tart is done when the crust is golden brown and the pears are tender and caramelized. This usually takes about 40-45 minutes, but keep an eye on it to prevent over-browning.
Yes, the tart can be served warm or at room temperature. It pairs perfectly with a scoop of vanilla ice cream or a dollop of whipped cream.
While the tart is best enjoyed fresh, you can make it a few hours in advance. Just store it at room temperature and reheat it in the oven for a few minutes before serving.
It is not recommended to freeze the tart as the texture of the pears may change. It's best to enjoy it fresh or within a day or two of baking.
Absolutely! If you follow a gluten-free diet, feel free to use a gluten-free flour blend for the crust. Just make sure to adjust the baking time if needed.
Certainly! Get creative with your toppings. You can sprinkle the tart with chopped nuts, drizzle it with caramel sauce, or even add a scoop of your favorite jam on top.
In conclusion, the Hasselback Pear Tart is a delightful twist on a classic dessert that will impress your guests with its stunning visual appeal and irresistible taste. Whether you're a seasoned baker or just starting out, this recipe is sure to be a hit. So why wait? Grab some pears, roll out that crust, and get ready to indulge in a slice of pure deliciousness!
AprilCook, recipe developer and the heart of Chefwiz. More about April