Halloween Sugar Cookies
Rate this recipeBe the first to rate
 By AprilPublished
 Are you ready to unleash your creativity this Halloween? Look no further than Halloween sugar cookies!
 By AprilPublished
 Are you ready to unleash your creativity this Halloween? Look no further than Halloween sugar cookies!
In a small bowl, whisk together the flour, baking powder, and salt.
Using a stand mixer fitted with the paddle attachment, beat the butter and granulated sugar on medium speed until light and fluffy (about 5 minutes).
Beat in the egg and vanilla.
Reduce the mixer speed to low and gradually add the flour mixture, mixing until fully incorporated.
Divide the dough in half and shape each half into a disc. Wrap them in plastic wrap and refrigerate for about 1 hour until firm.
Preheat the oven to 350 degrees F and position the oven racks in the top and bottom thirds. Line 2 baking sheets with parchment paper.
Let the dough sit at room temperature for a few minutes to make rolling easier.
Roll out one disc of dough to a thickness of 1/8 inch between two sheets of parchment paper.
Use cookie cutters to cut out desired Halloween shapes and place them about 2 inches apart on the prepared baking sheets. Repeat with the remaining disc of dough.
Bake the cookies for 10 to 12 minutes, rotating and switching the positions of the baking sheets halfway through, until the bottoms are just turning golden brown.
Allow the cookies to cool on the baking sheets for 5 minutes, then transfer them to a wire rack to cool completely (about 1 hour).
Reroll the dough scraps between two sheets
Are you ready to unleash your creativity this Halloween? Look no further than Halloween sugar cookies! These delightful treats are not only delicious but also a perfect canvas for your spooky imagination. In this article, we will explore the world of Halloween sugar cookies, from decorating tips to creative ideas.
Before you dive into the world of Halloween sugar cookies, it's important to have a solid foundation. Start by preparing a basic sugar cookie dough. This dough acts as a blank canvas for your Halloween creations. It's easy to make and can be customized with various flavors such as vanilla or almond extract.
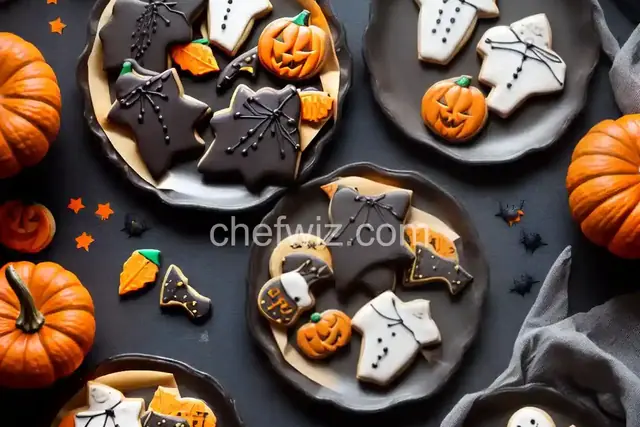
Once you have your dough ready, it's time to roll it out and cut it into Halloween-themed shapes. Think bats, pumpkins, ghosts, and witches' hats. The options are endless! You can use cookie cutters or even create your own templates.
Now that you have your Halloween sugar cookies ready, it's time to let your creativity soar. The decorating process is where the magic happens. Gather an array of colorful icing, sprinkles, and edible decorations. Use these tools to bring your Halloween-themed cookies to life.
Imagine the delight on your guests' faces when they bite into a sugar cookie that resembles a spooky ghost or a wicked witch. The possibilities are endless! Let your imagination run wild and experiment with different designs and techniques. You can use icing to pipe intricate details or create marbled effects. Sprinkles and edible glitter can add a touch of sparkle to your creations.
Creating stunning Halloween sugar cookies doesn't have to be intimidating. Here are some tips and tricks to help you along the way:
Halloween sugar cookies are not just treats; they are edible works of art. Once you have finished decorating your cookies, let them dry completely. This will ensure that your designs stay intact. Then, proudly display your creations on a festive platter or package them up in cute Halloween-themed treat bags to share with friends and family.
So, this Halloween, unleash your inner artist and let your creativity shine through delicious and spooky sugar cookies. Whether you are hosting a Halloween party or simply want to indulge in some festive baking, Halloween sugar cookies are the perfect choice. Get ready to create mouthwatering treats that will leave everyone craving for more!
Absolutely! Store-bought cookie dough can be a convenient option if you are short on time. Just make sure to follow the package instructions for baking and cooling.
Decorated sugar cookies can be stored in an airtight container at room temperature for up to a week. However, for the best taste and texture, it's recommended to consume them within a few days.
Yes, you can freeze undecorated sugar cookies for up to three months. Make sure to place them in a freezer-safe container or bag. When you are ready to decorate, thaw them at room temperature before proceeding.
Absolutely! Royal icing is a popular choice for decorating sugar cookies. It dries hard, making it ideal for intricate designs and stacking cookies.
Yes, you can add different flavors to your sugar cookie dough. Popular options include vanilla extract, almond extract, or citrus zest. Experiment with different flavors to find your favorite combination.
Yes, there are natural food coloring options available on the market. These are made from plant-based sources and can be a great alternative if you prefer to avoid artificial food coloring.
Absolutely! Decorating Halloween sugar cookies can be a fun and engaging activity for the whole family. Let your kids unleash their creativity and enjoy the process together.
Yes, there are alternative options for decorating sugar cookies. You can use melted chocolate, colored sugar, or even a simple powdered sugar glaze. These alternatives can add a unique touch to your cookies.
Yes, cookie stamps can be a fun and easy way to add designs to your sugar cookies. Look for Halloween-themed cookie stamps to create spooky patterns effortlessly.
AprilCook, recipe developer and the heart of Chefwiz. More about April