Grilled Ribs
Rate this recipeBe the first to rate
 By AprilPublished
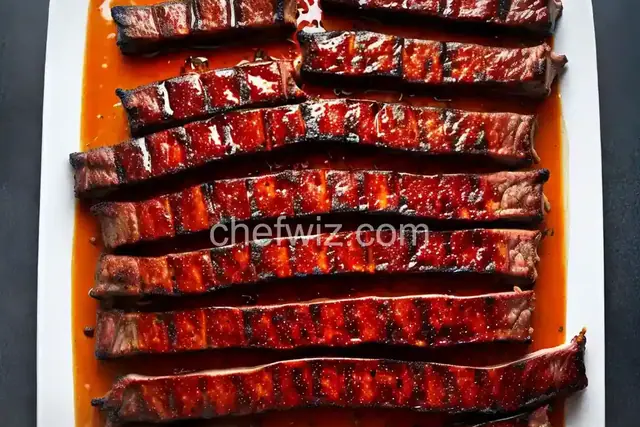
 There's something magical about sinking your teeth into tender, juicy grilled ribs.
 By AprilPublished
 There's something magical about sinking your teeth into tender, juicy grilled ribs.
In a small bowl, mix together brown sugar, paprika, salt, garlic powder, and cumin.
Set one burner on your gas grill to low heat or preheat your charcoal grill to 200 degrees Fahrenheit. Alternatively, prepare a charcoal grill by stacking charcoal on one side.
Place the ribs on a large piece of foil and coat all sides with the dry rub mixture. Let it sit for 10 minutes, then tightly wrap the ribs in the foil.
Put the ribs bone side up on the cooler side of the grill and cover it. After 1 1/2 hours, rotate the ribs 180 degrees and continue cooking for another 1 1/2 hours. Ensure that the grill temperature does not exceed 200 degrees Fahrenheit. By the end of the 3 hours, you should be able to see the bones protruding from the meat when you peek inside the foil.
Remove the ribs from the grill and transfer them to a large baking sheet. Open the foil and let the ribs rest for 10 minutes.
Increase the grill heat to high or preheat it to around 450 degrees Fahrenheit. If using a gas grill, turn on all burners. For a charcoal grill, add more coals and spread them out evenly.
Unwrap the ribs from the foil and place them directly on the grill. Use a pastry brush to generously baste the ribs with BBQ sauce. Flip the rack and
There's something magical about sinking your teeth into tender, juicy grilled ribs. The smoky flavor, the succulent meat, and the mouthwatering aroma - it's a sensory experience like no other. Whether you're a seasoned grill master or a novice backyard chef, this ultimate guide will help you elevate your BBQ game and create unforgettable grilled ribs that will have your friends and family begging for seconds.
When it comes to grilled ribs, the meat is the star of the show. But with so many options available, how do you choose the right cut? It all boils down to personal preference. Some prefer baby back ribs for their tenderness, while others opt for spare ribs for their meaty richness. Whichever you choose, make sure the meat is fresh and of high quality for the best results.
Before you fire up the grill, it's essential to prep your ribs properly. Start by removing the membrane on the bone side of the ribs. This thin layer can hinder the absorption of flavors and result in chewy meat. A simple trick to remove it is to use a butter knife to loosen one corner and then peel it off with a paper towel. Once the membrane is removed, season your ribs generously with your favorite dry rub or marinade. This step will infuse the meat with flavor and enhance its tenderness.
The grill is your canvas, and the ribs are your masterpiece. To achieve that perfect smoky flavor and caramelized crust, it's important to master the art of grilling. Start by preheating your grill to medium-low heat. This gentle heat will allow the ribs to cook slowly and evenly, resulting in tender meat that falls off the bone. Place the ribs bone-side down on the grill and let them cook for about 1.5 to 2 hours, flipping them occasionally to ensure even cooking. For that extra flavor boost, you can baste the ribs with your favorite BBQ sauce during the last 30 minutes of grilling.
What's the secret to achieving fall-off-the-bone tender ribs? It's all about the low and slow cooking method. By cooking the ribs at a lower temperature for an extended period, the collagen in the meat breaks down, resulting in tender, melt-in-your-mouth goodness. So resist the temptation to crank up the heat and be patient. Trust the process, and you'll be rewarded with ribs that are worth the wait.
Once your ribs are done grilling, resist the urge to dig in immediately. Instead, let them rest for about 10 minutes. This allows the juices to redistribute throughout the meat, ensuring every bite is moist and flavorful. The resting period also helps the meat retain its tenderness, making for an unforgettable dining experience.
Now that your grilled ribs are ready to be devoured, it's time to think about the perfect accompaniments. Whether you prefer classic BBQ sides like cornbread, coleslaw, and baked beans, or want to get adventurous with grilled vegetables and sweet potato fries, the choice is yours. The key is to create a well-rounded meal that complements the smoky flavors of the ribs.
Grilled ribs are the epitome of BBQ perfection. With the right cuts of meat, proper preparation, and careful grilling, you can create ribs that are tender, flavorful, and downright irresistible. So fire up that grill, embrace your inner grill master, and get ready to impress your guests with the ultimate grilled ribs experience. Happy grilling!
The best way to determine if your ribs are done is by using the bend test. Simply pick up the slab with a pair of tongs and give it a gentle bend. If the meat starts to crack on the surface, you're good to go.
Absolutely! Gas grills are perfect for grilling ribs. Just make sure to adjust the heat accordingly and follow the same steps for prepping and cooking.
Of course! Wet marinades can add a delicious flavor to your ribs. Just make sure to marinate them for a longer period to allow the flavors to penetrate the meat.
To prevent sticking, make sure to clean and oil your grill grates before cooking. You can also use a non-stick cooking spray or place the ribs on a piece of aluminum foil.
Absolutely! Grilled ribs freeze well and can be enjoyed later. Just make sure to store them in an airtight container or wrap them tightly in foil before freezing.
The choice of wood depends on personal preference. Popular options include hickory, applewood, and mesquite. Each wood imparts a unique flavor to the ribs, so feel free to experiment and find your favorite.
If you like a spicy kick, you can add cayenne pepper, chili powder, or hot sauce to your dry rub or marinade. Just be mindful of the desired level of heat and adjust the amount accordingly.
Absolutely! While grilling ribs on the grill adds that authentic smoky flavor, you can achieve great results by baking them in the oven. Just follow the same steps for prepping and cooking, but adjust the temperature and cooking time accordingly.
AprilCook, recipe developer and the heart of Chefwiz. More about April