Gluten-Free Oat and Buckwheat Pancakes
Rate this recipeBe the first to rate
 By AprilPublished
 Are you looking for a delicious and healthy breakfast option?
 By AprilPublished
 Are you looking for a delicious and healthy breakfast option?
Preheat the oven to 200°.
In a small saucepan, melt ¼ cup of butter over medium heat. Stir often until the butter foams and browns, without burning it. This should take around 4-5 minutes. Let it cool slightly.
In a blender, combine buttermilk and oats and blend until smooth.
Add eggs, buckwheat flour, flaxseeds, sugar, baking powder, baking soda, and salt to the blender. Blend on high for 30 seconds.
Add the melted butter to the blender and blend just until combined.
Heat a large nonstick skillet over medium heat.
Lightly coat the skillet with butter.
Working in batches, scoop about 3 tablespoonfuls of batter per pancake into the skillet.
Cook until the bottoms are golden brown and the tops are evenly covered with bubbles, which should take around 3 minutes.
Flip the pancakes and cook until they are cooked through and the undersides are golden, approximately 2 minutes.
Keep the cooked pancakes warm in the oven.
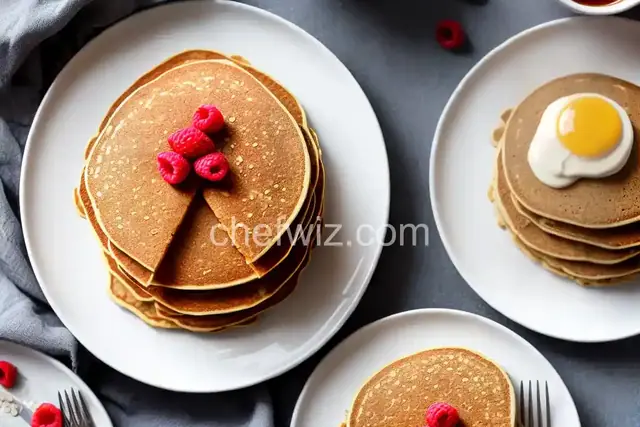
Serve the pancakes with plenty of syrup.
Optional: If you want to prepare the pancakes in advance, they can be made up to 2 weeks ahead. Simply wrap them in plastic and freeze them.
Are you looking for a delicious and healthy breakfast option? Look no further than gluten-free oat and buckwheat pancakes! These pancakes are not only tasty but also suitable for those with gluten sensitivities or celiac disease. In this article, we will explore the benefits of gluten-free pancakes and how to make them at home.
Gluten-free pancakes offer several advantages over their traditional counterparts. Firstly, they are suitable for individuals with gluten sensitivities or those following a gluten-free diet. This means that individuals with celiac disease or gluten intolerance can still enjoy a delicious stack of pancakes without any negative health effects.
Secondly, gluten-free pancakes can provide a healthier alternative by incorporating nutrient-rich ingredients like oats and buckwheat. These ingredients are high in fiber, vitamins, and minerals, making them a nutritious choice for breakfast.
Making gluten-free oat and buckwheat pancakes is a straightforward process. Here's a simple recipe to get you started:
To make these pancakes, you will need gluten-free oat flour, buckwheat flour, baking powder, salt, eggs, milk (or a dairy-free alternative), and a sweetener of your choice (such as honey or maple syrup).
In a mixing bowl, combine the oat flour, buckwheat flour, baking powder, and salt. Mix well to ensure the ingredients are evenly distributed.
In a separate bowl, whisk together the eggs, milk, and sweetener. Gradually pour the wet ingredients into the dry ingredients while stirring continuously. Mix until the batter is smooth and well-combined.
Heat a non-stick skillet or griddle over medium heat. Pour a ladleful of batter onto the skillet and spread it into a round shape. Cook until bubbles form on the surface, then flip the pancake and cook for another minute or until golden brown. Repeat this process until all the batter is used.
Here are some tips to ensure your gluten-free oat and buckwheat pancakes turn out perfectly:
Gluten-free oat and buckwheat pancakes are a delicious and nutritious breakfast option for individuals with gluten sensitivities or those following a gluten-free diet. By using gluten-free flours and incorporating wholesome ingredients, you can enjoy a stack of pancakes without compromising your health. So why not give this recipe a try and indulge in a satisfying breakfast treat?
Yes, you can substitute oat flour with other gluten-free flours like almond flour or rice flour. Just make sure to adjust the liquid ingredients accordingly for the right consistency.
No, gluten-free pancakes can be enjoyed by anyone, even those without gluten sensitivities. They offer a healthier alternative and are a great way to incorporate nutrient-rich ingredients into your diet.
Absolutely! You can freeze any leftover gluten-free pancakes for future consumption. Just make sure to wrap them individually and store them in an airtight container or freezer bag.
Yes, you can prepare the pancake batter in advance and store it in the refrigerator for up to 24 hours. Just give it a good stir before cooking.
To make the pancakes fluffy, make sure not to overmix the batter. Leaving some lumps in the batter will help create air pockets, resulting in lighter and fluffier pancakes.
Yes, you can use regular milk if you don't have any dietary restrictions. However, if you're lactose intolerant or following a dairy-free diet, opt for a dairy-free milk alternative like almond milk or coconut milk.
Absolutely! Feel free to add your favorite flavors like cinnamon, vanilla extract, or even chocolate chips to the pancake batter for a delightful twist.
Not at all! Gluten-free pancakes are just as easy to cook as regular pancakes. Just make sure to follow the recipe instructions and cook them over medium heat to prevent burning.
AprilCook, recipe developer and the heart of Chefwiz. More about April