Glow-in-the-Dark Cake
Rate this recipeBe the first to rate
 By AprilPublished
 Have you ever wondered how to make your next celebration truly unforgettable?
 By AprilPublished
 Have you ever wondered how to make your next celebration truly unforgettable?
Preheat the oven to 350 degrees F.
Coat four 8-inch round cake pans with cooking spray and dust with flour, tapping out the excess. If you only have 1 or 2 pans, make the cake mix in batches and use half of the food coloring in each batch.
Prepare the cake batter according to the instructions on the package.
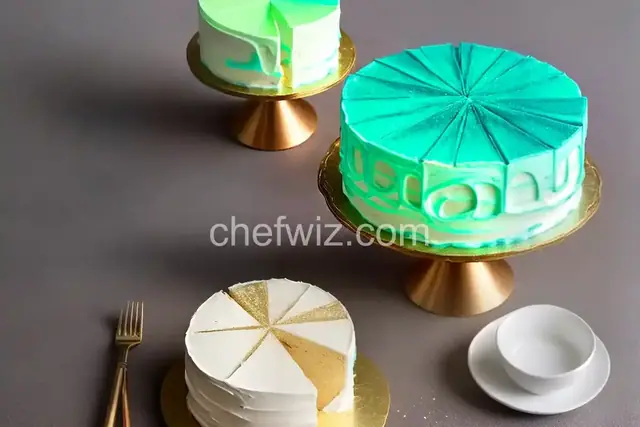
Divide the batter into 3 bowls. Add green food coloring to one bowl, pink to another, and yellow to the last bowl.
Create a tie-dye pattern by randomly adding a quarter-cup scoop of different colored batters to the prepared pans. Use a toothpick to swirl the colors together. Tap the pans to release any air bubbles.
Bake the cakes in the preheated oven, rotating the pans from top to bottom halfway through baking. Bake until a tester inserted in the center comes out clean, which should take about 25 to 28 minutes.
Allow the cakes to cool on a rack for 10 minutes, then remove them from the pans and let them cool completely.
In a large bowl, beat the butter and salt with an electric mixer on medium speed until smooth and light, about 1 minute.
Add the confectioners' sugar to the bowl and beat on low speed to incorporate. Then, increase the speed to medium-high and beat until the frosting is fluffy, which should take about 1 to 2 minutes.
Have you ever wondered how to make your next celebration truly unforgettable? Look no further than a glow-in-the-dark cake! This magical and mesmerizing dessert is sure to captivate your guests and leave them in awe. In this article, we will explore the secrets behind creating a glow-in-the-dark cake that will light up any occasion.
Before we dive into the artistic process, let's take a moment to understand the science behind the glow. The secret lies in a luminescent substance called phosphorescence. Similar to the glow-in-the-dark stars on your bedroom ceiling, phosphorescent pigments absorb and store light energy, then emit it slowly over time. By incorporating these pigments into the cake, you can create a stunning glow that will amaze everyone who lays eyes on it.
When it comes to making a glow-in-the-dark cake, not all ingredients are created equal. It is crucial to select the right components that will not only create a vibrant glow but also taste delicious. From neon food coloring to edible phosphorescent powder, there are various options available to achieve the desired effect. Experimentation is key here, as different brands and types of pigments may yield different results.
Now that you have gathered your glowing ingredients, it's time to mix them into the cake batter. Just like an artist with a palette of colors, you can combine different shades to create a mesmerizing glow effect. Remember to start with a small amount of pigment and gradually add more until you achieve the desired luminosity. Don't be afraid to get creative and try different combinations to make your cake truly unique.
Once your batter is mixed to perfection, it's time to bake the cake. Keep in mind that the glow-in-the-dark effect may fade slightly during the baking process. Don't worry – this is completely normal. The colors will become more vibrant once the cake cools down. Just be patient and trust the process.
Unleash your inner creativity and make your next celebration shine with a glow-in-the-dark cake. By understanding the science behind the glow, choosing the right ingredients, and experimenting with mixing and baking, you can create a truly enchanting dessert that will leave a lasting impression. So, gather your glowing ingredients, put on your apron, and let your imagination run wild. It's time to create a cake that will light up the night!
Yes, it is safe to eat a glow-in-the-dark cake as long as you use edible phosphorescent pigments specifically designed for culinary use. These pigments are non-toxic and approved for consumption.
The glow will last for several hours, depending on the type and amount of pigment used. It is recommended to showcase the cake in a dimly lit environment to enhance the effect.
Absolutely! You can make a glow-in-the-dark cake with any flavor you desire. Whether it's a classic vanilla, a rich chocolate, or a fruity delight, the glow-in-the-dark effect will add a touch of magic to any taste.
Yes, you can use the same technique to create glow-in-the-dark cupcakes. Simply follow the same steps for mixing the pigments into the batter and adjust the baking time accordingly.
While natural food coloring can add a pop of color to your cake, it may not produce the same vibrant glow as neon colors. Edible phosphorescent pigments are specifically formulated to create the desired luminosity.
It is not recommended to use glow sticks in the cake as they contain chemicals that are not safe for consumption. Stick to edible phosphorescent pigments for a safe and delicious glow-in-the-dark effect.
Yes, you can use a regular cake mix as the base for your glow-in-the-dark cake. Simply follow the instructions on the cake mix box and add the phosphorescent pigments to achieve the desired glow.
Absolutely! Using a blacklight in combination with the phosphorescent pigments will intensify the glow and create a truly mesmerizing effect. Set the stage with dim lighting and let the cake steal the show.
AprilCook, recipe developer and the heart of Chefwiz. More about April