Flourless Chocolate Lava Cakes Recipe
Rate this recipeBe the first to rate
 By AprilPublished
 Are you a chocolate lover? Do you crave the rich, velvety goodness of a decadent chocolate dessert?
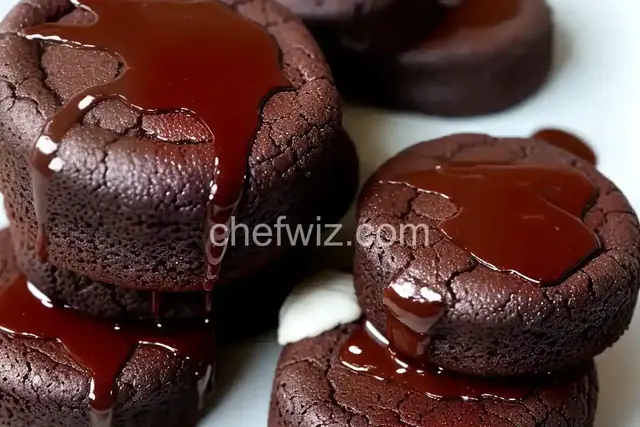 By AprilPublished
 Are you a chocolate lover? Do you crave the rich, velvety goodness of a decadent chocolate dessert?
Adjust the oven rack to the middle position and preheat the oven to 375°F (190°C).
Butter seven 4-ounce ramekins.
Using a microwave or a bowl set over a pan of simmering water, melt the chocolate with the butter. Stir occasionally until melted and smooth. Remove from heat.
While the chocolate is melting, whip the eggs, sugar, and salt using a mixer fitted with a whip attachment on medium-high speed. Mix until the mixture is lightened and pale in color, which should take about 5 minutes.
Reduce the mixer speed to low and mix in the chocolate mixture until combined.
Spoon the mixture into the buttered ramekins and place them on a baking sheet.
Bake in the preheated oven for about 10 minutes, or until the edges are set but the center is still slightly underdone. Avoid over-baking.
Let the ramekins cool for 3 minutes before serving.
Are you a chocolate lover? Do you crave the rich, velvety goodness of a decadent chocolate dessert? Look no further than flourless chocolate lava cakes! These little delights are a slice of heaven for any chocolate aficionado. In this article, we will explore the magic of flourless chocolate lava cakes and how you can make them at home.
Imagine sinking your fork into a warm, chocolatey cake only to discover a gooey, molten chocolate center oozing out. The contrast between the moist cake and the luscious lava is pure bliss. Flourless chocolate lava cakes are like a dance between your taste buds and your soul. They are the epitome of indulgence, a dessert that can transport you to a state of pure happiness.
Flourless chocolate lava cakes are a gluten-free delight. By eliminating flour from the recipe, the focus remains solely on the chocolate. This allows the chocolate to shine and creates a denser, fudgier texture. It's a win-win situation for those with gluten sensitivities or for anyone who simply wants a more intense chocolate experience.
So, what makes these lava cakes so irresistibly gooey? The secret lies in the chocolate and the precise baking time. Using high-quality chocolate with a high cocoa content is crucial. As the cakes bake, the outer edges set, while the center remains molten. It's like finding buried treasure in every bite. The baking time is critical to achieve the perfect lava consistency - too short, and you end up with a fully cooked cake, too long, and you lose the lava effect.
Now that we've uncovered the magic behind flourless chocolate lava cakes, let's dive into making them at home. Here's a step-by-step guide:
To create these delectable lava cakes, you'll need high-quality dark chocolate, butter, sugar, eggs, and a pinch of salt. It's important to use the best ingredients you can find to ensure the richest flavor.
In a microwave-safe bowl or over a double boiler, melt the chocolate and butter together until smooth and velvety. This mixture forms the base of your lava cakes and gives them their intense chocolate flavor.
Once the chocolate and butter mixture has cooled slightly, whisk in the sugar and eggs until well combined. The sugar adds sweetness and helps create a smooth, shiny texture, while the eggs provide structure and richness.
Grease your ramekins with butter and dust them with cocoa powder to prevent sticking. Pour the batter into the ramekins, filling them about three-fourths of the way. This allows room for the cakes to rise and creates space for the lava center.
Place the ramekins on a baking tray and bake in a preheated oven until the edges are set but the center is still jiggly. The exact baking time will depend on your oven and the size of your ramekins, so keep a close eye on them. Remember, the lava cakes should have a gooey center when done.
Flourless chocolate lava cakes are a dessert that never fails to impress. With their intense chocolate flavor and gooey lava center, they are a delightful indulgence for any chocolate lover. By following a few simple steps, you can recreate this decadent dessert in the comfort of your own kitchen. So why wait? Treat yourself and your loved ones to the magic of flourless chocolate lava cakes today!
A1: While it's best to enjoy these lava cakes fresh out of the oven, you can make the batter in advance and refrigerate it. Just remember to bring it to room temperature before baking.
A2: Dark chocolate works best for flourless chocolate lava cakes as it has a higher cocoa content. Milk chocolate may not provide the same intensity of flavor.
A3: Yes! Once baked, you can freeze the lava cakes for up to a month. Just make sure to thaw them completely before reheating.
A4: Absolutely! You can experiment with adding extracts like vanilla or even a dash of espresso powder to enhance the flavor.
A5: Butter provides the best flavor and texture for flourless chocolate lava cakes. Substituting it may alter the results.
A6: Of course! You can use smaller ramekins or even a muffin tin to create individual-sized lava cakes.
A7: The edges should be set, but the center should still be slightly jiggly. This ensures the perfect molten lava center.
A8: Absolutely! The combination of warm lava cake and cold ice cream is a match made in dessert heaven.
AprilCook, recipe developer and the heart of Chefwiz. More about April