Easy Bunny Cake
Rate this recipeBe the first to rate
 By AprilPublished
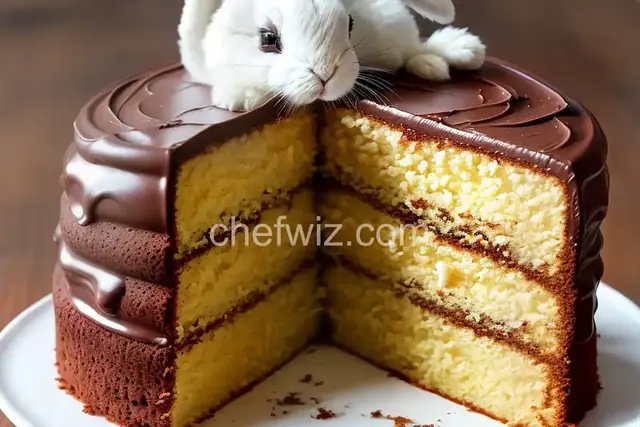
Who doesn't love a cute and delicious bunny cake? It's the perfect dessert for Easter or any springtime celebration.
 By AprilPublished
Who doesn't love a cute and delicious bunny cake? It's the perfect dessert for Easter or any springtime celebration.
This Easter bunny cake is quick and easy to make using a boxed cake mix. It will become a holiday favorite in your home.
Ingredients needed:
- Boxed cake mix (follow package instructions)
- Water
- Vegetable oil
- Eggs
- Vanilla frosting
- Coconut flakes
- Jellybeans
- Licorice
Instructions:
Preheat the oven to 350 degrees F (175 degrees C) and grease the sides and bottoms of two 9-inch metal springform pans.
In a large bowl, beat the cake mix, water, vegetable oil, and eggs with an electric mixer on low speed until moistened, about 30 seconds. Then increase the speed to medium and beat for 2 minutes. Pour the batter into the prepared pans.
Bake in the preheated oven until a toothpick inserted in the centers comes out clean, approximately 23 to 25 minutes.
Allow the cakes to cool in the pans for 15 minutes, then remove them from the springform pans and let them cool completely for about 20 more minutes.
Place one cake on a serving tray to form the bunny's head.
Cut 2 convex-shaped ears from each side of the second cake and place them on each side of the head as ears. Place the remaining concave-shaped piece about 1/2 inch below the head to create the bowtie.
Frost the entire bunny cake with vanilla frosting and pat coconut flakes
Who doesn't love a cute and delicious bunny cake? It's the perfect dessert for Easter or any springtime celebration. Whether you're a baking pro or a beginner, this easy bunny cake recipe will have you hopping with joy. Let's dive right in and create a masterpiece that will have everyone saying, "What a hare-raisingly good cake!"
Spring is a time of renewal and new beginnings. It's a season that brings warmth, color, and joy. What better way to celebrate than with a bunny cake? This adorable dessert is not only a feast for the taste buds but also a feast for the eyes. Imagine a fluffy bunny face, complete with edible ears and a cute little nose. It's a showstopper that will make your guests' hearts melt.
Creating a bunny cake may sound like a daunting task, but fear not! This recipe is designed to be simple and foolproof. You don't need any fancy equipment or advanced baking skills. All you need is some basic ingredients, a few cake pans, and a sprinkle of creativity. Let's break it down step by step:
The first step is to bake the cake. You can use any cake recipe you like, whether it's a classic vanilla or a rich chocolate. Prepare the batter according to the recipe instructions, and then divide it evenly between two round cake pans. Pop them in the oven and let the magic happen. In no time, your kitchen will be filled with the irresistible aroma of freshly baked cake.
Once your cakes have cooled, it's time to assemble the bunny. Place one cake layer on a serving plate or a cake board. This will be the bunny's face. Take the second cake layer and cut it in half. These halves will become the bunny's ears. Arrange them on top of the face, creating a bunny shape.
Now comes the fun part - decorating! Whip up a batch of your favorite frosting. You can use buttercream, cream cheese frosting, or any other frosting that tickles your taste buds. Cover the entire cake with a thin layer of frosting, also known as a crumb coat. This will help seal in any crumbs and provide a smooth surface for the final layer of frosting.
Now it's time to bring your bunny cake to life. Use your remaining frosting to cover the cake in a thick, even layer. Get creative with different colors and textures. Use a piping bag and a star tip to create fur-like patterns. Add candy eyes, a cute little nose, and some whiskers. Don't forget the floppy ears! You can use fondant or marshmallow treats to shape them. Your bunny cake is now ready to steal the show!
Yes, you can use any cake flavor you prefer. Get creative and experiment with different flavors to find your favorite.
Yes, you can prepare the cake layers in advance and store them in an airtight container. Assemble and decorate the cake closer to the time you plan to serve it.
The baking time will vary depending on the recipe and the size of your cake pans. Follow the instructions provided in your chosen cake recipe for the most accurate baking time.
Absolutely! Store-bought frosting can be a time-saver. However, homemade frosting allows for more customization and flavor options.
Yes, you can substitute gluten-free flour in your cake recipe to make a gluten-free bunny cake. Just make sure to use gluten-free ingredients for the frosting and decorations as well.
The bunny cake will stay fresh for up to 3-4 days if stored properly in an airtight container in the refrigerator.
Of course! Get creative and use different decorations to make your bunny cake unique. You can use sprinkles, edible flowers, or even fresh fruit.
Absolutely! Instead of using round cake pans, you can use smaller molds or cupcake pans to create adorable mini bunny cakes.
So there you have it - an easy bunny cake recipe that will bring a smile to everyone's face. With just a few simple steps, you can create a showstopping dessert that will have your guests hopping with joy. Whether it's Easter or any other occasion, this bunny cake is sure to be a hit. So grab your apron, put on your baking hat, and let's get hopping!
AprilCook, recipe developer and the heart of Chefwiz. More about April