Easiest Chocolate Birthday Cake
Rate this recipeBe the first to rate
 By AprilPublished
 Birthdays are special occasions that call for celebration, joy, and of course, cake!
 By AprilPublished
 Birthdays are special occasions that call for celebration, joy, and of course, cake!
Preheat your oven to 325° and position a rack in the center.
Grease a 9 round cake pan with vegetable oil, both the bottom and sides. Use your fingertips to do this.
Place a piece of parchment paper on the bottom of the pan, smoothing it to remove any air bubbles. You can easily create a parchment circle by placing the pan on a piece of parchment, tracing the circumference with a pencil, and cutting it out.
In a large bowl, whisk together 1⅓ cups all-purpose flour, 1¼ cups granulated sugar, 1¾ tsp. baking powder, ¼ tsp. baking soda, and 1¼ tsp. kosher salt.
Sift ½ cup cocoa powder into the same bowl and whisk everything together to combine. If desired, you can stop here and save these dry ingredients in an airtight container to make a DIY cake mix.
In a medium bowl, whisk together 2 large eggs, ¾ cup vegetable oil, and 1 tsp. vanilla extract until well combined and creamy (about 30 seconds).
Using a spatula, mix the egg mixture into the dry ingredients until fully incorporated. It will be thick and pasty, which is okay.
In a small saucepan, warm 1 cup milk over medium heat until it reaches a bare simmer (do not let it boil).
Whisk the warmed milk into the
Birthdays are special occasions that call for celebration, joy, and of course, cake! And what better way to celebrate than with a scrumptious chocolate birthday cake? In this article, we will explore the easiest way to make a delectable chocolate cake that will leave everyone asking for seconds.
Chocolate is loved by people of all ages. Its rich and indulgent flavor is a universal favorite, making it the perfect choice for a birthday cake. Whether it's a child or an adult, chocolate has a way of bringing a smile to everyone's face. So why not make a chocolate birthday cake that will be remembered for years to come?
When it comes to making a chocolate birthday cake, simplicity is key. The recipe we are about to share is easy to follow, even for those who are new to baking. With just a few basic ingredients and some simple steps, you can create a masterpiece that will impress your friends and family.
To make the easiest chocolate birthday cake, you will need:
You will also need some basic baking equipment, such as a mixing bowl, a whisk or electric mixer, a cake pan, and an oven.
Now let's dive into the step-by-step instructions for making the easiest chocolate birthday cake:
In a mixing bowl, combine the cocoa powder, flour, baking powder, and sugar. Mix them well until they are evenly combined. Next, add the softened butter, eggs, milk, and vanilla extract. Mix everything together until you have a smooth batter.
Preheat your oven to the specified temperature mentioned in the recipe. Grease your cake pan with butter or cooking spray to prevent the cake from sticking. Pour the batter into the pan and spread it evenly. Place the pan in the preheated oven and bake for the recommended time or until a toothpick inserted into the center comes out clean.
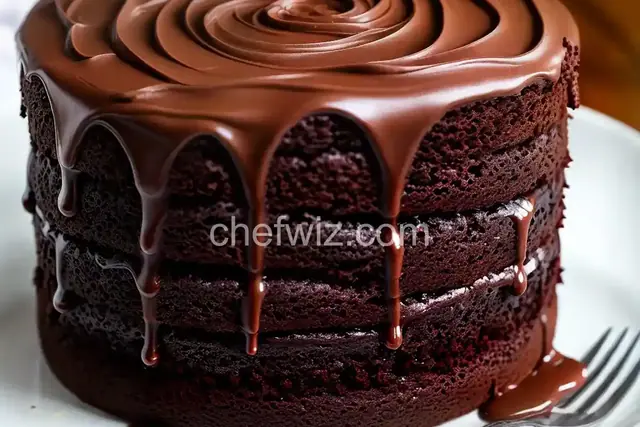
Once the cake has cooled completely, it's time to unleash your creativity and decorate it according to the occasion. You can use frosting, whipped cream, or even chocolate ganache to add a touch of elegance to your cake. Top it off with some colorful sprinkles or edible decorations to make it visually appealing.
Now that you know the secret to making the easiest chocolate birthday cake, it's time to put your baking skills to the test. With a simple recipe, basic ingredients, and a little creativity, you can create a cake that will be the highlight of any birthday celebration. So go ahead, gather your ingredients, and get ready to indulge in a slice of chocolatey goodness!
A1: While cocoa powder is recommended for this recipe, you can substitute it with an equal amount of melted dark chocolate if desired. Just make sure to adjust the sugar amount accordingly.
A2: All-purpose flour works best for this recipe, but you can experiment with other types of flour, such as whole wheat flour or almond flour, for a different flavor and texture.
A3: When stored properly in an airtight container, the cake can stay fresh for up to 3-4 days. However, it is best enjoyed within the first 1-2 days.
A4: Yes, you can freeze the cake for up to 2-3 months. Just make sure to wrap it tightly in plastic wrap or place it in an airtight container before freezing.
A5: Absolutely! Feel free to add your favorite nuts or chocolate chips to the batter for some extra crunch and flavor.
A6: Yes, you can substitute each egg with 1/4 cup of unsweetened applesauce or mashed banana for an eggless version of the cake.
A7: Greasing the pan with butter or cooking spray and lining the bottom with parchment paper can help prevent the cake from sticking.
A8: Absolutely! This recipe can be easily adapted to make delicious chocolate cupcakes. Just adjust the baking time accordingly.
AprilCook, recipe developer and the heart of Chefwiz. More about April