Dutch Baby Recipe
Rate this recipeBe the first to rate
 By AprilPublished
 Are you craving a delicious and comforting breakfast that will leave you satisfied and impressed?
 By AprilPublished
 Are you craving a delicious and comforting breakfast that will leave you satisfied and impressed?
Preheat the oven to 400°F (205°C) and place a 10-inch skillet on the middle rack.
In a food processor, combine eggs, sugar, cinnamon, salt, and vanilla extract. Pulse until well mixed.
Add flour to the mixture and pulse again to combine.
With the food processor running, gradually add milk and process for 30 seconds.
Remove the hot skillet from the oven and add butter, swirling it around to coat the pan until melted.
Pour the batter into the skillet.
Bake for approximately 20 minutes or until the dough is puffed and golden.
Serve immediately, optionally sprinkling extra sugar on top and squeezing some lemon juice over it.
Are you craving a delicious and comforting breakfast that will leave you satisfied and impressed? Look no further than the Dutch Baby! This pancake-like dish is a delightful treat that is easy to make and guaranteed to impress your taste buds. In this article, we will delve into the world of Dutch Babies, exploring their origin, ingredients, and how to make them at home. So, let's get started!
Have you ever wondered what a Dutch Baby is? Well, imagine a pancake and a popover had a baby - that's a Dutch Baby! This German-inspired dish is a cross between a pancake and a souffle. It's light and fluffy with a crispy edge, making it a unique and delicious breakfast option.
Have you ever wondered where the Dutch Baby got its name? Despite the name, the Dutch Baby actually originated in Germany. Some believe that the name "Dutch" comes from the German word "Deutsch," which means German. It is thought that German immigrants brought this delectable dish to America, where it gained popularity and became known as the Dutch Baby.
To make a mouthwatering Dutch Baby, you'll need a few simple ingredients. Flour, eggs, milk, and butter are the main components that create the magic in this dish. Additionally, you can add flavorings like vanilla extract or lemon zest to enhance the taste. The best part is that these ingredients are likely already in your pantry, making it a convenient and budget-friendly breakfast option.
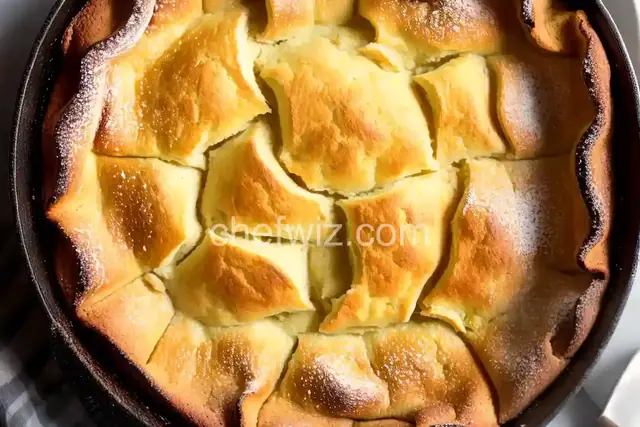
Now that you have your ingredients ready, it's time to whip up a delicious Dutch Baby. The process is surprisingly simple. You'll start by preheating your oven and melting butter in a cast-iron skillet. Then, you'll blend the batter ingredients together until smooth and pour it into the skillet. The Dutch Baby will puff up beautifully in the oven, creating an impressive presentation. Serve it warm, dusted with powdered sugar and topped with your favorite fruits or syrup. It's a breakfast fit for royalty!
Creating the perfect Dutch Baby may seem intimidating, but fear not! Here are some tips and tricks to ensure success:
The Dutch Baby is a delightful breakfast dish that combines the best elements of pancakes and popovers. With its fluffy texture and crispy edges, it's a treat that will leave you wanting more. Whether you enjoy it with a sprinkle of powdered sugar and a drizzle of syrup or get creative with savory toppings, the Dutch Baby is a versatile dish that is sure to impress. So, why not give it a try and experience the magic of a Dutch Baby for yourself?
While a cast-iron skillet is the traditional choice for making a Dutch Baby, you can use a regular oven-safe skillet or baking dish as an alternative.
A Dutch Baby is best enjoyed fresh out of the oven when it's at its peak puffiness. However, if you have leftovers, you can store them in the refrigerator and reheat them later. Just keep in mind that it may not be as puffy as when it was freshly baked.
Eggs are a crucial ingredient in creating the airy texture of a Dutch Baby. While there may be egg substitutes available, they may not yield the same results.
Absolutely! While sweet Dutch Babies are more common, you can experiment with savory variations by adding ingredients like cheese, herbs, or even bacon to the batter.
It's not recommended to freeze a Dutch Baby as it may lose its texture and become soggy when thawed and reheated.
While traditional all-purpose flour is commonly used in Dutch Baby recipes, you can experiment with alternative flours like whole wheat or gluten-free blends. Just keep in mind that the texture and taste may vary.
Absolutely! Instead of using a large skillet, you can divide the batter into individual portions and bake them in smaller oven-safe dishes for adorable mini Dutch Babies.
Yes! You can substitute dairy-free milk and vegan butter for the milk and butter in the recipe to make a vegan or dairy-free Dutch Baby.
While it's common to add toppings like fruits or powdered sugar after baking, you can experiment by folding ingredients like blueberries or chocolate chips into the batter before pouring it into the skillet for a delightful surprise.
AprilCook, recipe developer and the heart of Chefwiz. More about April