Dr. Pepper Baby Back Ribs Recipe
Rate this recipeBe the first to rate
 By AprilPublished
 Are you looking for a mouthwatering and tender ribs recipe that will make your taste buds dance with joy?
 By AprilPublished
 Are you looking for a mouthwatering and tender ribs recipe that will make your taste buds dance with joy?
Heat butter in a saucepan until melted.
Add onions and garlic, and cook until onions become translucent (around 10 minutes).
Combine the remaining sauce ingredients in the saucepan and cook until the flavors blend and the sauce thickens (approximately 30 minutes).
Taste the sauce and adjust the seasoning with salt and pepper.
Allow the sauce to cool for 10 minutes, then blend it with an immersion blender or regular blender.
Transfer the sauce to a glass jar for storage, and refrigerate for up to 2 weeks.
Remove the membrane and trim the ribs.
Apply a generous amount of your favorite dry rub to each rack of ribs.
Wrap the ribs in foil or place them in a large container, and refrigerate overnight.
Take the ribs out of the fridge while preparing the smoker.
Preheat the smoker to 225°F, and add apple wood chunks for smoking when it reaches the desired temperature.
Once the wood is producing smoke, place the ribs in the smoker, meat side up, and smoke for 3-5 hours.
Check the ribs by lifting them from one end to see if they have a slight bend.
Brush on the sauce and continue cooking until the sauce caramelizes (approximately 15-20 minutes longer).
Remove the ribs from the smoker, slice them
Are you looking for a mouthwatering and tender ribs recipe that will make your taste buds dance with joy? Look no further than this incredible Dr. Pepper Baby Back Ribs recipe! These ribs are infused with a delicious blend of flavors that will leave you craving for more. So, let's dive into the world of finger-licking goodness!
Have you ever wondered how a simple soda can transform your ribs into a culinary masterpiece? The secret lies in the magical properties of Dr. Pepper. The sweetness and caramel undertones of this popular carbonated soft drink add a unique depth and richness to the meat, resulting in ribs that are tender, juicy, and bursting with flavor.
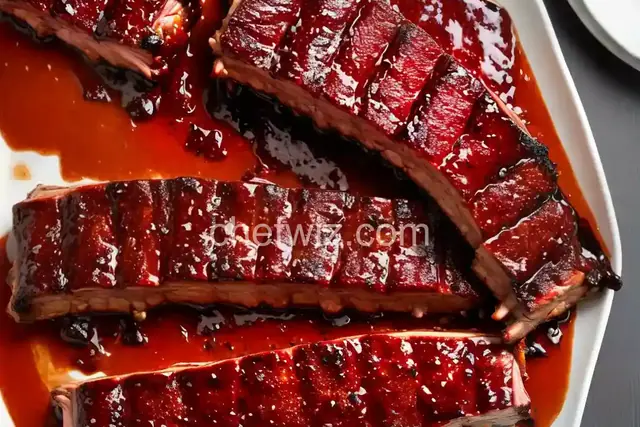
Imagine sinking your teeth into succulent baby back ribs that are coated in a sticky, glaze-like sauce. Every bite is a harmonious blend of sweet and savory flavors that will make your taste buds sing. The Dr. Pepper marinade acts as a tenderizer, ensuring that the meat is incredibly tender and falls right off the bone.
These Dr. Pepper Baby Back Ribs are like a party in your mouth. The flavors are bold, yet balanced, creating a culinary experience that will have your guests raving about your cooking skills. Whether you're hosting a backyard barbecue or a cozy dinner party, these ribs are sure to be the star of the show.
Now that we've whetted your appetite, let's dive into the step-by-step process of making these delectable Dr. Pepper Baby Back Ribs. Follow these instructions carefully, and you'll be rewarded with ribs that are tender, juicy, and packed with flavor.
Start by selecting high-quality baby back ribs from your local butcher or grocery store. Remove the silver skin from the back of the ribs, as it can become tough and chewy when cooked. This will ensure that your ribs are tender and easy to eat.
In a bowl, combine Dr. Pepper, soy sauce, garlic, onion powder, and a touch of brown sugar. Mix well until the sugar has dissolved, creating a flavorful marinade. Place the ribs in a large ziplock bag and pour the marinade over them. Seal the bag tightly and refrigerate for at least four hours, allowing the flavors to infuse the meat.
Preheat your grill to medium heat, ensuring that the temperature is around 250°F (121°C). This low and slow cooking method will result in tender, fall-off-the-bone ribs. If you're using a charcoal grill, arrange the coals on one side to create an indirect cooking zone.
Remove the ribs from the marinade and let any excess liquid drip off. Place the ribs on the grill, bone side down, in the indirect cooking zone. Close the lid and let the ribs cook for approximately three hours, flipping them every 45 minutes to ensure even cooking.
In the final hour of cooking, it's time to add the finishing touch. Brush your favorite barbecue sauce generously over the ribs, allowing it to caramelize and create a sticky, flavorful glaze. Continue cooking for an additional 45 minutes, or until the meat is tender and the sauce has formed a beautiful crust.
There you have it – a tantalizing Dr. Pepper Baby Back Ribs recipe that will take your taste buds on a flavorful journey. The combination of Dr. Pepper and a few simple ingredients creates a marinade that transforms ordinary ribs into a culinary masterpiece. So, fire up your grill, gather your loved ones, and get ready to enjoy a meal that will leave everyone craving for more.
A1: While diet Dr. Pepper can be used as a substitute, keep in mind that it may alter the flavor profile slightly. The sugar content in regular Dr. Pepper adds a unique depth that complements the ribs perfectly.
A2: Absolutely! Simply follow the same steps but cook the ribs in a preheated oven at 250°F (121°C) for approximately three hours. Remember to flip and glaze the ribs as directed.
A3: Yes, you can use spare ribs or St. Louis-style ribs instead of baby back ribs. The cooking time may vary slightly, so keep an eye on the meat to ensure it's cooked to perfection.
A4: If you prefer a spicier kick, you can add a dash of cayenne pepper or your favorite hot sauce to the marinade. This will give the ribs an extra layer of heat and complexity.
A5: While Dr. Pepper is recommended for its unique flavor profile, you can experiment with other sodas like Coca-Cola or root beer. Each soda will impart its own distinct taste to the ribs.
A6: Absolutely! Marinating the ribs overnight will allow the flavors to penetrate the meat even further, resulting in an even more flavorful end result.
A7: It's important to let the ribs rest for about 10 minutes after removing them from the grill. This allows the juices to redistribute, ensuring that each bite is as tender and juicy as possible.
A8: Yes, you can freeze any leftover ribs for future enjoyment. Simply wrap them tightly in aluminum foil or place them in an airtight container before freezing. When ready
AprilCook, recipe developer and the heart of Chefwiz. More about April