DIY Sugar Cubes Recipe
Rate this recipeBe the first to rate
 By AprilPublished
Are you tired of using regular sugar in your tea or coffee? Do you want to add a touch of elegance to your drinks?
 By AprilPublished
Are you tired of using regular sugar in your tea or coffee? Do you want to add a touch of elegance to your drinks?
Mix together the sugar and water until the texture is consistent. The sugar should be slightly moistened and crumbly, but not watery. If it is watery, add more sugar to balance the consistency.
Take approximately 1 heaping teaspoon of the mixture per cube and firmly press it into a candy mold. Make sure to pack it down tightly.
Allow the cubes to sit at room temperature overnight so they can harden.
Once hardened, remove the cubes from the molds.
Store the cubes in an airtight container at room temperature for up to 2 years.
Are you tired of using regular sugar in your tea or coffee? Do you want to add a touch of elegance to your drinks? Look no further! In this article, we will guide you through the process of making your own delicious and beautiful sugar cubes at home. Get ready to impress your guests and elevate your beverage experience!
Before we dive into the details, let's talk about why you should consider making your own sugar cubes. Firstly, it allows you to customize the size and shape of the cubes according to your preference. Whether you prefer small, delicate cubes or larger ones that pack a sweet punch, the choice is yours. Secondly, making your own sugar cubes gives you the freedom to experiment with different flavors. You can add a hint of vanilla, a dash of cinnamon, or even infuse them with your favorite herbal tea. The possibilities are endless!
Now that you're convinced to embark on this sugar cube adventure, let's gather the necessary ingredients and tools. Luckily, you probably already have most of these items in your kitchen:
1. Start by pouring the granulated sugar into a mixing bowl.
2. Gradually add water, one tablespoon at a time, while stirring the sugar. The goal is to create a thick paste-like consistency.
3. Once the mixture is thick and sticky, transfer it to ice cube trays or silicone molds. Gently press the mixture into each compartment, ensuring it is compact.
4. Allow the sugar cubes to dry and harden for at least 24 hours. You can leave them at room temperature or place them in a cool, dry place.
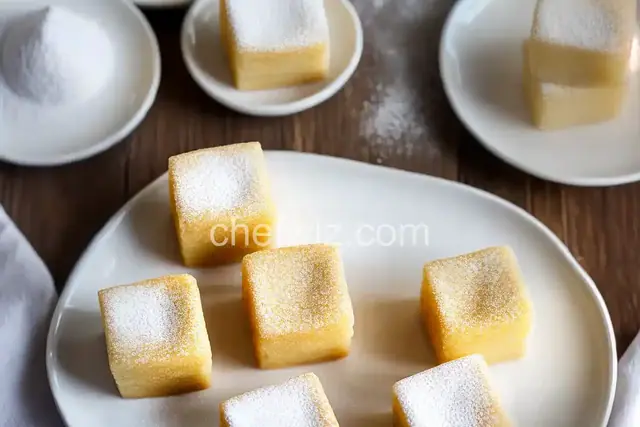
5. Once the cubes are completely dry, carefully remove them from the trays or molds. Voila! Your homemade sugar cubes are ready to add sweetness to your favorite beverages.
A1: Powdered sugar is not recommended for making sugar cubes as it contains added cornstarch, which may affect the texture and consistency of the cubes.
A2: If stored in an airtight container, homemade sugar cubes can last for several months without losing their quality.
A3: Absolutely! Adding a few drops of food coloring to the mixture can create vibrant and visually appealing sugar cubes.
A4: Yes, you can add a few drops of flavored extracts like vanilla, almond, or mint to infuse your sugar cubes with delicious flavors.
A5: The number of sugar cubes you can make depends on the size of your ice cube trays or molds. On average, you can expect to make around 20-30 cubes.
A6: Absolutely! Silicone molds with various shapes, such as hearts or stars, can add a fun and whimsical touch to your sugar cubes.
A7: While you can use brown sugar, keep in mind that it has a higher moisture content, which may affect the drying time and texture of the cubes.
A8: Making your own sugar cubes can be a cost-effective option, especially if you enjoy experimenting with different flavors and shapes.
In conclusion, creating your own sugar cubes is a delightful and easy way to enhance your beverage experience. With just a few simple ingredients and tools, you can elevate your drinks to a new level of sweetness. So why settle for ordinary when you can have extraordinary? Give it a try and enjoy the satisfaction of sipping on a drink adorned with your own homemade sugar cubes.
AprilCook, recipe developer and the heart of Chefwiz. More about April