DIY Pear Liqueur Recipe
Rate this recipeBe the first to rate
 By AprilPublished
 Are you a fan of delicious and unique liqueurs? Do you enjoy the sweet and aromatic flavors of pears?
 By AprilPublished
 Are you a fan of delicious and unique liqueurs? Do you enjoy the sweet and aromatic flavors of pears?
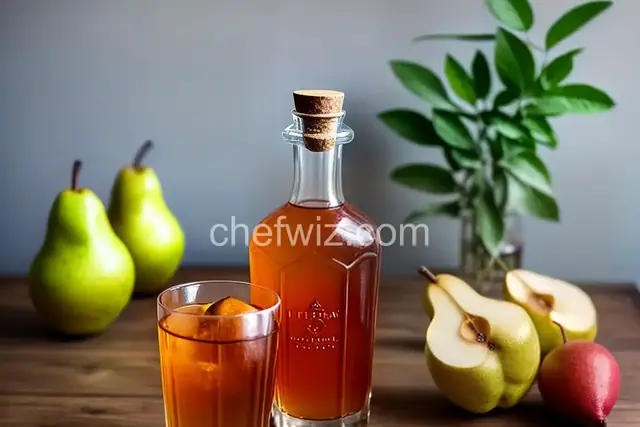
Wash and chop one pear, removing seeds and core, but keeping the skin intact.
Split and scrape the vanilla bean.
Place the chopped pear and vanilla bean in a sealable glass jar.
Cover the pear and vanilla bean with brandy, ensuring there is enough space to add more liquid later.
Seal the jar and shake it, then let it steep for 2 days.
Remove the vanilla bean and continue steeping for another 3 days.
Chop the second pear, removing seeds and core.
In a pot, combine the chopped pear, water, and sugar.
Stir the mixture and bring it to a boil over medium heat, which should take approximately 5 to 7 minutes.
Reduce the heat and let the mixture simmer for an additional 5 minutes.
Allow the syrup mixture to cool.
After cooling, pour the syrup (including the fruit) into the steeping jar.
Shake the jar and let it steep for 2 more days.
Taste the mixture and if it has reached the desired flavor, strain it through a fine-mesh strainer and then a coffee filter.
Transfer the strained mixture into a bottle or jar.
Are you a fan of delicious and unique liqueurs? Do you enjoy the sweet and aromatic flavors of pears? If so, then you're in for a treat! In this article, we will explore the world of DIY pear liqueur and discover how you can create your very own batch at home. With just a few simple steps, some fresh pears, and a little bit of patience, you can enjoy a homemade pear liqueur that is sure to impress your friends and family.
There's something truly magical about making your own liqueur. It's a process that allows you to infuse your favorite flavors into a spirit, creating a unique and personal concoction that is unmatched by anything you can find on store shelves. And when it comes to pear liqueur, the possibilities are endless.
When it comes to making pear liqueur, the type of pears you choose can make all the difference. Look for ripe and fragrant pears that are bursting with flavor. The sweetness and juiciness of the pears will directly impact the final taste of your liqueur.
One of the key steps in making pear liqueur is allowing time for infusion. Just like a fine wine, the flavors of the pears need time to meld with the alcohol and develop a rich and complex taste. Patience is key here, as the longer you let the pears infuse, the more pronounced the flavor will become.
Before you start making your pear liqueur, it's important to gather all the necessary ingredients. You will need fresh pears, a high-quality vodka, and some sugar. Additionally, you may want to experiment with different spices or herbs to add an extra layer of complexity to your liqueur.
Once you have your pears, wash them thoroughly and remove the stems and seeds. You can peel the pears if you prefer a smoother liqueur, but leaving the skins on can add a subtle hint of bitterness that balances the sweetness.
Place the prepared pears in a large glass jar or container and pour the vodka over them. Make sure the pears are completely submerged in the alcohol. Seal the container tightly and store it in a cool, dark place. Let the pears infuse for at least two weeks, but preferably longer for a more intense flavor.
After the infusion period, it's time to add some sweetness to your pear liqueur. Dissolve sugar in warm water and add it to the infused vodka and pears. The amount of sugar you add will depend on your personal preference for sweetness. Stir well to ensure the sugar is fully dissolved.
Once the sugar is added, it's time to bottle your homemade pear liqueur. Use a funnel to transfer the liquid into clean, sterilized bottles. Seal the bottles tightly and let the liqueur age for a few more weeks to allow the flavors to further develop and harmonize.
Creating your own pear liqueur is a rewarding and delicious endeavor. With just a few simple steps, you can transform fresh pears into a flavorful and aromatic liqueur that is sure to impress. So why not give it a try? Experiment with different ingredients and techniques, and soon you'll have a homemade pear liqueur that is truly one-of-a-kind.
Yes! You can experiment with different types of pears to create unique flavor profiles.
If stored properly in a cool, dark place, your pear liqueur can last for several months.
Absolutely! The amount of sugar you add can be adjusted to suit your personal taste preferences.
Yes, you can experiment with different spirits like rum or brandy to create unique variations of pear liqueur.
While fresh pears are recommended for the best flavor, you can use frozen pears if fresh ones are not available.
Pear liqueur can be enjoyed on its own, over ice, or mixed into cocktails for a burst of flavor.
Absolutely! Bottled in beautiful containers, homemade pear liqueur makes a thoughtful and personalized gift for any occasion.
Yes! Pear liqueur can add a delightful flavor to desserts, sauces, and even savory dishes.
AprilCook, recipe developer and the heart of Chefwiz. More about April