DIY Hazelnut Liqueur Recipe
Rate this recipeBe the first to rate
 By AprilPublished
 Have you ever wanted to create your own delectable hazelnut liqueur?
 By AprilPublished
 Have you ever wanted to create your own delectable hazelnut liqueur?
In a sealable jar, mix together chopped hazelnuts, vodka, and brandy.
Shake the jar to combine the ingredients, then let it steep at room temperature for 2 weeks.
In a small saucepan, combine sugar and water. Heat the mixture until the sugar is fully dissolved.
Allow the sugar mixture to cool, then add it to the hazelnut mixture in the jar.
Shake the jar again and let the mixture steep for 3 days.
After 3 days, add a vanilla bean to the jar and continue to let it steep for an additional 3 to 5 days.
Taste the mixture occasionally to check if the desired flavor is achieved.
Once the desired flavor is achieved, strain the mixture through a sieve.
Strain it again through a cheesecloth or coffee filter to ensure a smooth texture.
Transfer the strained mixture to a container and refrigerate it for up to 2 months.
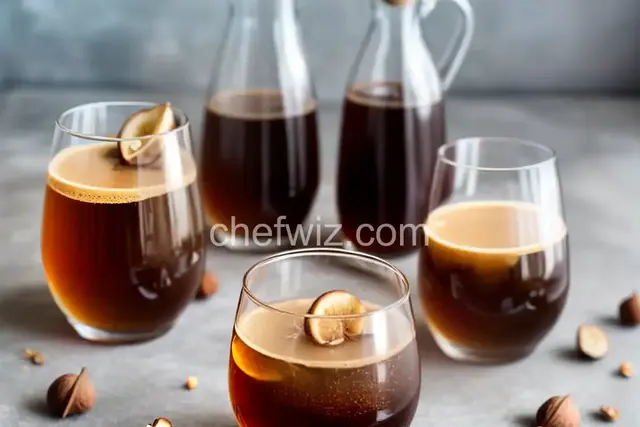
Have you ever wanted to create your own delectable hazelnut liqueur? Look no further! In this article, we'll guide you through the process of making your very own DIY hazelnut liqueur. Get ready to embark on a nutty adventure that will tantalize your taste buds and impress your friends!
Hazelnut liqueur is a delightful concoction that combines the rich, smooth flavors of hazelnuts with the warmth of alcohol. It's the perfect balance of sweetness and nuttiness, making it a versatile ingredient for cocktails or a delightful digestif on its own.
Imagine sipping on a velvety hazelnut liqueur, with its notes of toasted nuts and hints of vanilla, while enjoying the company of loved ones. It's a flavor experience that transports you to a cozy evening by the fireplace, or a sunny afternoon in an outdoor café.
Like any great recipe, the quality of the ingredients is key. When selecting hazelnuts for your liqueur, opt for fresh, high-quality nuts. You want hazelnuts that are plump, with a rich, oily texture. These will ensure that your liqueur is bursting with flavor.
Pro tip: Toasting your hazelnuts before using them in your recipe will enhance their natural nuttiness. Simply spread them on a baking sheet and roast them in the oven until they turn golden brown. The aroma alone will have you salivating!
Now comes the fun part – infusing the hazelnuts into your chosen alcohol. Many recipes call for vodka as the base, as its neutral flavor allows the hazelnut essence to shine through. However, feel free to experiment with other spirits like rum or whiskey for a unique twist.
Combine your toasted hazelnuts with your chosen alcohol in a clean glass jar, making sure the nuts are fully submerged. Seal the jar tightly and store it in a cool, dark place for at least two weeks. The longer you let it infuse, the more pronounced the hazelnut flavor will become.
While hazelnut liqueur is delicious on its own, you can take it to the next level by adding additional flavors. A touch of vanilla extract adds a subtle sweetness, while a hint of chocolate or coffee can elevate the nuttiness to new heights.
Remember, the beauty of making your own liqueur is that you have full control over the flavors. So, don't be afraid to experiment and create your signature hazelnut liqueur that perfectly suits your palate.
Once your hazelnut liqueur is ready, it's time to enjoy it in all its glory. Here are a few serving suggestions to get you started:
Creating your own hazelnut liqueur is a rewarding and delicious endeavor. With just a few simple ingredients and a little patience, you can craft a homemade liqueur that will impress even the most discerning palates. So, gather your hazelnuts, choose your favorite alcohol, and let the magic of DIY hazelnut liqueur unfold!
While hazelnuts are the traditional choice for hazelnut liqueur, you can certainly experiment with other nuts like almonds or walnuts. Just keep in mind that the flavor profile will be different.
When stored properly in a cool, dark place, your homemade hazelnut liqueur can last for up to a year. However, it's so delicious that it probably won't last that long!
Absolutely! If you prefer a sweeter liqueur, you can add a touch of simple syrup or honey to your homemade hazelnut liqueur. Just remember to taste and adjust accordingly.
If you prefer a non-alcoholic version, you can substitute the alcohol with a non-alcoholic vanilla extract or hazelnut syrup. While it won't have the same depth of flavor, it can still be a delicious alternative.
Definitely! Bottling your homemade hazelnut liqueur in a beautiful glass bottle and adding a personalized label can make it a thoughtful and unique gift for any occasion.
Absolutely! Hazelnut liqueur can add a wonderful flavor to baked goods like cakes, cookies, or even homemade ice cream. Just be mindful of the alcohol content and adjust accordingly.
Pre-roasted hazelnuts can work in a pinch, but toasting them yourself will yield a fresher and more vibrant flavor. So, if you have the time, it's worth the extra effort.
Store your hazelnut liqueur in a tightly sealed glass bottle in a cool, dark place. It's best to avoid exposure to direct sunlight, as it can affect the flavor and quality of the liqueur.
Now that you have all the information you need, it's time to gather your ingredients, unleash your creativity, and embark on the adventure of making your very own DIY hazelnut liqueur. Get ready to impress your taste buds and indulge in the nutty goodness that awaits!
AprilCook, recipe developer and the heart of Chefwiz. More about April