DIY Banana Liqueur
Rate this recipeBe the first to rate
 By AprilPublished
 Have you ever wanted to add a tropical twist to your cocktails?
 By AprilPublished
 Have you ever wanted to add a tropical twist to your cocktails?
In a sealable glass jar, place banana slices and pour in rum.
Seal the jar and shake to combine the ingredients.
Allow the mixture to steep at room temperature, away from direct sunlight, for 3 days.
After 3 days, strain out the banana slices from the liquid.
Filter the mixture through two layers of cheesecloth, pressing down to extract the liquid.
Repeat the straining process to remove any debris that may have passed through the initial straining.
Heat water and sugar in a pot over medium heat until it reaches a boiling point and forms a syrup. This usually takes around 7 to 10 minutes.
Let the syrup cool down.
Combine the cooled syrup with the banana infusion.
Seal the bottle or jar and shake well to mix the ingredients together.
Allow the mixture to rest for at least one day before using it.
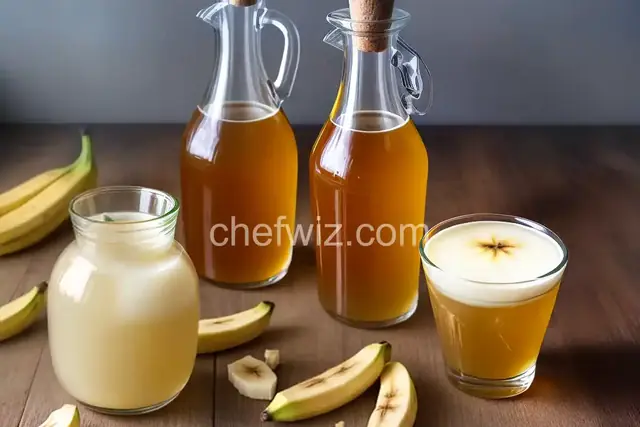
Have you ever wanted to add a tropical twist to your cocktails? Look no further than DIY banana liqueur! This homemade liqueur is bursting with the sweet and creamy flavor of ripe bananas, making it the perfect addition to your favorite drinks. In this article, we'll show you how to make your own banana liqueur from scratch, using simple ingredients and easy steps. So grab your apron and let's get started!
Before we dive into the process of making banana liqueur, let's make sure we have all the necessary ingredients. You'll need ripe bananas, sugar, water, vodka (or rum), and a mason jar. The number of bananas and the amount of other ingredients will depend on how much liqueur you want to make. Remember, the more bananas you use, the stronger the banana flavor will be in your liqueur!
Start by peeling and slicing the ripe bananas. The riper the bananas, the sweeter and more flavorful your liqueur will be. Once the bananas are sliced, place them in a mason jar and set aside.
In a saucepan, combine equal parts sugar and water. For example, if you're using one cup of sugar, add one cup of water. Heat the mixture over medium heat, stirring constantly until the sugar is completely dissolved. Once the syrup is ready, remove it from the heat and let it cool.
Once the simple syrup has cooled down, pour it over the sliced bananas in the mason jar. Make sure all the bananas are fully submerged in the syrup. This will help extract the banana flavor and sweetness into the liqueur.
Next, it's time to add the vodka (or rum) to the mason jar. The amount of alcohol you add will depend on how strong you want your liqueur to be. A good rule of thumb is to use equal parts banana mixture and alcohol. Close the mason jar tightly and give it a good shake to mix everything together.
Now comes the hard part - waiting! Place the mason jar in a cool, dark place and let the mixture infuse for at least two weeks. This will allow the flavors to meld together and create a delicious banana liqueur. Remember to give the jar a gentle shake every few days to ensure everything is well-mixed.
After two weeks of anticipation, it's finally time to enjoy the fruits of your labor! Strain the banana liqueur through a fine-mesh sieve or cheesecloth to remove any banana solids. The resulting liquid will be smooth, sweet, and bursting with banana flavor.
Now, the possibilities are endless! Use your homemade banana liqueur to elevate your favorite cocktails like a Banana Daiquiri or a Banana Colada. You can even drizzle it over ice cream or use it to create a delicious banana-infused dessert. Get creative and let your taste buds be your guide!
Yes, absolutely! In fact, using brown bananas will result in a more intense and ripe banana flavor in your liqueur.
Definitely! While vodka is traditionally used in banana liqueur recipes, rum can be a great alternative if you prefer a deeper and more complex flavor profile.
If stored properly in a cool, dark place, your homemade banana liqueur can last for up to a year. However, we doubt it'll stick around that long once you start enjoying it!
Of course! If you want to experiment with different flavors, feel free to add other fruits like strawberries or pineapple to the banana liqueur. Just remember to adjust the sugar and alcohol ratios accordingly.
Absolutely! Simply omit the alcohol and follow the same steps to create a delicious and flavorful banana syrup. This can be used as a topping for pancakes, waffles, or even mixed with sparkling water for a refreshing mocktail.
Yes, frozen bananas can be used to make banana liqueur. Just make sure to thaw them before slicing and adding them to the mason jar.
Definitely! If you prefer a sweeter liqueur, you can increase the amount of sugar in the simple syrup. Likewise, if you prefer a less sweet liqueur, you can reduce the amount of sugar used.
Absolutely! Pour your homemade banana liqueur into small, decorative bottles and add a personalized label. It makes for a thoughtful and unique gift for any cocktail lover!
In conclusion, making your own banana liqueur is a fun and rewarding DIY project. With just a few simple ingredients and some patience, you can create a delicious and versatile liqueur that will elevate your cocktails and desserts to a whole new level. So why not give it a try? Cheers to the sweet taste of success!
AprilCook, recipe developer and the heart of Chefwiz. More about April