DIY Amaro Recipe
Rate this recipeBe the first to rate
 By AprilPublished
 Are you a fan of the complex and bittersweet flavors of Amaro?
 By AprilPublished
 Are you a fan of the complex and bittersweet flavors of Amaro?
Grind the herbs and spices, including gentian root, using a mortar and pestle until they are roughly broken up. Alternatively, pulse them a few times in a food processor.
Transfer the ground herbs and spices to a glass jar that can be sealed.
Pour the alcohol into the jar with the ground herbs and spices.
Allow the mixture to steep at room temperature for a period of 3 weeks, making sure to shake it frequently.
After the initial steeping time, place the sugar and water in a pot and bring it to a boil over medium heat.
Cook the sugar and water mixture for about 5 minutes, or until the sugar is completely dissolved.
Let the syrup cool down completely.
Pour the cooled syrup into the jar containing the steeped mixture.
Reseal the jar and let it rest for an additional 2 weeks, stirring it frequently during this time.
After 2 weeks, open the jar and taste the mixture. If a stronger flavor is desired, reseal the jar and allow it to steep for another week.
Strain the mixture through cheesecloth to remove any solids.
Filter the strained mixture through a coffee filter or fresh cheesecloth into a bottle that can be sealed.
Store the bottle at room temperature for a maximum of 6 months.
Are you a fan of the complex and bittersweet flavors of Amaro? Have you ever wondered if you could create your own unique blend of this popular Italian liqueur? Well, wonder no more! In this article, we will guide you through the process of making your very own DIY Amaro recipe. Get ready to embark on a journey of flavors and discover the art of crafting your own bitter liqueur.
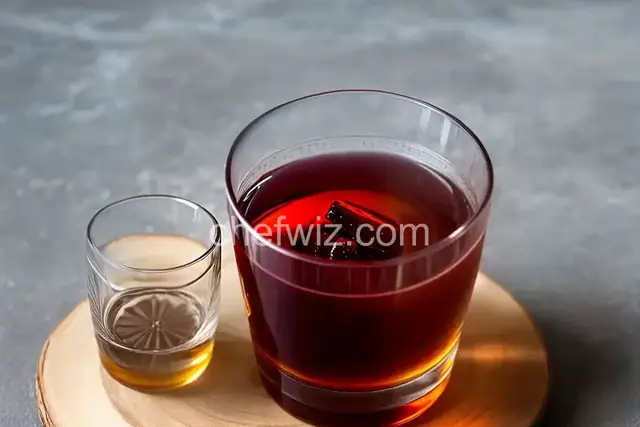
Amaro is a traditional Italian liqueur known for its bitter and herbal taste. It is made by infusing a variety of botanicals, such as herbs, spices, roots, and barks, in a base spirit. The mixture is then sweetened and aged, resulting in a complex and flavorful beverage that can be enjoyed on its own or used as a cocktail ingredient.
While there are many commercial Amaro brands available, making your own allows you to have complete control over the ingredients and flavor profile. You can experiment with different botanicals and proportions to create a truly unique and personalized Amaro that suits your taste preferences.
Before you dive into the world of DIY Amaro, let's gather the necessary ingredients and equipment. The beauty of making your own Amaro is that you can customize the recipe according to your preferences. Here are some commonly used ingredients:
In addition to the ingredients, you will need the following equipment:
Now that you have gathered all the ingredients and equipment, it's time to start the infusion process. Think of it as capturing the essence of the botanicals and extracting their flavors. Here's a step-by-step guide:
Start by cleaning and drying the herbs, spices, and citrus peels. This will ensure that there are no impurities that could affect the flavor of your Amaro. Chop or crush the ingredients to release their aromatic oils.
Place the botanicals in a glass jar or bottle and pour the base spirit over them. The ratio of botanicals to base spirit depends on your taste preferences. Start with equal parts and adjust as you go. Seal the jar tightly and give it a gentle shake to mix the ingredients.
Store the jar in a cool, dark place and let the botanicals infuse for at least two weeks. During this time, the flavors will meld together, creating a harmonious blend. Don't forget to give the jar a gentle shake every few days to encourage the infusion process. After two weeks, start tasting the Amaro to check the flavor intensity.
Once you are satisfied with the flavor, it's time to strain the liquid. Place a fine-mesh strainer or cheesecloth over a bowl and pour the infused Amaro through it. This will remove any solids and ensure a smooth and clear liqueur. Now, it's time to add the sweetener. Start with a small amount and gradually increase until you achieve the desired level of sweetness.
If you want to deepen the flavors and add complexity to your Amaro, consider aging it. Transfer the strained Amaro into an aging vessel, such as a wooden barrel or glass container, and let it rest for a few weeks or even months. During this time, the flavors will continue to evolve and mellow. Finally, use a funnel to transfer the aged Amaro into smaller bottles for easy storage and serving.
Congratulations! You have successfully embarked on the journey of creating your very own DIY Amaro. By experimenting with different botanicals, proportions, and aging techniques, you can craft a bitter liqueur that is truly unique to your taste. So, gather your ingredients, unleash your creativity, and enjoy the process of crafting your own Amaro. Cheers!
A1: Absolutely! Fresh herbs and spices can add a vibrant and aromatic quality to your Amaro. Just make sure to wash and dry them thoroughly before using.
A2: When stored properly in a cool, dark place, your homemade Amaro can last for several months to a year. However, it's best to consume it within a few months for optimal flavor.
A3: Yes, you can experiment with alternative sweeteners to customize the flavor of your Amaro. Just keep in mind that different sweeteners may affect the overall taste and consistency.
A4: Absolutely! Feel free to explore different herbs, spices, and citrus peels to create your own unique flavor profile. The possibilities are endless!
A5: You can enjoy your DIY Amaro both ways! It's delicious sipped on its own as a digestif or mixed into cocktails for added depth and complexity.
A6: Aging the Amaro is optional but highly recommended. It allows the flavors to mellow and develop, resulting in a smoother and more complex liqueur.
A7: Absolutely! Bott
AprilCook, recipe developer and the heart of Chefwiz. More about April