Danish Pastry Apple Bars
Rate this recipeBe the first to rate
 By AprilPublished
 Are you looking for a delicious and easy-to-make dessert that will wow your guests?
 By AprilPublished
 Are you looking for a delicious and easy-to-make dessert that will wow your guests?
Preheat the oven to 375 degrees F (190 degrees C).
In a large bowl, combine flour and salt. Cut in shortening until the mixture resembles coarse crumbs.
In a measuring cup, beat the egg yolk and add enough milk to make a total of 2/3 cup liquid. Stir this mixture into the flour mixture until all the flour is damp.
Divide the dough in half. On a floured surface, roll out half of the dough into a rectangle and fit it into a 9x13 inch pan.
In a large bowl, combine the apples, brown sugar, white sugar, cinnamon, and nutmeg. Place this apple mixture in the pan.
Roll out the remaining dough and place it over the apples. Seal the edges and cut slits in the top dough.
Beat the egg white until frothy and brush it on the crust.
Bake in the preheated oven for 50 minutes, or until the crust is golden brown.
You can also use this recipe with a blueberry filling. Combine 2 cups of white sugar, 1/2 cup of all-purpose flour, 1/2 teaspoon salt, and 1/2 teaspoon cinnamon for the blueberry filling.
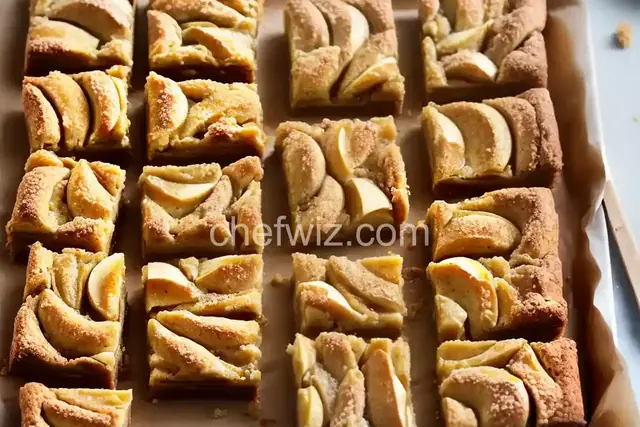
Are you looking for a delicious and easy-to-make dessert that will wow your guests? Look no further than Danish Pastry Apple Bars! These sweet and flaky treats are perfect for any occasion, whether it's a family gathering, a dinner party, or simply a sweet indulgence for yourself. With a buttery dough and a luscious apple filling, these bars are sure to become a favorite. Let's dive into the world of Danish pastry!
Danish pastry is a versatile and delicate dough that originated in Denmark. It is made by layering butter onto the dough, creating a flaky and buttery texture. This process, known as lamination, gives Danish pastry its signature lightness and richness.
Imagine biting into a warm Danish pastry apple bar and being greeted with a symphony of flavors. The crispness of the pastry, the sweetness of the apple filling, and the aroma of cinnamon and spices all come together in a heavenly combination. It's like taking a bite of pure happiness!
Making Danish Pastry Apple Bars may seem intimidating at first, but with a little practice and patience, anyone can master the art. The key is to take your time and follow the steps carefully. The reward? A batch of delectable bars that will impress even the most discerning taste buds.
The first step in creating these mouthwatering bars is making the Danish pastry dough. It starts with a simple mixture of flour, sugar, salt, yeast, and warm milk. Once the dough is mixed, it's time to add the butter. This is where the magic happens! The butter is carefully incorporated into the dough through a process of rolling and folding. The result is a dough with thin layers of butter, perfect for achieving that flaky texture.
While the dough is resting and rising, it's time to prepare the apple filling. Fresh apples are peeled, cored, and sliced before being tossed with sugar, cinnamon, and a hint of lemon juice. The mixture is then cooked until the apples are tender and fragrant, creating a sweet and aromatic filling that will make your taste buds dance with joy.
Now comes the fun part - assembling the bars! The risen dough is rolled out into a rectangle and topped with the apple filling. The edges are folded over to encase the filling, creating a beautiful pastry pocket. The bars are then baked until golden brown and fragrant, filling your kitchen with the irresistible aroma of freshly baked pastries.
Danish Pastry Apple Bars are a delightful treat that combines the richness of Danish pastry with the sweetness of apple filling. With a little time, effort, and love, you can create a batch of these delectable bars that will leave everyone asking for more. So why wait? Get your apron on, preheat that oven, and embark on a journey of culinary bliss!
Of course! While apple filling is traditional and delicious, you can experiment with different fruits such as berries, peaches, or even a combination of fruits.
Yes, you can make the dough ahead of time and refrigerate it for up to 24 hours. This allows the flavors to develop and makes the dough easier to work with.
Absolutely! Once baked and cooled, you can store the bars in an airtight container and freeze them for up to 3 months. Simply thaw them at room temperature or reheat them in the oven for a warm and flaky treat.
Definitely! Adding nuts or raisins to the apple filling can add extra texture and flavor to the bars. Feel free to get creative and customize the recipe to your liking.
Yes, you can drizzle a simple glaze made with powdered sugar and milk over the bars for an extra touch of sweetness. It adds a beautiful finishing touch and enhances the overall taste.
While the traditional recipe contains butter and wheat flour, you can experiment with alternative ingredients to make the bars gluten-free or dairy-free. There are many great substitutes available that can still yield delicious results.
Absolutely! You can adjust the size of the bars by cutting the dough and adjusting the amount of filling accordingly. Just keep in mind that the baking time may vary.
Yes, serving the bars with a scoop of vanilla ice cream or a dollop of whipped cream is a delightful way to elevate the dessert. The warm bars paired with the cold and creamy ice cream create a perfect harmony of flavors and textures.
AprilCook, recipe developer and the heart of Chefwiz. More about April