Cobweb Brownies
Rate this recipeBe the first to rate
 By AprilPublished
 Are you ready for a frightfully delicious treat this Halloween?
 By AprilPublished
 Are you ready for a frightfully delicious treat this Halloween?
Preheat the oven to 350 degrees Fahrenheit.
Grease a 9x13 inch baking pan with cooking spray.
Follow the instructions on the brownie mix box to prepare the batter.
Pour the prepared brownie batter into the greased pan.
Bake the brownies in the preheated oven for 20-25 minutes, or as instructed on the box.
Allow the brownies to cool to room temperature.
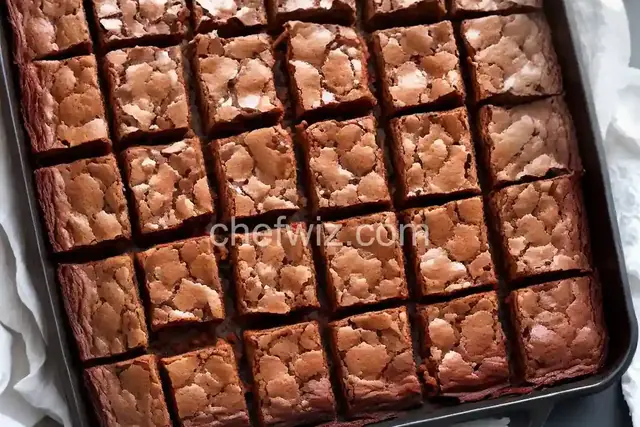
Cut the cooled brownies into squares.
Microwave the marshmallows for about 30 seconds, until gooey and melted. They may still appear lumpy.
Stir the melted marshmallows with a fork until smooth, and let them cool slightly.
Using two forks, stretch about a tablespoon of the melted marshmallow into a thin strand.
Drape the marshmallow strand over the brownies to create a web-like pattern.
Repeat the process to create more strands and complete the web-like pattern.
Serve the brownies immediately or store them for 1-2 days.
Are you ready for a frightfully delicious treat this Halloween? Look no further than Cobweb Brownies! These delectable desserts are perfect for satisfying your sweet tooth while adding a spooky touch to your Halloween celebrations. In this article, we'll dive into the world of Cobweb Brownies, exploring their origins, how to make them, and why they're the perfect addition to any Halloween gathering.
What makes Cobweb Brownies so special? Picture a rich, fudgy brownie base topped with a delicate, intricately designed white chocolate cobweb. The contrast between the dark brownie and the intricate web pattern is both visually stunning and deliciously satisfying. It's like a work of art that you can eat!
Much like a spider's web, these brownies are delicate and intricate. The web design is carefully crafted using melted white chocolate, giving it a hauntingly beautiful appearance. When you take a bite, you'll experience the perfect balance of rich chocolate and smooth, sweet white chocolate.
While the exact origins of Cobweb Brownies are unknown, they have become a Halloween staple in recent years. Perhaps it's the combination of the spooky cobweb design and the comforting taste of brownies that makes them so popular during this time of year. Regardless of their origins, Cobweb Brownies have taken the dessert world by storm.
Just like a spider spins its web to catch prey, Cobweb Brownies have a way of capturing the hearts and taste buds of anyone who tries them. They're a treat that embodies the essence of Halloween – a perfect blend of spooky and sweet.
Now that we've piqued your interest, let's dive into the process of making Cobweb Brownies. But first, a word of caution – these brownies require a bit of patience and precision. But trust us, the end result is worth the effort!
Every great Cobweb Brownie starts with a fudgy brownie base. The key to achieving that perfect fudgy texture lies in the balance of ingredients – rich chocolate, butter, sugar, and eggs. The result? A gooey, melt-in-your-mouth brownie that serves as the perfect canvas for your cobweb design.
Once your brownies have cooled, it's time to create the cobweb design. Melt some white chocolate and carefully drizzle it over the brownie surface in a circular motion. Use a toothpick or a skewer to create the intricate web pattern. It may take a bit of practice, but with each stroke, you'll see the cobweb come to life.
No cobweb is complete without a spider. For an extra touch of spookiness, you can add a chocolate spider on top of your Cobweb Brownies. It's the perfect finishing touch that will have your guests marveling at your Halloween baking skills.
Still not convinced that Cobweb Brownies deserve a spot on your Halloween menu? Here are a few reasons why they should be at the top of your baking list:
So go ahead, embrace the Halloween spirit and whip up a batch of Cobweb Brownies. Whether you're hosting a spooky soiree or simply indulging in some Halloween-themed treats, these brownies are sure to delight both young and old alike.
Absolutely! While white chocolate is commonly used, you can experiment with dark or milk chocolate for a different flavor profile.
Definitely! You can prepare the brownies in advance and add the cobweb design just before serving. This way, you can save time without compromising on taste.
Yes, you can use a box mix if you're short on time. Simply follow the instructions on the box and proceed with creating the cobweb design.
Cobweb Brownies can be stored in an airtight container at room temperature for up to 3-4 days. However, they are best enjoyed fresh.
Absolutely! Get creative and experiment with different patterns. You can try a spiral design, a star-shaped cobweb, or even a free-form web.
Yes, there are eggless brownie recipes available that will work perfectly for Cobweb Brownies. Simply substitute the eggs with a suitable egg replacer or another binding agent.
Yes, you can freeze Cobweb Brownies for up to 2 months. Just make sure to wrap them tightly in plastic wrap and place them in an airtight container before freezing.
Of course! Feel free to experiment with different nuts or even leave them out if you prefer a nut-free version. Walnuts, almonds, or pecans would all work well.
In conclusion, Cobweb Brownies are the perfect Halloween treat that combines spooky aesthetics with delicious flavors. They're a delightful addition to any Halloween gathering and are sure to impress both kids and adults. So why
AprilCook, recipe developer and the heart of Chefwiz. More about April