Classic Éclairs Recipe
Rate this recipeBe the first to rate
 By AprilPublished
 Are you ready to embark on a delicious journey to the world of éclairs?
 By AprilPublished
 Are you ready to embark on a delicious journey to the world of éclairs?
Place the oven rack in the middle position and preheat the oven to 350°F (177°C).
Create a template for the éclairs by drawing twelve 4 1/2-inch long lines, 2 inches apart, on a sheet of parchment paper using a ruler and a Sharpie. Flip the paper and place it on an aluminum half-sheet tray. Repeat this step with another piece of parchment paper and tray.
Pipe a small amount of choux paste under each corner of the parchment paper to hold it in place.
Start piping the first tray of éclair shells by holding the piping bag at a 45° angle. Drag the tip lightly along the surface of the paper, applying steady downward pressure to pipe a 1-inch wide line of choux following a single line on the template. Stop piping by ceasing the pressure and moving the pastry tip up and over towards the opposite end of the éclair before lifting away. Repeat this step until the tray is full. Smooth out any uneven éclairs by gently patting down bumps with a wet finger. Coat éclairs evenly with cooking spray.
Bake the first tray of éclair shells for approximately 30 minutes, or until they are puffed, golden brown, and hollow feeling. While the first tray is baking, repeat Step 4 for the second tray of éclair shells. Once the first tray is fully baked, remove it from the oven and place the second
Are you ready to embark on a delicious journey to the world of éclairs? These delightful pastries have been enchanting taste buds for centuries. With their light and airy texture, creamy fillings, and glossy chocolate glaze, éclairs are a true indulgence. In this article, we will explore the secrets behind creating the perfect classic éclairs. Let's dive in!
Éclair making is an art that requires precision, patience, and a touch of creativity. Just like a skilled painter, you need the right tools and techniques to create a masterpiece. But fear not! With a little practice and our expert tips, you can become an éclair connoisseur in no time.
At the heart of every éclair lies the delicate pâte à choux. This light pastry dough is what gives éclairs their signature shape and texture. It's like the canvas on which you'll create your edible work of art. The key to achieving the perfect pâte à choux lies in the balance of ingredients and the cooking process. So, let's gather our ingredients and get started!
Just like a painter who mixes different colors to create unique hues, you can experiment with various fillings and glazes for your éclairs. From classic vanilla pastry cream to indulgent chocolate ganache, the possibilities are endless. Let your imagination run wild and create éclairs that reflect your personal taste and style.
Even the most skilled artists make mistakes, and éclair making is no exception. But fear not, for we have identified some common pitfalls and how to avoid them. By steering clear of these mistakes, you'll be on your way to éclair perfection!
Just like a masterpiece can be ruined by improper brushstrokes, overbaking or underbaking your éclairs can lead to disappointment. You want your éclairs to be golden brown and crisp on the outside, while still being hollow and airy on the inside. Keep a close eye on them while they bake, and you'll avoid this common mistake.
Choosing the right filling for your éclairs is crucial. A common mistake is using a filling that is too thick or too runny, resulting in a less-than-perfect éclair experience. The filling should be creamy, smooth, and just the right consistency to complement the delicate pastry. Take your time to perfect your filling, and your éclairs will thank you!
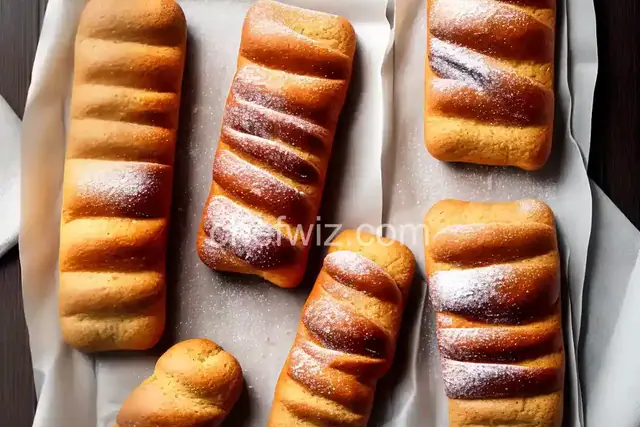
Now that you have mastered the art of éclair making, it's time to present your delicious creations to the world. Just like a painter who signs their artwork, you can add a personal touch to your éclairs. Dust them with powdered sugar, drizzle them with a chocolate glaze, or top them with a sprinkle of chopped nuts. The choice is yours!
Creating classic éclairs is like painting a masterpiece. With the right techniques, ingredients, and a sprinkle of creativity, you can create éclairs that will delight your taste buds and impress your friends and family. So, don your apron, grab your pastry bag, and let the éclair making adventure begin!
Yes, you can freeze éclairs. Just make sure to wrap them tightly in plastic wrap or place them in an airtight container before freezing. Thaw them at room temperature before enjoying.
Éclairs are best enjoyed fresh, but they can stay fresh for up to 2 days if stored properly in an airtight container in the refrigerator.
Absolutely! Feel free to experiment with different flavors for the filling. From fruity fillings like raspberry to exotic options like matcha, the choice is yours.
While éclairs require precision, they are not overly difficult to make. With practice and following the right techniques, you can master the art of éclair making.
Yes, you can get creative with the glaze for your éclairs. From white chocolate to caramel, the glaze options are endless. Let your taste buds guide you.
Traditional éclairs require eggs to achieve the desired texture and rise. However, there are eggless versions available that use alternative ingredients.
The best way to fill éclairs is by using a pastry bag fitted with a small round tip. Insert the tip into the éclair and gently squeeze the filling inside.
While the classic éclair shape is long and tubular, you can certainly get creative with different shapes. You can make mini éclairs, heart-shaped éclairs, or even square éclairs. Let your imagination run wild!
Yes, you can make éclairs in advance. Prepare the pastry dough, fillings, and glaze ahead of time, and assemble the éclairs just before serving for the best results.
AprilCook, recipe developer and the heart of Chefwiz. More about April