Classic Caramel Corn
Rate this recipeBe the first to rate
 By AprilPublished
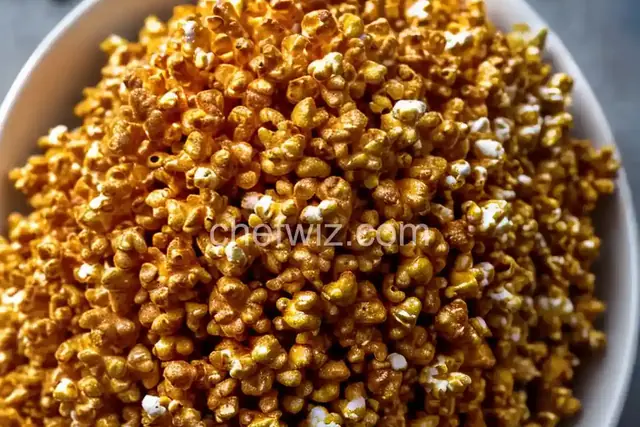
 Who doesn't love the sweet and crunchy goodness of caramel corn?
 By AprilPublished
 Who doesn't love the sweet and crunchy goodness of caramel corn?
Preheat the oven to 250 degrees F (120 degrees C).
Spray a large shallow roasting pan with cooking spray.
Fill the pan with popcorn.
Place the pan in the preheated oven.
In a heavy 2-quart saucepan over medium heat, combine brown sugar, corn syrup, butter, and salt.
Stir the mixture constantly until it comes to a boil.
Once boiling, stop stirring and let the mixture boil for 5 minutes.
Remove the saucepan from the heat.
Stir in baking soda and vanilla until the mixture is well combined.
Pour the syrup over the warmed popcorn.
Stir the popcorn until it is evenly coated with the syrup.
Return the pan to the oven and bake for 45 minutes, stirring occasionally.
Remove the pan from the oven.
Spread the popcorn onto a large foil sheet that has been greased with cooking spray.
Allow the popcorn to cool.
Break the popcorn apart into desired pieces.
Store the popcorn in a tightly covered container.
Who doesn't love the sweet and crunchy goodness of caramel corn? It's a classic treat that brings back memories of carnivals, movie nights, and cozy evenings by the fire. In this article, we'll explore the art of making homemade caramel corn, step by step. Get ready to indulge in a delightful blend of caramel, butter, and popcorn!
While you can easily find caramel corn at the store, there's something special about making it from scratch. Not only do you have control over the quality of ingredients, but you can also customize the flavors to your liking. Plus, the process itself is quite enjoyable – from popping the corn kernels to drizzling the caramel sauce, it's a sensory experience that's hard to beat.
Before diving into the caramel corn making process, it's crucial to gather all the necessary ingredients. You'll need fresh popcorn kernels, granulated sugar, butter, corn syrup, salt, and baking soda. Don't forget a large pot, a baking sheet, and parchment paper for easy cleanup. Once you have everything ready, it's time to start cooking!
First things first, you need to pop the popcorn kernels. Heat a large pot on the stovetop, add some oil, and carefully pour in the kernels. Cover the pot with a lid and wait for the symphony of popping sounds. Shake the pot occasionally to ensure even cooking. Once the popping slows down, remove the pot from the heat and let it cool slightly.
In a separate saucepan, melt the butter and stir in the sugar, corn syrup, and salt. Let the mixture come to a boil, stirring constantly. Once the sugar has dissolved completely, remove the saucepan from the heat and carefully stir in the baking soda. Be prepared for the sauce to foam up – this is what gives the caramel corn its light and airy texture.
Now comes the fun part – it's time to coat the popcorn in the luscious caramel sauce. Pour the sauce over the popped popcorn and use a spatula to gently toss and coat each kernel. Make sure every piece gets a generous drizzle of caramel goodness. Once all the popcorn is coated, spread it out on a baking sheet lined with parchment paper.
Preheat your oven to a low temperature, around 250°F (120°C). Place the baking sheet in the oven and let the caramel corn bake for about an hour, stirring every 15 minutes to ensure even heat distribution. After an hour, remove the baking sheet from the oven and let the caramel corn cool completely. As it cools, the caramel will harden, giving you that delightful crunch.
Once the caramel corn is completely cooled, it's time to dig in and enjoy! Serve it in a large bowl or portion it out into individual snack bags for easy on-the-go munching. Share it with friends and family, or keep it all to yourself – we won't judge! This homemade caramel corn is great for parties, movie nights, or whenever you're craving a sweet and salty treat.
There you have it – a complete guide to making classic caramel corn from scratch. From popping the corn kernels to coating them in a homemade caramel sauce, it's a process that's as rewarding as it is delicious. So why settle for store-bought when you can create your own batch of caramel heaven? Gather your ingredients, get your popcorn popping, and indulge in the sweet and crunchy delight of homemade caramel corn!
While you can certainly use microwave popcorn, popping your own kernels gives you more control over the flavor and quality of the final product. It's worth the extra effort!
Absolutely! Feel free to get creative and add your favorite nuts, chocolate chips, or even dried fruit to the caramel corn before baking. Just make sure to adjust the baking time accordingly.
If stored in an airtight container, homemade caramel corn can stay fresh for up to two weeks. However, it's so delicious that it rarely lasts that long!
Yes, you can use brown sugar for a richer flavor. Just keep in mind that it will affect the color and texture of the caramel sauce.
Yes, if you use gluten-free popcorn and ingredients, caramel corn can be gluten-free. Always double-check ingredient labels to ensure they are gluten-free certified.
Yes, you can substitute corn syrup with honey or maple syrup for a different flavor profile. However, the texture and consistency may vary slightly.
Absolutely! Just make sure you have a large enough pot and baking sheet to accommodate the doubled quantity.
If you don't have an oven, you can spread the coated popcorn on a baking sheet and let it air dry for a few hours. The caramel will firm up, giving you a delicious homemade treat.
AprilCook, recipe developer and the heart of Chefwiz. More about April