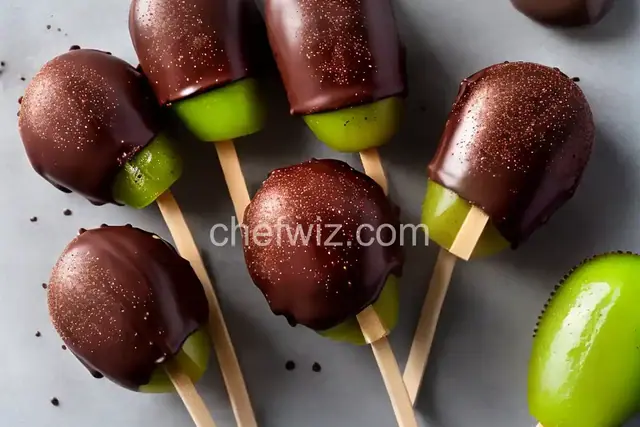
Who doesn't love the combination of sweet and tangy flavors? If you're a fan of chocolate and kiwi, then you're in for a treat with these delicious Chocolate Covered Kiwi Pops. They are the perfect summer snack or dessert, and they're incredibly easy to make. Here's everything you need to know about these mouthwatering treats.
Why Chocolate Covered Kiwi Pops?
Imagine the juiciness of fresh kiwi slices coated in a rich layer of smooth, velvety chocolate. The contrast of flavors and textures is simply irresistible. These popsicles are not only a delightful treat but also a refreshing way to enjoy the goodness of fruit. Plus, they are visually appealing, making them a hit at parties and gatherings.
How to Make Chocolate Covered Kiwi Pops
Creating these delightful treats is easier than you might think. All you need are a few simple ingredients and some popsicle sticks. Start by slicing fresh kiwis into thick rounds. Insert a popsicle stick into each kiwi slice, and freeze them for a couple of hours until firm. Then, melt some chocolate and dip each frozen kiwi slice into the melted chocolate, ensuring it's fully coated. Place the chocolate-covered kiwi pops back in the freezer until the chocolate hardens. And voila! Your tasty treats are ready to be enjoyed!
Tips for the Best Chocolate Covered Kiwi Pops
To make your Chocolate Covered Kiwi Pops truly outstanding, here are a few tips to keep in mind:
1. Choose Ripe Kiwis:
Opt for ripe kiwis that are slightly soft to the touch. They will have a sweeter flavor and a vibrant green color.
2. Use Good Quality Chocolate:
The quality of the chocolate you use will greatly impact the taste of your pops. Choose a high-quality chocolate that melts smoothly and has a rich, chocolatey flavor.
3. Get Creative with Toppings:
Add some extra pizzazz to your Chocolate Covered Kiwi Pops by sprinkling them with chopped nuts, coconut flakes, or colorful sprinkles. Get creative and let your taste buds guide you!
Enjoying Your Chocolate Covered Kiwi Pops
Now that your Chocolate Covered Kiwi Pops are ready, it's time to indulge in their deliciousness. Take a bite and savor the perfect combination of tart kiwi and smooth chocolate. These popsicles are a delightful treat on a hot summer day or a lovely addition to any dessert spread. Share them with friends and family or keep them all to yourself – the choice is yours!
In Conclusion
Chocolate Covered Kiwi Pops are a simple yet delightful treat that combines the sweetness of chocolate with the tanginess of kiwi. They are visually appealing, easy to make, and perfect for any occasion. So, gather your ingredients, get creative with toppings, and indulge in the deliciousness of these mouthwatering popsicles. Your taste buds will thank you!
Frequently asked questions
- Can I use other fruits instead of kiwi?
Absolutely! While kiwi is a fantastic choice, you can experiment with other fruits like strawberries, bananas, or even pineapple. The possibilities are endless!
- Can I use white chocolate instead of dark chocolate?
Of course! If you prefer the creamy sweetness of white chocolate, go ahead and use it instead. It will create a different flavor profile but will still be equally delicious.
- Can I make these pops ahead of time?
Yes, you can! These popsicles can be prepared in advance and stored in the freezer for up to a week. Just make sure to keep them in an airtight container to prevent freezer burn.
- Are Chocolate Covered Kiwi Pops vegan-friendly?
They can be! Simply choose a vegan-friendly chocolate brand and ensure that all the ingredients used are plant-based. You can also experiment with dairy-free alternatives like coconut milk chocolate for a vegan twist.
- Can I add a touch of citrus to the pops?
Absolutely! If you want to enhance the tanginess of the kiwi pops, you can add a squeeze of lemon or lime juice to the melted chocolate before dipping the kiwi slices. It will add a refreshing zing to the pops.
- How long does it take for the chocolate to harden?
It typically takes around 10-15 minutes for the chocolate to harden once the popsicles are back in the freezer. However, it's best to leave them in for a bit longer to ensure the chocolate is fully set.
- Can I use frozen kiwi slices instead of fresh?
Fresh kiwi slices work best for this recipe as they hold their shape better when dipped in chocolate. Frozen kiwi slices may become too soft and watery, affecting the overall texture of the pops.
- Can I make mini versions of these pops?
Absolutely! If you prefer bite-sized treats, you can cut the kiwi slices into smaller rounds and use shorter popsicle sticks. They make for a delightful bite-sized treat that's perfect for parties or snacking.
 By AprilPublished