Chocolate Covered Caramels
Rate this recipeBe the first to rate
 By AprilPublished
 Who can resist the melt-in-your-mouth goodness of chocolate covered caramels?
 By AprilPublished
 Who can resist the melt-in-your-mouth goodness of chocolate covered caramels?
Grease an 8 x 8 inch square pan.
In a heavy 4 quart saucepan, melt the butter over medium heat.
Add the brown sugar, corn syrup, and milk to the saucepan.
Stir constantly and heat the mixture to a temperature between 242 to 248 degrees F (116 to 120 degrees C). This can be tested by dropping a small amount of syrup into cold water, which should form a firm but pliable ball.
Remove the saucepan from heat and stir in the vanilla extract.
Pour the mixture into the prepared pan.
Allow the caramel to cool and set.
Once set, cut the caramel into 1-inch squares.
Chill the caramel squares in the refrigerator until firm.
In a double boiler or microwave-safe bowl, melt the chocolate with 1 tablespoon of butter.
Stir the chocolate until smooth.
Dip each caramel square into the melted chocolate.
Place the dipped caramel squares on wax paper to cool.
Who can resist the melt-in-your-mouth goodness of chocolate covered caramels? The perfect combination of rich, creamy chocolate and gooey caramel creates a treat that is simply irresistible. Whether you're looking for a sweet indulgence or a homemade gift, these delectable treats are sure to satisfy any sweet tooth.
Making chocolate covered caramels is like creating a work of art. Just like a painter carefully selects their brushes and colors, you too must choose the right ingredients and tools to create the perfect treat. The process requires precision and patience, but the end result is worth every effort.
The first step to creating delicious chocolate covered caramels is choosing the right ingredients. High-quality chocolate and soft, chewy caramels are essential for a delectable treat. Opt for dark, milk, or white chocolate, depending on your preference. And don't forget to add a sprinkle of sea salt or chopped nuts for an extra burst of flavor.
Once you have your ingredients ready, it's time to prepare the caramels. Gently melt them in a saucepan over low heat, stirring constantly to avoid burning. The caramel should be smooth and creamy, ready to be transformed into a delectable treat.
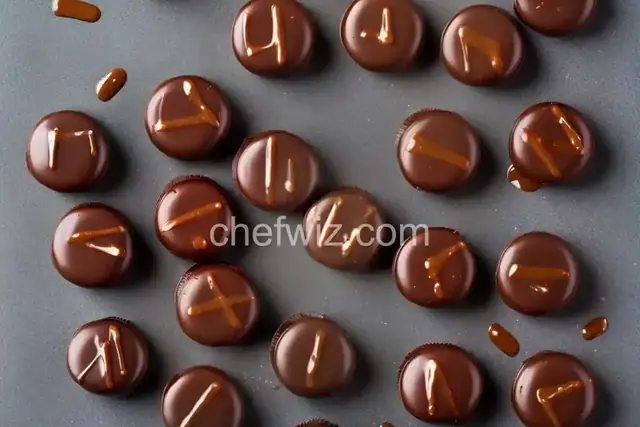
Now comes the fun part - dipping the caramels in chocolate and adding your favorite toppings. Just like an artist adds the finishing touches to their masterpiece, you too can get creative with your chocolate covered caramels. Dip each caramel in the melted chocolate, ensuring it's fully coated. Then, place it on a parchment-lined baking sheet and let your imagination run wild. Sprinkle some colorful sprinkles, drizzle some caramel sauce, or create a marbled effect with a contrasting chocolate color.
After you've decorated your caramels, it's time for some patience. Allow them to cool and set at room temperature or in the refrigerator. This waiting game is like the anticipation of seeing a completed work of art. The longer you wait, the more the flavors meld together, creating a truly heavenly treat.
Chocolate covered caramels are a delightful treat that combines the best of both worlds - rich, velvety chocolate and gooey caramel. Making these delectable treats is like creating a work of art, where every step requires precision and patience. With the right ingredients, a little creativity, and a sprinkle of love, you can create a treat that will satisfy any sweet tooth. So go ahead, indulge in the decadence of chocolate covered caramels and experience a moment of pure bliss.
Absolutely! Store-bought caramels work just as well for making chocolate covered caramels. Just make sure they are soft and chewy.
The choice of chocolate is entirely up to you. Dark, milk, or white chocolate all work well. Choose your favorite or mix and match for a variety of flavors.
Of course! Get creative with your toppings. Sprinkle some sea salt, chopped nuts, or even crushed cookies for an extra burst of flavor and texture.
If stored in an airtight container, these treats can last for up to two weeks. But let's be honest, they'll probably be devoured long before then!
Absolutely! These chocolate covered caramels are great for making ahead of time. They make for a perfect homemade gift or a sweet treat for any occasion.
Yes, you can freeze these treats for future indulgence. Just make sure to store them in an airtight container or freezer bag to prevent freezer burn.
Absolutely! Experiment with different flavors of caramels, such as salted caramel or even fruit-flavored caramels, for a fun twist on the classic treat.
While you can use a chocolate coating, melting chocolate creates a smoother finish and allows for more creativity when decorating your caramels.
AprilCook, recipe developer and the heart of Chefwiz. More about April