Chocolate Covered Banana Pops
Rate this recipeBe the first to rate
 By AprilPublished
 Who doesn't love the combination of chocolate and bananas? It's a match made in dessert heaven!
 By AprilPublished
 Who doesn't love the combination of chocolate and bananas? It's a match made in dessert heaven!
Start by peeling the bananas and cutting each one in half crosswise.
Insert a craft stick into each banana half.
Place the banana halves on a tray and cover them with plastic wrap.
Put the tray in the freezer and let the bananas freeze for about 3 hours.
Take out the peanuts and place them in a shallow dish or on a plate.
In the top pan of a double boiler, melt the chocolate over slightly simmering water. Stir frequently and make sure the water doesn't touch the bottom of the pan.
Pour the melted chocolate into a tall glass.
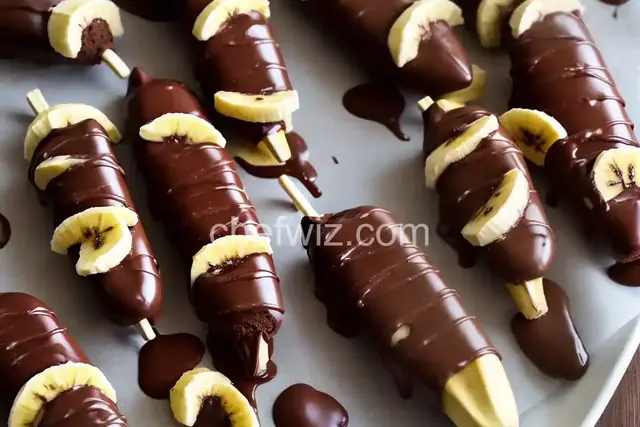
Take the frozen banana halves and dip each one into the chocolate, turning it to coat the entire surface.
Immediately roll the chocolate-covered banana in the peanuts.
Place the coated banana on a tray lined with waxed paper.
Serve the frozen bananas immediately or wrap them individually in plastic wrap or waxed paper and freeze for up to 2 weeks.
Who doesn't love the combination of chocolate and bananas? It's a match made in dessert heaven! Whether you're a kid or a kid at heart, chocolate covered banana pops are a tasty and fun treat that will satisfy any sweet tooth. In this article, we'll dive into the wonderful world of chocolate covered banana pops, exploring their history, the different variations, and how to make them at home. So grab a banana and let's get started!
Chocolate covered banana pops have been enjoyed for decades, bringing joy to people of all ages. The exact origin of this delightful treat is unclear, but it's believed to have become popular in the early 20th century. Some say it was inspired by frozen chocolate-covered bananas sold at amusement parks and fairs. Others credit inventive home cooks who wanted to create a simple and delicious dessert using readily available ingredients.
Part of the appeal of chocolate covered banana pops is their versatility. There are endless variations to satisfy different tastes and dietary preferences. From classic milk chocolate to dark chocolate, white chocolate, or even vegan options, there's a flavor for everyone. You can also customize your pops with various toppings like chopped nuts, sprinkles, shredded coconut, or drizzles of caramel or peanut butter. The possibilities are truly endless!
Creating your own chocolate covered banana pops is a fun and easy project that the whole family can enjoy. Start by gathering your ingredients: ripe bananas, chocolate (of your choice), and any desired toppings. Peel the bananas and cut them in half. Insert popsicle sticks into each banana half, creating a handle for easy dipping. Place the bananas on a parchment-lined baking sheet and freeze them until firm.
Meanwhile, melt your chocolate in a microwave-safe bowl or on the stovetop, making sure to stir it frequently to prevent burning. Once the chocolate is smooth and melted, it's time to dip your frozen banana pops. Hold a banana by the stick and dip it into the melted chocolate, swirling it around to coat it completely. Allow any excess chocolate to drip off before placing it back on the baking sheet.
If you're adding toppings, sprinkle or drizzle them onto the chocolate before it hardens. Once all your banana pops are coated, return them to the freezer for at least an hour, or until the chocolate is completely firm. Once they're ready, indulge in the sweet and creamy delight of chocolate covered banana pops!
Chocolate covered banana pops are a simple yet delicious treat that can bring joy to any occasion. Whether you're enjoying them on a hot summer day or as a special dessert after a meal, these popsicles are sure to satisfy your cravings. So why not give them a try? With their endless variations and easy preparation, chocolate covered banana pops are a delightful treat that will leave you wanting more. So go ahead, get creative, and enjoy the sweet combination of chocolate and bananas!
Absolutely! You can use milk chocolate, dark chocolate, white chocolate, or even vegan chocolate depending on your preferences and dietary restrictions.
Yes, you can customize your pops with a variety of toppings such as chopped nuts, sprinkles, shredded coconut, or drizzles of caramel or peanut butter. Get creative and have fun!
It's best to freeze your banana pops for at least an hour, or until the chocolate is completely firm. This ensures that they hold their shape and are easy to enjoy.
Yes, you can make them in advance and store them in an airtight container in the freezer. They will keep well for up to a week, allowing you to enjoy them whenever you have a craving.
While they do contain fruit, chocolate covered banana pops are still a dessert and should be enjoyed in moderation. However, they can be a healthier alternative to store-bought ice cream or other sugary treats.
Freezing the bananas before dipping them in chocolate helps the chocolate set quickly and ensures a firm texture. If you prefer a softer texture, you can skip the freezing step, but the chocolate may take longer to harden.
Absolutely! You can experiment with other fruits like strawberries, pineapple chunks, or even frozen grapes. Just make sure to adjust the dipping and freezing times accordingly.
If you have leftover melted chocolate, you can let it cool and harden, then store it in an airtight container at room temperature. When you're ready to use it again, simply reheat it gently until it melts.
If you don't have popsicle sticks, you can use wooden skewers, plastic straws, or even fork handles as handles for your banana pops. Just make sure they're sturdy enough to hold the weight of the chocolate and frozen banana.
AprilCook, recipe developer and the heart of Chefwiz. More about April