Chipas (Argentinean Cheese Bread)
Rate this recipeBe the first to rate
 By AprilPublished
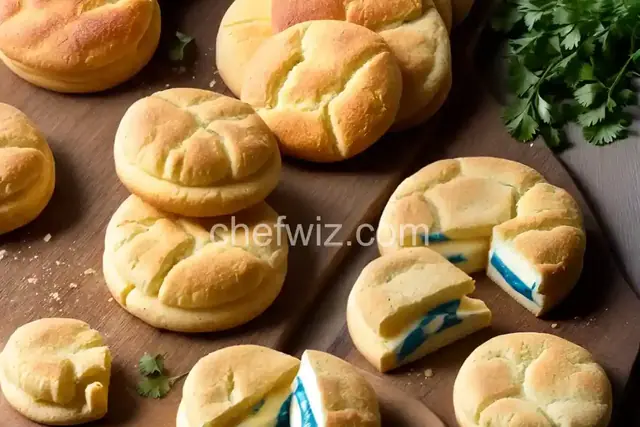
 Have you ever tried a snack that's crispy on the outside, soft on the inside, and oozing with cheesy goodness?
 By AprilPublished
 Have you ever tried a snack that's crispy on the outside, soft on the inside, and oozing with cheesy goodness?
Preheat the oven to 350 degrees F (175 degrees C).
Grease a baking sheet with cooking spray.
In a large bowl, combine the egg, milk, cheese, and butter.
Add the tapioca starch and flour to the mixture, stirring until a dough forms.
On a lightly floured surface, knead the dough for 2 minutes.
Roll the dough into golf ball-sized pieces.
Place the dough balls onto the prepared baking sheet.
Bake in the preheated oven for 10 to 15 minutes, or until golden brown.
Have you ever tried a snack that's crispy on the outside, soft on the inside, and oozing with cheesy goodness? If not, then you're in for a treat! Chipas, also known as Argentinean cheese bread, is a delightful delicacy that will have your taste buds dancing with joy. In this article, we'll explore the origins of chipas, why they're so popular, and how you can make them at home. So, grab a cup of tea or coffee, and let's dive into the world of chipas!
Chipas have a fascinating history that dates back to the indigenous Guarani people in what is now modern-day Paraguay and Argentina. The Guarani used to make a similar bread called "mbaipy," which was made from cassava flour and cooked over an open fire. When the Spanish arrived in South America, they introduced wheat flour and cheese to the region. The Guarani quickly adapted their traditional recipe to include these new ingredients, giving birth to the chipas we know and love today.
Chipas have gained immense popularity not only in Argentina but also in neighboring countries like Paraguay and Brazil. There are several reasons why chipas have become a beloved snack:
Now that you know why chipas are so popular, let's dive into the process of making them at home. The key ingredients you'll need are:
To make chipas, you'll mix these ingredients together to form a dough, shape the dough into small balls, and bake them in the oven until they are golden brown and crispy. The result? A batch of mouthwatering chipas that will make your home smell irresistible!
Chipas are a delightful snack that brings together the flavors of cheese, butter, and a touch of sweetness. Whether you enjoy them as a quick bite or as a side dish, chipas are sure to satisfy your cravings. With just a few simple ingredients, you can recreate this Argentinean delicacy in the comfort of your own kitchen. So, why not give it a try? Your taste buds will thank you!
Yes, you can substitute cassava flour with tapioca flour or a gluten-free flour blend. However, keep in mind that the texture and taste may vary slightly.
Absolutely! Chipas freeze well and can be stored in the freezer for up to a month. Just make sure to thaw them before reheating.
While traditional chipas use hard cheese, you can experiment with different cheeses to add your own twist. Cheddar, mozzarella, or even blue cheese can work beautifully!
Eggs play a crucial role in binding the ingredients together and giving chipas their characteristic texture. However, if you have an egg allergy, you can try using a vegan egg substitute or mashed bananas as a replacement.
Absolutely! Feel free to get creative and add herbs, spices, or even chopped vegetables to the dough to customize the flavor of your chipas.
Traditionally, chipas are shaped into small balls or rings. However, you can experiment with different shapes like twists, sticks, or even mini muffins to make them more visually appealing.
Chipas are best enjoyed fresh out of the oven when they are still warm and crispy. However, they can also be enjoyed at room temperature.
Absolutely! If your chipas have cooled down, you can reheat them in a preheated oven for a few minutes to regain their crispiness.
AprilCook, recipe developer and the heart of Chefwiz. More about April