Cheese Taco Shells
Rate this recipeBe the first to rate
 By AprilPublished
Are you tired of the same old tortilla shells for your tacos?
 By AprilPublished
Are you tired of the same old tortilla shells for your tacos?
Preheat the oven to 375 degrees.
Line a baking sheet with parchment paper and spray it with cooking spray.
Place 1/2 cup portions of cheddar on the baking sheet and sprinkle them with pepper.
Bake the cheese until it is melted and slightly crispy, which should take about 5 to 7 minutes.
Use a paper towel to blot any excess grease from the cheese.
While the cheese is baking, prepare four stations by placing two upside-down glasses and a wooden spoon as a bridge at each station.
Immediately transfer the baked cheese mounds to the wooden spoons using a spatula, allowing them to form shells. Let them cool.
In a large skillet over medium heat, heat oil and add onions. Cook the onions until they are soft, which should take about 5 minutes.
Add ground beef to the skillet and cook it until it is no longer pink, which should take about 6 minutes. Remove any excess fat and season the beef with taco seasoning.
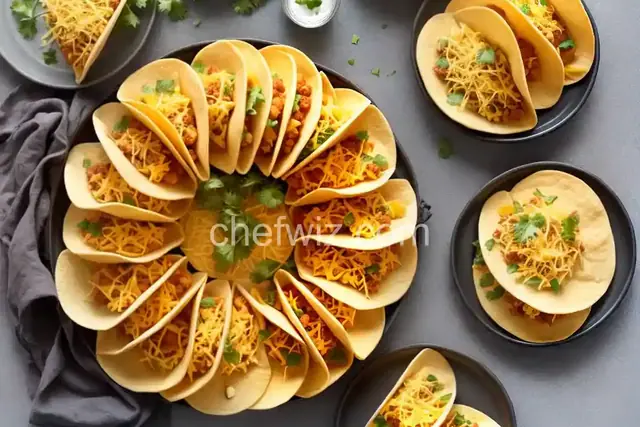
Assemble the tacos by filling the cheese shells with the cooked beef and topping them with lettuce, tomatoes, and hot sauce.
Are you tired of the same old tortilla shells for your tacos? Do you crave something different, something that will take your taco experience to a whole new level? Look no further - cheese taco shells are here to tantalize your taste buds! In this article, we will explore the wonderful world of cheese taco shells, their benefits, and how to make them. Get ready for a cheesy adventure!
Imagine biting into a taco with a crispy shell that is not only flavorful but also made entirely of cheese. Sounds like a dream, right? Well, cheese taco shells can turn this dream into a reality. These shells are made by melting and shaping cheese into the perfect vessel for your taco fillings. The result is a crunchy and cheesy delight that adds a whole new dimension to your taco experience.
Creating the perfect cheese taco shell is an art in itself. It requires the right type of cheese, the right cooking technique, and a dash of creativity. While there are various types of cheese that can be used, it's important to choose a cheese that melts well and has enough structural integrity to hold its shape. Popular choices include cheddar, mozzarella, and Monterey Jack.
Once you have your cheese, the next step is to melt it and shape it into a taco shell. This can be done by either using a non-stick pan or baking the cheese in the oven. The melted cheese is then cooled and shaped into a taco shell. The result is a crispy and cheesy shell that is ready to be filled with your favorite taco ingredients.
Aside from the delicious taste, cheese taco shells offer several benefits that make them a popular choice among taco enthusiasts. Firstly, they are a great low-carb alternative for those who are watching their carbohydrate intake. By replacing the traditional tortilla shell with a cheese shell, you can enjoy your tacos guilt-free.
Secondly, cheese taco shells are gluten-free, making them a suitable option for those with gluten sensitivities or celiac disease. With cheese taco shells, you don't have to compromise on taste or texture while adhering to a gluten-free diet.
Lastly, cheese taco shells are incredibly versatile. You can experiment with different types of cheese, add spices or herbs to the cheese mixture for added flavor, or even mix different types of cheese together to create unique combinations. The possibilities are endless!
Now that you know the benefits of cheese taco shells, let's dive into the process of making them. Here is a step-by-step guide:
As mentioned earlier, select a cheese that melts well and has enough structure to hold its shape.
Melt the cheese either on a non-stick pan or in the oven until it is fully melted and bubbly.
Carefully remove the melted cheese from the pan or oven and shape it into a taco shell form while it is still pliable.
Allow the cheese to cool and harden into the desired shape. This will give it that perfect crunchy texture.
Once the cheese taco shell has cooled and hardened, it's time to fill it with your favorite taco fillings. Whether it's seasoned ground beef, grilled chicken, or vegetarian options, the choice is yours. Let your creativity run wild!
So, next time you're craving tacos, why not try something different and make cheese taco shells? It's a simple yet exciting way to elevate your taco experience. With their crispy texture, cheesy goodness, and endless possibilities, cheese taco shells are sure to become a new favorite in your culinary repertoire. Give it a try and let your taste buds embark on a cheesy adventure!
While there are various types of cheese you can use, it's important to choose a cheese that melts well and has enough structural integrity to hold its shape. Popular choices include cheddar, mozzarella, and Monterey Jack.
Yes, cheese taco shells are a great low-carb alternative to traditional tortilla shells. By using cheese as the shell, you can enjoy your tacos without the guilt of excess carbohydrates.
Yes, cheese taco shells are gluten-free, making them a suitable option for those with gluten sensitivities or celiac disease. Enjoy your tacos without worrying about gluten!
Absolutely! Adding spices or herbs to the cheese mixture can enhance the flavor of your cheese taco shells. Try adding some chili powder, garlic powder, or even dried herbs like oregano or basil.
Definitely! Mixing different types of cheese together can create unique flavor combinations for your cheese taco shells. Experiment with different cheeses and find your perfect blend.
Yes, you can make cheese taco shells in advance. Simply store them in an airtight container to maintain their crispiness. When you're ready to eat, fill them with your desired taco ingredients and enjoy!
While it's best to enjoy cheese taco shells fresh for that perfect crunch, you can reheat them if needed. Place them in a preheated oven or toaster oven for a few minutes until they regain their crispiness.
Absolutely! If you don't have a non-stick pan, you can make cheese taco shells by baking the melted cheese in the oven. Simply line a baking sheet with parchment paper and shape the melted cheese on it before baking.
So there you have it - everything you need to know about cheese taco shells. From their benefits to the step-by-step process of making them, you're now equipped to embark on a cheesy taco adventure. So, why wait? Get your ingredients ready, melt that cheese, and enjoy the crispy, cheesy goodness of cheese taco shells!
AprilCook, recipe developer and the heart of Chefwiz. More about April