Cereal-Bowl Cake
Rate this recipeBe the first to rate
 By AprilPublished
 Have you ever wanted to enjoy a bowl of cereal in a whole new way?
 By AprilPublished
 Have you ever wanted to enjoy a bowl of cereal in a whole new way?
Prepare a 2 1/2-quart ovenproof bowl by coating it with cooking spray.
Follow the instructions on the cake mix and prepare the batter. Pour the batter into the prepared bowl.
Bake the cake at 325 degrees F until a toothpick inserted into the center comes out clean. This should take about 1 hour.
Allow the cake to cool completely.
Remove the cake from the bowl by unmolding it and place it with the rounded side facing down.
Using a long serrated knife, trim off the domed top of the cake to make it level.
Use a small serrated knife to cut a circle into the top of the cake, about 3/4 inch from the edge and 1 1/2 inches deep. Remove the cake from the middle of the circle using your fingers or a fork.
Flip the cake over and place it on a cardboard circle or plate lined with wax paper.
Spread frosting on the rounded side of the cake, leaving the flat base unfrosted.
Cut out a small cardboard circle and place it on the unfrosted base of the cake.
Flip the cake over onto another piece of wax paper.
Frost the lip and the inside of the cake. The inside doesn't have to be perfectly frosted as it will be covered with ice cream.
Transfer the cake to the freezer and let it
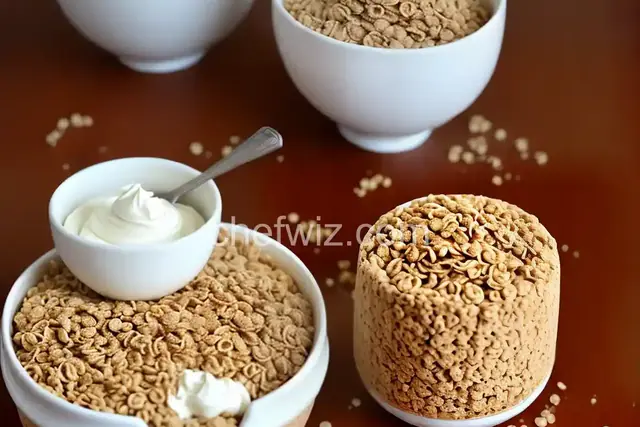
Have you ever wanted to enjoy a bowl of cereal in a whole new way? Look no further than the delightful Cereal-Bowl Cake! This innovative dessert takes the classic combination of cereal and milk and transforms it into a scrumptious cake that is sure to satisfy your cravings. Whether you're a cereal lover or simply looking for a unique dessert idea, this cake is a must-try. Let's dive into the world of Cereal-Bowl Cake and discover why it's a hit among food enthusiasts of all ages.
Imagine a cake that captures the essence of your favorite cereal. Each bite delivers a burst of flavors, reminiscent of those early morning breakfasts. The soft and moist cake layers perfectly mimic the texture of cereal soaked in milk. With every slice, you'll experience the nostalgia and joy of diving into a bowl of cereal, but with an exciting twist!
This delightful dessert is not only visually appealing but also incredibly customizable. Just like choosing your favorite cereal and milk combination, you can personalize your Cereal-Bowl Cake to suit your taste buds. Whether you prefer fruity flavors, chocolatey goodness, or the classic cereal staples, the possibilities are endless.
Creating a Cereal-Bowl Cake is a fun and creative process that allows you to let your imagination run wild. Start by selecting your favorite cereal and gathering the necessary ingredients to bake the cake layers. Once the cake is baked and cooled, the real fun begins!
Spread a layer of creamy frosting on top of the first cake layer, just like pouring milk over your cereal. Then, sprinkle a generous amount of your chosen cereal on top, adding an extra crunch and burst of flavor. Repeat this process with the second cake layer, frosting, and cereal. Finally, top it all off with a dollop of whipped cream or a drizzle of chocolate sauce.
Whether it's a birthday celebration, a family gathering, or a simple get-together with friends, the Cereal-Bowl Cake is guaranteed to be a crowd-pleaser. Its unique concept and delicious taste make it the perfect dessert for any occasion. Not only will it wow your guests, but it'll also bring back cherished memories of childhood breakfasts.
Children and adults alike will adore this whimsical cake. It's a fantastic way to introduce little ones to the world of baking and get them excited about trying new flavors. Plus, it's an excellent opportunity for adults to embrace their inner child and indulge in a playful and tasty treat.
Yes, absolutely! The beauty of this dessert is that it can be customized to your liking. Feel free to use your favorite cereal or mix and match different varieties to create a unique flavor combination.
No, the cake layers are moist and delicious without being soggy. They perfectly mimic the texture of cereal soaked in milk, providing a delightful eating experience.
While it's best to enjoy the cake fresh, you can prepare the cake layers in advance and assemble them closer to serving time. This way, you can still enjoy the flavors and textures at their best.
Absolutely! The frosting choice is entirely up to you. Whether you prefer a classic buttercream, a cream cheese frosting, or a whipped cream topping, it will all work beautifully with the Cereal-Bowl Cake.
Yes, you can easily make a gluten-free version of the Cereal-Bowl Cake by using gluten-free flour and ensuring that your chosen cereal is also gluten-free. This way, everyone can enjoy this delightful treat.
Absolutely! Fresh fruit can be a wonderful addition to your Cereal-Bowl Cake. Whether you want to add sliced strawberries, blueberries, or even banana slices, it will enhance the flavors and add a refreshing touch.
Yes, you can make individual-sized Cereal-Bowl Cakes by using smaller cake pans or even baking the cake batter in muffin tins. This way, everyone can have their own personalized treat.
While the cake itself already captures the essence of cereal soaked in milk, you can certainly serve it with a glass of milk on the side for an extra nostalgic touch. It's all about creating a fun and memorable experience!
In conclusion, the Cereal-Bowl Cake is a delightful and innovative dessert that brings the joy of breakfast cereal to a whole new level. With its customizable flavors, whimsical design, and nostalgic appeal, it's a treat that will impress both young and old. So why not dive into a bowl of deliciousness and enjoy a slice of Cereal-Bowl Cake today?
AprilCook, recipe developer and the heart of Chefwiz. More about April