Candy Bar Cake
Rate this recipeBe the first to rate
 By AprilPublished
 Do you have a sweet tooth that craves the perfect combination of chocolatey goodness and chewy delight?
 By AprilPublished
 Do you have a sweet tooth that craves the perfect combination of chocolatey goodness and chewy delight?
Prepare the cake: Cut off 1/2 inch from both ends of the pound cake, then level the top to make it even. Stand the cake upright and slice it horizontally into two equal rectangles.
Melt the chocolate in the microwave, stirring at 30-second intervals until smooth. In a mixer, combine the butter, 3 tablespoons of milk, and confectioners' sugar. Mix in the melted chocolate. If needed, add more milk to achieve a spreadable consistency for the frosting.
Place the cake rectangles on a cooling rack set on a rimmed baking sheet. Spread some frosting on one short end of each cake, then press them together to form one long rectangle. You can use a thin piece of cardboard underneath for easier transportation later.
Spread the remaining frosting on the cake, creating an even layer about 1 inch thick. Make the edges slightly higher than the center. Use an offset spatula to smooth the top and sides. Freeze for approximately 30 minutes, or until firm.
In a bowl, mix the peanuts and dulce de leche together.
Take the cake out of the freezer. Spread the peanut mixture evenly on top of the frosting. Freeze for another 30 minutes, or until the dulce de leche is firm.
Meanwhile, prepare the chocolate coating by microwaving the chocolate and butter in 30-second intervals, stirring until melted and smooth.
Pour the melted chocolate
Do you have a sweet tooth that craves the perfect combination of chocolatey goodness and chewy delight? Look no further than the exquisite Candy Bar Cake! This heavenly creation is a delectable treat that will transport you to a world of pure indulgence. Get ready to tantalize your taste buds as we dive into the scrumptious world of Candy Bar Cakes.
Imagine sinking your teeth into a moist and luscious cake, generously adorned with an assortment of your favorite candy bars. Each bite is an explosion of flavors, combining the richness of chocolate, the creaminess of caramel, and the crunch of nuts. It's like a symphony in your mouth, leaving you craving for more.
Whether you prefer Snickers, Kit Kat, Twix, or Milky Way, Candy Bar Cakes allow you to customize your dessert to perfection. You can mix and match different candy bars to create a unique flavor profile that suits your taste buds. It's the ultimate sweet escape!
Now that you're salivating at the thought of sinking your teeth into a Candy Bar Cake, let's talk about how you can bring this mouthwatering creation to life. The process is surprisingly simple, even for those with limited baking skills.
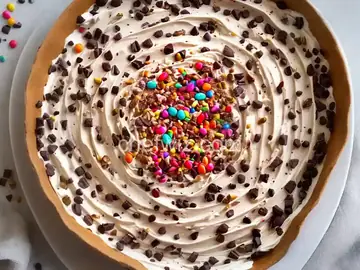
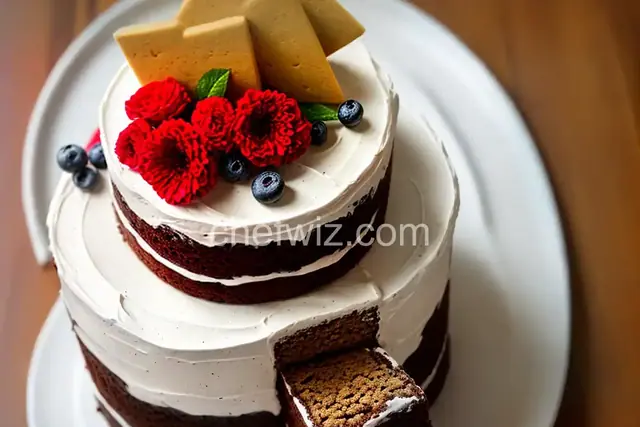
Start by baking a basic chocolate cake as your foundation. Once cooled, generously frost it with a luscious layer of chocolate buttercream or cream cheese frosting. Now, here comes the fun part – decorating your cake with candy bars!
Unleash your creativity as you arrange your favorite candy bars on top of the cake. You can chop them into bite-sized pieces, or leave them whole for an eye-catching effect. The possibilities are endless!
Candy Bar Cakes are not just reserved for birthdays or special occasions. They are the perfect dessert for any time you crave a little sweetness in your life. Whether you're celebrating a promotion, hosting a dinner party, or simply treating yourself, a Candy Bar Cake is always a crowd-pleaser.
Just picture yourself cutting into a slice of this heavenly creation, the candy bars glistening under the warm glow of candlelight. It's a picture-perfect moment that will leave your guests in awe.
Candy Bar Cakes are the epitome of sweetness and indulgence. They are a delightful treat that brings joy to any occasion, big or small. So why not unleash your inner baker and create your own Candy Bar Cake masterpiece? Let your taste buds embark on a journey of pure bliss as you savor each bite of this heavenly creation. Get ready to impress your friends and family with a dessert that will leave them craving for more!
Absolutely! The beauty of Candy Bar Cakes is that you can use any candy bars your heart desires. Get creative and experiment with different combinations to find your perfect match.
The baking time will vary depending on the recipe you choose. On average, it takes around 30-40 minutes to bake a chocolate cake. Allow additional time for cooling and decorating your cake with the candy bars.
Absolutely! If you're short on time or prefer a shortcut, you can use a store-bought cake mix as the base for your Candy Bar Cake. It will still taste delicious!
Yes, you can freeze a Candy Bar Cake. Make sure to wrap it tightly in plastic wrap or place it in an airtight container before freezing. When you're ready to enjoy it, let it thaw in the refrigerator overnight and bring it to room temperature before serving.
A freshly baked Candy Bar Cake can be stored at room temperature in an airtight container for up to 3-4 days. If you refrigerate it, it can last up to a week.
Absolutely! There are plenty of vegan and gluten-free recipes available for Candy Bar Cakes. Simply substitute the necessary ingredients to accommodate your dietary preferences.
Definitely! While the candy bars steal the show, you can get creative and add other toppings to enhance the flavor and presentation of your Candy Bar Cake. Think whipped cream, sprinkles, or even a drizzle of caramel or chocolate sauce.
Yes, many bakeries and online retailers offer pre-made Candy Bar Cakes for your convenience. However, making it from scratch allows you to personalize the flavors and decorations to your liking.
AprilCook, recipe developer and the heart of Chefwiz. More about April