Campfire Chili in a Dutch Oven Recipe
Rate this recipeBe the first to rate
 By AprilPublished
 Are you ready to take your camping experience to the next level?
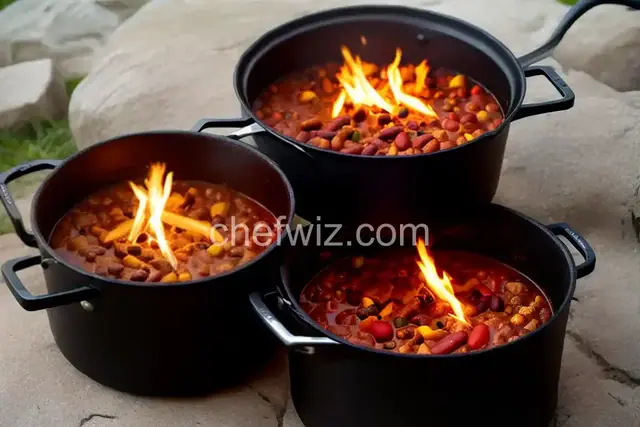 By AprilPublished
 Are you ready to take your camping experience to the next level?
Rinse and drain the soaked beans.
Heat oil in a Dutch oven over hot coals until it starts smoking.
Add half of the pork and cook until all sides are well-browned, around 10 minutes.
Transfer the cooked pork to a large bowl and repeat with the remaining half of pork.
Transfer the second batch of pork to the same bowl as the first batch.
Add the sausage to the pot and cook, breaking it up with a wooden spoon until it is no longer raw.
Return the cooked pork to the pot with the sausage.
Add the onion, jalapeño, chili powder, cumin, oregano, and half of the cilantro to the pot.
Cook and stir constantly until the mixture becomes aromatic and the onions start to soften, approximately 4 minutes.
Add the soaked beans, tomatoes, enough water to cover the meat and beans by 2 inches, and a large pinch of salt. The taste should be under-seasoned as it will reduce.
Place the lid on the Dutch oven and cover with hot coals. Allow it to heat for 10 minutes, then check the temperature. The liquid should be mildly bubbling.
Allow the mixture to cook until the beans are soft and creamy and the meat is completely tender. This can take anywhere from 3 to 6 hours, depending on the heat level (for best results, cook over
Are you ready to take your camping experience to the next level? Picture this: you're sitting around a crackling campfire, the stars shining brightly above you, and the mouthwatering aroma of chili filling the air. There's nothing quite like enjoying a warm, hearty bowl of campfire chili on a chilly night in the great outdoors. In this article, we'll guide you through the process of making delicious campfire chili in a Dutch oven. Let's get started!
When it comes to cooking over a campfire, a Dutch oven is a game-changer. Its thick, heavy construction allows for even heat distribution, ensuring that your chili cooks evenly and to perfection. The tight-fitting lid helps retain moisture, making your chili tender and flavorful. Plus, the versatility of a Dutch oven allows you to cook a wide range of dishes, from stews to desserts, all in one pot.
Before you embark on your camping adventure, make sure you gather all the necessary ingredients for your campfire chili. You'll need a variety of ingredients, such as ground beef, onions, garlic, beans, tomatoes, and spices. Don't forget to pack your favorite toppings too, like shredded cheese, sour cream, and green onions. With all the ingredients in hand, you're ready to start cooking!
Before you start cooking your campfire chili, it's important to properly prepare your Dutch oven. Begin by cleaning the oven and seasoning it to ensure a non-stick surface. Then, line the bottom of the oven with charcoal briquettes. These briquettes will provide a consistent heat source for your chili. Place additional charcoal on the lid for even heat distribution from the top. Now, your Dutch oven is ready for some campfire cooking!
Start by browning the ground beef in your Dutch oven over the campfire. Once the meat is cooked, add the onions and garlic, sautéing them until they're fragrant and translucent. Next, add the beans, tomatoes, and spices, stirring everything together. Place the lid on the Dutch oven, ensuring it's tightly sealed. Let the chili simmer over the campfire for a couple of hours, allowing the flavors to meld together. Stir occasionally to prevent sticking and burning. As the aroma fills the air, you'll know your campfire chili is almost ready!
After patiently waiting for your campfire chili to cook, it's time to enjoy the fruits of your labor. Serve up generous bowls of chili, topped with your favorite garnishes. The warmth and heartiness of the chili will warm your soul as you sit around the campfire, sharing stories and laughter with your loved ones. It's a moment to savor, a memory to cherish.
Campfire chili in a Dutch oven is the epitome of outdoor cooking perfection. The combination of smoky campfire flavors and the rich, hearty chili creates an unforgettable dining experience. Whether you're camping in the wilderness or enjoying a backyard bonfire, this recipe is sure to satisfy your taste buds and warm your soul. So gather your ingredients, fire up the campfire, and get ready to indulge in a steaming bowl of campfire chili. Happy cooking!
While a Dutch oven is ideal for campfire cooking, you can still make delicious chili using other cookware options. Consider using a cast-iron skillet or a heavy-duty pot with a tight-fitting lid. The key is to ensure even heat distribution and moisture retention.
Absolutely! Swap out the ground beef for plant-based alternatives like lentils or textured vegetable protein (TVP). Load up your chili with a variety of vegetables, such as bell peppers, corn, and zucchini, for a flavorful vegetarian option.
Controlling the heat of your campfire is crucial for successful cooking. Use the air vents on your fire pit or adjust the size and arrangement of the logs to regulate the heat. Remember, a well-controlled fire ensures even cooking and prevents burning.
Absolutely! Campfire chili freezes well, making it a convenient option for future camping trips or quick weeknight dinners. Allow the chili to cool completely, then transfer it to airtight containers or freezer bags. Label and date the containers for easy identification.
Leftover campfire chili can be kept in the refrigerator for up to four days. If you've frozen the chili, it can last for several months. Always ensure that the chili is stored properly in airtight containers to maintain its quality.
Yes, you can adapt the campfire chili recipe to be cooked on a stovetop. Simply follow the same steps but adjust the cooking time accordingly. Simmer the chili over low heat for a couple of hours to allow the flavors to develop.
Adding beer to your campfire chili can add depth and richness to the flavor profile. Consider using a dark beer for a robust taste. The alcohol will cook off during the simmering process, leaving behind a delicious hint of flavor.
Absolutely! In fact, making campfire chili in advance allows the flavors to develop even further. Prepare the chili up until the simmering step, then refrigerate or freeze it. When you're ready to enjoy, simply reheat the chili over the campfire or stovetop.
AprilCook, recipe developer and the heart of Chefwiz. More about April