Brown Butter Apple Tart
Rate this recipeBe the first to rate
 By AprilPublished
 When the leaves start to change color and the air gets crisp, it's the perfect time to indulge in a warm and comforting dessert.
 By AprilPublished
 When the leaves start to change color and the air gets crisp, it's the perfect time to indulge in a warm and comforting dessert.
Prepare a tart pan by coating it with nonstick spray.
In a mixing bowl, use an electric mixer or stand mixer with a paddle attachment to combine the butter, sugar, and salt. Mix until the mixture becomes pale and creamy, which should take around 2 minutes.
Add the egg, cream, and vanilla to the mixture. Mix until the ingredients are well combined and the mixture is smooth.
Add all of the flour to the mixture at once and beat until the dough starts to come together.
Transfer the dough onto a work surface and knead it a few times until it just comes together. Divide the dough into two halves and shape each half into a smooth ball. Flatten the balls into disks and tightly wrap each disk with plastic wrap. Chill one disk in the refrigerator overnight and freeze the other disk for later use.
Roll out the chilled dough disk between two sheets of plastic wrap, adjusting the plastic as needed, until it is about 1/8-inch thick and 2 inches wider than the tart pan. Place the dough, still wrapped in plastic wrap, on a baking sheet and refrigerate it until it becomes firm enough to handle, which should take around 30 minutes.
Remove the top piece of plastic from the dough and invert it into the tart pan. Press the dough onto the bottom and up the sides of the pan. If the dough is too soft, refrigerate it until it becomes firm enough to
When the leaves start to change color and the air gets crisp, it's the perfect time to indulge in a warm and comforting dessert. And what could be more comforting than a homemade brown butter apple tart? This delicious treat combines the sweetness of apples with the nutty richness of brown butter, all nestled in a flaky crust. In this article, we'll explore the art of making a brown butter apple tart and share some tips and tricks along the way.
Before we dive into the tart itself, let's talk about brown butter. If you've never experienced the transformative power of brown butter, you're in for a treat. Brown butter is simply butter that has been cooked until the milk solids turn brown, giving it a nutty and caramel-like flavor. It adds a depth of flavor to your tart that you won't get from regular melted butter.
To make brown butter, simply melt butter in a saucepan over medium heat. As the butter melts, it will begin to foam. Keep a close eye on it and swirl the pan occasionally to ensure even browning. Once the butter turns a golden brown color and gives off a heavenly aroma, remove it from the heat and transfer it to a heatproof bowl to cool. Be careful not to burn the butter, as it can go from perfectly browned to burnt in a matter of seconds.
Now that we have our brown butter ready, it's time to move on to the tart crust. A good tart crust should be tender and flaky, providing the perfect base for our apple filling. To achieve this, it's important to use cold ingredients and handle the dough as little as possible.
For the tart crust, you'll need flour, butter, sugar, salt, and ice water. The flour provides structure, the butter adds flavor and flakiness, the sugar adds a touch of sweetness, and the salt enhances the flavors. The ice water helps keep the butter cold and prevents the dough from becoming tough.
To make the crust, start by combining the flour, sugar, and salt in a large bowl. Cut the cold butter into small cubes and add it to the flour mixture. Use a pastry cutter or your fingers to cut the butter into the flour until the mixture resembles coarse crumbs. Gradually add in the ice water, a tablespoon at a time, and mix until the dough comes together.
Now that our crust is ready, it's time to prepare the star of the show - the apple filling. Choose firm and slightly tart apples, such as Granny Smith or Honeycrisp, for the best results. Peel, core, and thinly slice the apples, then toss them in a mixture of sugar, cinnamon, and a squeeze of lemon juice. This will bring out the natural sweetness of the apples and add a hint of warmth.
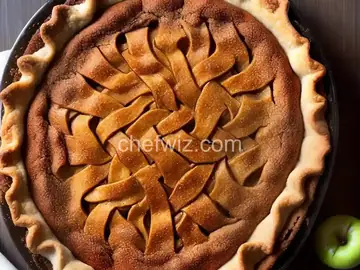
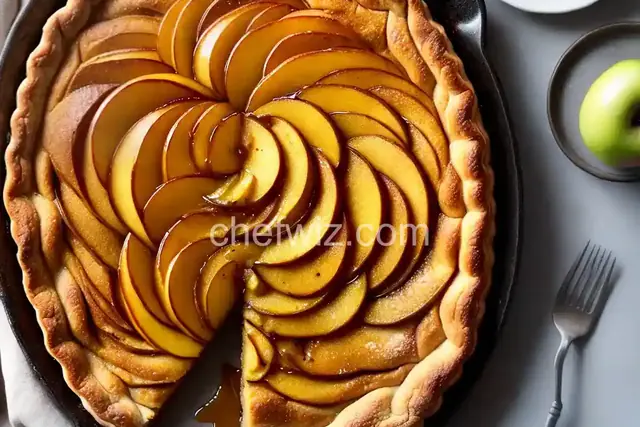
With our crust and filling ready, it's time to assemble the tart. Roll out the dough into a circle and transfer it to a tart pan. Arrange the apple slices in a circular pattern, starting from the outer edge and working your way in. Drizzle the brown butter over the apples, allowing it to seep into all the nooks and crannies.
Place the tart in a preheated oven and bake until the crust is golden and the apples are tender. The aroma of the brown butter and apples will fill your kitchen, making it hard to resist digging in right away. But be patient - let the tart cool slightly before serving to allow the flavors to meld together.
A brown butter apple tart is the epitome of fall flavors. The combination of nutty brown butter and sweet, cinnamon-spiced apples is simply irresistible. Whether you're hosting a dinner party or simply treating yourself to a cozy night in, this tart is sure to impress. So grab your apron, roll up your sleeves, and get ready to create a dessert that will make your taste buds dance with delight!
Definitely! While apples are traditional, you can experiment with other fruits like pears or peaches to create your own twist on this classic dessert.
Absolutely! If you're short on time or prefer the convenience, store-bought pie crust will work just fine. Just make sure to follow the package instructions for baking times and temperatures.
Yes, you can prepare the tart ahead of time and store it in the refrigerator. Simply bake it when you're ready to serve, and you'll have a warm and delicious dessert in no time.
While the tart is best enjoyed fresh, you can freeze any leftover slices. Just wrap them tightly in plastic wrap and store them in the freezer. When you're craving a slice, simply thaw it in the refrigerator overnight and reheat it in the oven for a few minutes.
That's entirely up to you! Both whipped cream and ice cream pair beautifully with the flavors of the tart. Choose whichever you prefer or enjoy it on its own - it's delicious either way!
Absolutely! Feel free to experiment with different spices like nutmeg, allspice, or cardamom to customize the flavor of your tart.
While you can use salted butter, it's best to use unsalted butter in this recipe. This allows you to control the amount of salt in the crust and balance the flavors more effectively.
Definitely! Simply divide the dough and apple filling into individual portions and adjust the baking time accordingly. Mini tarts are perfect for serving at parties or to enjoy as individual desserts.
AprilCook, recipe developer and the heart of Chefwiz. More about April