Beehive Cake
Rate this recipeBe the first to rate
 By AprilPublished
 Have you ever marveled at the intricate design of a beehive? The way bees work together to create something so beautiful and functional is truly remarkable.
 By AprilPublished
 Have you ever marveled at the intricate design of a beehive? The way bees work together to create something so beautiful and functional is truly remarkable.
Melt the butter in a saucepan.
Add sugar and honey to the melted butter and cook until it becomes bubbly.
Remove the saucepan from the heat and stir in the almonds.
Allow the mixture to cool.
To make the custard filling:
Place the sugar and cornstarch in a small to medium-sized pan.
In a separate bowl, mix the egg yolks and milk together.
Whisk the egg yolk and milk mixture into the pan with the sugar and cornstarch.
Cook this mixture over low heat and gradually increase to medium heat until it boils. The mixture will bubble slowly.
Whisk the bubbling mixture for 3 to 4 minutes, then remove from heat.
Soak the gelatin in 1/4 cup of warm water for 5 minutes.
Add the gelatin mixture to the hot custard and whisk.
Set aside the custard in a clean bowl to cool, covering it with plastic wrap to prevent crusting. Refrigerate until cool.
Once the custard has cooled, whip the cream, sugar, and vanilla until they form medium peaks.
Fold the whipped cream into the cooled custard. Make sure to whisk the custard to a creamy stage before gradually folding in the whipped cream.
Refrigerate until ready to fill the split cake layers.
To prepare the cake:
Sift the
Have you ever marveled at the intricate design of a beehive? The way bees work together to create something so beautiful and functional is truly remarkable. Well, what if I told you that you can bring that same sense of wonder to your next celebration with a beehive cake? This delicious dessert not only looks amazing but also tastes heavenly. So, let's dive into the world of beehive cakes and discover how you can make your next occasion truly buzz-worthy!
Imagine a cake that resembles a real beehive, complete with honeycomb patterns and adorable little sugar bees. The beehive cake is a true work of art that will leave your guests in awe. Whether it's a birthday party, a baby shower, or a garden-themed event, this cake will be the highlight of the celebration.
But a beehive cake is not just about looks; it's also about taste. Picture a moist and flavorful cake layered with luscious buttercream frosting. The combination of textures and flavors will have your taste buds buzzing with delight. From classic vanilla to rich chocolate or fruity flavors like lemon or strawberry, there's a beehive cake for every palate.
Now that you're intrigued by the idea of a beehive cake, let's talk about how you can make one yourself. Don't worry; you don't need to be a professional baker to achieve this masterpiece. With a few simple steps and some creativity, you can create a stunning beehive cake that will impress everyone!
Before you start baking, make sure you have all the necessary ingredients. From flour and sugar to eggs and butter, gather everything you need to make a delicious cake. And don't forget the essential tools like cake pans, mixing bowls, and a piping bag for frosting.
Once you have everything ready, it's time to prepare the cake batter. Follow your favorite cake recipe, whether it's a classic vanilla or a decadent chocolate cake. Remember to add your own twist to make it truly unique. Maybe a hint of almond extract or a touch of citrus zest?
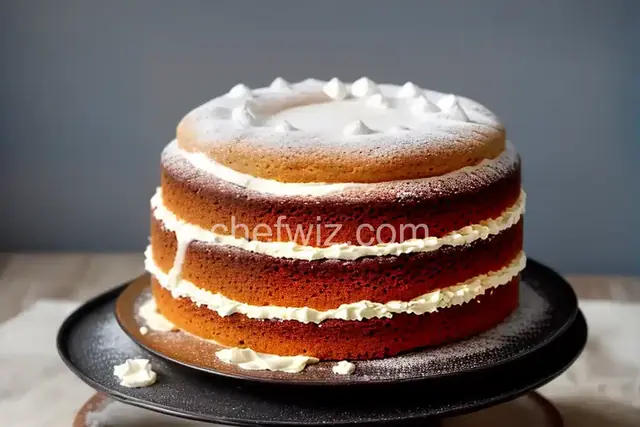
After baking the cake, it's time to shape it into a beehive. Start by trimming the edges to create a rounded dome shape. Then, cut the cake horizontally into layers and fill each layer with your choice of frosting. As you stack the layers, the beehive shape will start to take form.
Now comes the fun part – decorating the beehive cake! Use buttercream frosting to create the honeycomb pattern on the outside of the cake. You can achieve this by piping hexagonal shapes onto the cake's surface. Then, add adorable sugar bees to bring the beehive to life. Get creative with edible flowers or green buttercream grass for a whimsical touch.
A beehive cake is more than just a dessert; it's a masterpiece that will leave your guests buzzing with delight. With its stunning design and delicious taste, it's the perfect centerpiece for any occasion. So, gather your ingredients, unleash your creativity, and create a beehive cake that will make your celebration truly unforgettable. Happy baking!
The time it takes to make a beehive cake depends on your baking skills and the complexity of the design. On average, it can take anywhere from 2 to 4 hours, including baking and decorating.
Absolutely! If you're short on time or prefer the convenience of a boxed mix, go ahead and use it. Just be sure to follow the instructions on the box and add your own personal touch to make it special.
Yes, you can! There are many vegan cake recipes available that use substitutes like applesauce or flaxseed meal instead of eggs. With a little bit of research and experimentation, you can create a delicious vegan beehive cake.
To keep your beehive cake fresh and moist, store it in an airtight container at room temperature. Avoid placing it in the refrigerator, as it can dry out the cake.
Absolutely! If you prefer individual portions or want to serve a variety of flavors, mini beehive cupcakes are a great option. Simply divide the cake batter into cupcake liners, bake, and decorate each cupcake to resemble a beehive.
Yes, you can make a gluten-free beehive cake by using gluten-free flour blends in your cake batter. Just make sure to check that all your ingredients, including the frosting and decorations, are also gluten-free.
Yes, you can freeze a beehive cake for future enjoyment. Wrap it tightly in plastic wrap and place it in an airtight container before freezing. When you're ready to enjoy it, let it thaw in the refrigerator overnight.
Absolutely! Fondant is often used for cake decorations, but if you're not a fan of its texture or taste, you can skip it. Buttercream frosting and other edible decorations can create a stunning beehive cake without fondant.
Yes, you can get creative with colors! While the traditional honeycomb pattern is yellow, you can use different shades of yellow or even experiment with other colors like orange or pastels. Let your imagination soar!
AprilCook, recipe developer and the heart of Chefwiz. More about April