Beef Chimichangas
Rate this recipeBe the first to rate
 By AprilPublished
 Are you craving something deliciously crispy and satisfying? Look no further than beef chimichangas!
 By AprilPublished
 Are you craving something deliciously crispy and satisfying? Look no further than beef chimichangas!
Preheat the oven to 450 degrees F (230 degrees C).
In a skillet over medium heat, cook the ground beef, onion, garlic, taco seasoning, and oregano until the beef is browned and crumbled (approximately 8 minutes). Remove excess fat.
Add sour cream, chilies, and vinegar to the skillet and mix well. Remove from heat and stir in the Cheddar cheese.
In a small skillet over low heat, melt the margarine. Dip each tortilla into the melted margarine for about 30 seconds or until softened.
Place the softened tortilla onto a baking sheet and spoon approximately 1/3 cup of the meat mixture onto it.
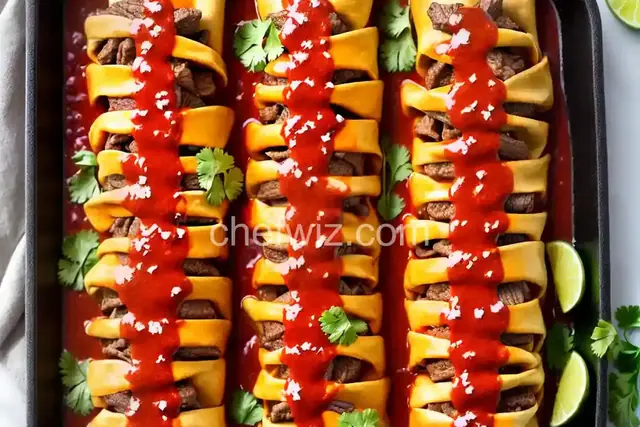
Fold the right and left sides of the tortilla over the filling, then fold the top and bottom, creating an envelope that completely encloses the filling.
Place the filled tortilla seam side down on the baking sheet. Repeat this process with the remaining tortillas and filling.
Bake in the preheated oven for approximately 15 minutes or until the tortilla becomes crisp.
Are you craving something deliciously crispy and satisfying? Look no further than beef chimichangas! These delectable Mexican treats are a perfect combination of flavors and textures, making them a favorite for many food enthusiasts. In this article, we will explore the wonderful world of beef chimichangas, their origins, and how to enjoy them to the fullest!
Like many other mouthwatering dishes, the exact origin of beef chimichangas is up for debate. Some believe that they were first created in Mexico, while others argue that they originated in the southwestern United States. Regardless of their origin, there's no denying that beef chimichangas have become a beloved part of Mexican and Tex-Mex cuisine.
Beef chimichangas are essentially deep-fried burritos filled with savory ingredients such as seasoned ground beef, cheese, beans, and vegetables. The tortilla becomes wonderfully crisp and golden, encasing a warm and flavorful filling. These scrumptious delights are often served with salsa, guacamole, or sour cream to enhance the taste.
One of the reasons beef chimichangas have gained such popularity is their versatility. You can customize the filling to suit your taste preferences, making them perfect for both meat-lovers and vegetarians alike. The combination of crispy exterior and savory filling creates a delightful contrast that keeps people coming back for more.
Moreover, beef chimichangas are a great option for those who enjoy Tex-Mex cuisine but want something different from the traditional tacos and enchiladas. They offer a unique culinary experience that is sure to satisfy your cravings for something indulgent and flavorful.
There are several ways to enjoy beef chimichangas. You can serve them as a main course with rice and beans, or as a delicious appetizer alongside salsa and guacamole. These crispy delights are also great for parties and gatherings, as they can be easily prepared in advance and then fried to perfection just before serving.
For those who prefer a healthier option, you can also try baking the chimichangas instead of deep-frying them. This method reduces the amount of oil used while still achieving a satisfying crunch. Either way, you are in for a treat!
Beef chimichangas are a delightful Mexican treat that combines the best of both worlds – a crispy, golden exterior and a flavorful, savory filling. Whether you enjoy them as a main course or an appetizer, these delicious treats are sure to satisfy your taste buds. So why not give them a try and experience the joy of beef chimichangas for yourself?
The level of spiciness in beef chimichangas can vary depending on the recipe. If you prefer a milder flavor, you can adjust the spices accordingly. Feel free to experiment and find the perfect level of spiciness for your taste buds!
Absolutely! While beef is the traditional choice for chimichangas, you can substitute it with chicken, pork, or even shrimp for a different twist. The key is to use flavorful and well-seasoned meat to enhance the overall taste.
Yes, you can! If you're planning to make beef chimichangas for a party or gathering, you can prepare them in advance and refrigerate them until you're ready to fry or bake them. Just be sure to wrap them tightly in foil or plastic wrap to prevent them from drying out.
Absolutely! Beef chimichangas freeze well and can be stored for up to three months. Just make sure to wrap them tightly in foil or freezer bags to prevent freezer burn. When you're ready to enjoy them, simply thaw them in the refrigerator overnight and then fry or bake them as usual.
Traditional flour tortillas used for chimichangas contain gluten. However, if you follow a gluten-free diet, you can use gluten-free tortillas or even corn tortillas as a substitute. Just make sure to check the packaging to ensure they are gluten-free.
Absolutely! If you prefer a healthier option, you can bake beef chimichangas instead of frying them. Simply place them on a baking sheet lined with parchment paper and bake them in a preheated oven until they are golden and crispy. This method reduces the amount of oil used while still achieving a satisfying crunch.
Absolutely! If you're a vegetarian or simply prefer a meatless option, you can fill your chimichangas with a combination of beans, cheese, and vegetables. You can get creative with your choice of fillings, such as grilled peppers, onions, and even sweet potatoes!
Yes, you can! To reheat leftover beef chimichangas, simply place them on a baking sheet and bake them in a preheated oven until they are heated through. This method helps to maintain their crispy texture while ensuring the filling is hot and delicious.
AprilCook, recipe developer and the heart of Chefwiz. More about April